A product is used to group many of the resources and data related to a specific product being offered through the Bridge system.
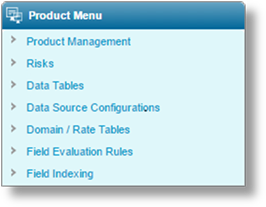
Each product has multiple screens of information, accessed through the Product Menu widget to the left of the page. The widget becomes available on opening an existing product or completing and saving the Product Management screen for a new product.
|
Includes settings to define the product itself. | |
|
This feature is not in use at this time. | |
|
Defines the base configuration for advanced lookup tables. | |
|
Defines how data tables, workflow grids, and web services are used to supply data to workflow controls. | |
|
Used to manage data and settings for use in data tables. | |
|
Creates rules to activate field evaluation in response to specific events. | |
|
Collects and organizes data, allowing triggers to evaluate data from outside the context of a single claim. |
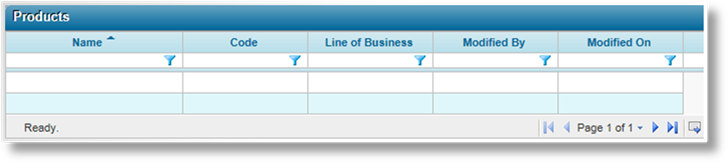
1. In the main menu, select Product Design, then select Products. A list of all available products is displayed.
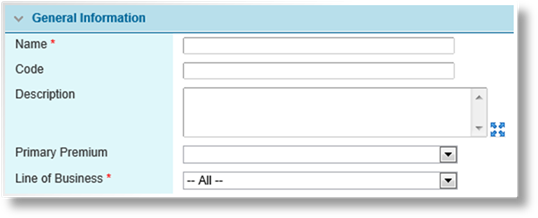
2. Click Add. The Product Management page opens.
3. Complete the necessary information. Fields marked with a red asterisk * are required.
|
Name |
Enter the name of the product. This is the internal name, used to select this product when creating or editing a master cover. |
|
Code |
This is an internal reference name generated by the system when the product is saved. |
|
Description |
Enter a description of the product. |
|
Primary Premium |
Select a Premium Type to be used as the primary premium for use in reports. |
|
Line of Business |
Select a Line of Business from the list of industry presets. |
4. Click Save to save the product but remain on the page, click Save & Close to save the product and return to the product list, or click Close to return to the product list without saving the product.
5. On saving, the Product Menu widget opens to the left of the page, allowing access to different screens of product data. In addition, the Status panel is added at the bottom of the page.

|
Created By |
Identifies the date and time the product was created, and the user who created it. |
|
Last Modified By |
Identifies the last date and time the product was changed, and the user who made the changes. |
1. In the main menu, select Product Design, then select Products. A list of all available products is displayed.

2. Click a link in the Name column to view the product details. If there are a large number of available products, see the Using Grids section for help on finding the appropriate product.
The Product Management page opens, and the Product Menu widget appears to the left of the page for navigation to other screens.
See the section on Creating a New Product for a detailed description of the fields. All fields may be edited, if necessary.
3. Click Save to save any changes and remain on the page, click Save & Close to save and return to the products list, or click Close to return to the products list without saving any changes.