
Each data table has multiple screens of information and settings, accessed through the Data Table Menu widget to the left of the page. The widget becomes available on opening an existing data table or completing and saving the Data Table Management screen for a new table.
|
Data Table Management |
Includes settings to define the data table. |
1. Once a Product has been selected, click Data Tables in the Product Menu widget. A list of all available data tables is displayed. For instructions on selecting a product, see Viewing and Modifying a Product.

2. Click Add. The Data Table Management page opens.
3. Complete the necessary information. Fields marked with a red asterisk * are required.

|
Name |
Enter the name of the table. |
|
Code |
This is an internal reference name. A code can be entered manually, or leave the field blank to have the system generate a code on saving. |
|
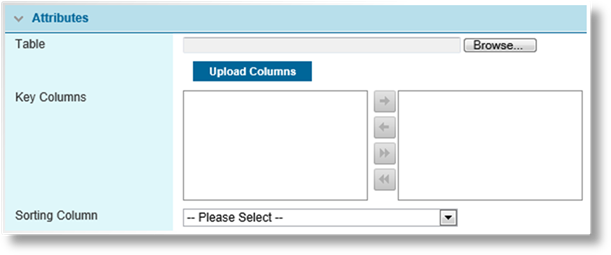
Table |
This field is used to upload a sample Excel file to define the columns. Click the Browse button to open a standard file browser window. Locate and select the appropriate file, and the file name and path appear in the field. Only the first row of the first sheet is imported, with all other data ignored. Any unnamed columns appearing before the last named column will be imported and generic column names will be assigned. |
|
|
Example: Importing the above sheet would create the following columns:
|
|
Upload Columns |
Click Upload Columns to import the selected Table file. The columns defined in the file will populate the Key Columns field, Sorting Column list, and the Columns grid below. |
|
Key Columns |
Select which columns will serve as key columns. All key columns must be required data, and a combination of all key columns must uniquely identify individual entries in the table. |
|
Sorting Column |
A column can be selected to serve as sorting or sequence values. The selected column will not be available for use as a Primary Display Column or Key Column in a Data Source Configuration. |
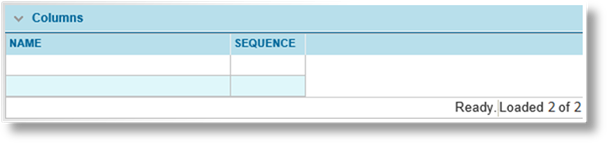
The Columns grid displays all columns included in the table, and the sequence as they appear in the source file.
4. Click Save to save the data table but remain on the page, click Save & Close to save the table and return to the data table list, or click Close to return to the data table list without saving the table.
5. On saving, the Data Table Menu widget opens to the left of the page, allowing access to different screens of table data and settings. In addition, the Status panel is added at the bottom of the page.

|
Created By |
Identifies the date and time the table was created, and the user who created it. |
|
Last Modified By |
Identifies the last date and time the table was changed, and the user who made the changes. |
1. Once a Product has been selected, click Data Tables in the Product Menu widget. A list of all available data tables is displayed. For instructions on selecting a product, see Viewing and Modifying a Product.
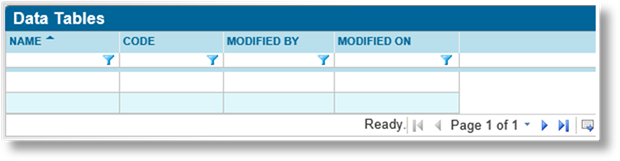
2. Click a link in the Name column to view the table details. If there are a large number of available tables, see the Using Grids section for help on finding the appropriate table.
The General Information page opens, and the Data Table Menu widget appears to the left of the page for navigation to other screens.


