
A workflow is a collection of fields, panels, and screens that define how the end users will navigate and enter data for submissions and claims. This is the final step in the workflow design process, although additional configuration is required at the master cover level. See the Managing Master Covers section for instructions on attaching and configuring a workflow.
There are core workflows, used for submissions and claims, that are divided into Steps. Each step contains as many screens as necessary. The navigation options within the workflow allows user to navigate through steps and screens.
Tabbed workflows are connected to tab grids within a core workflow. When adding a record to a tab grid, the tab workflow replaces the core workflow in the center of the page. Each screen is displayed as a tab, and the tabs are used to navigate through the workflow. When the user is finished with the tab workflow, closing the record returns to the core workflow.
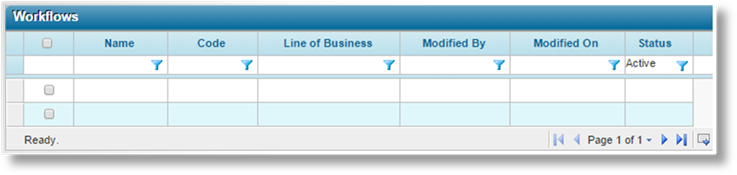
1. In the main menu, select Product Design, then select Workflow Configurations, then Workflows. A list of all available workflows is displayed.
|
|
Tip: By default, only Active workflows are displayed. Clear the filter in the Status column to view all workflows. |
2. Click Create. The Workflow Management page opens.
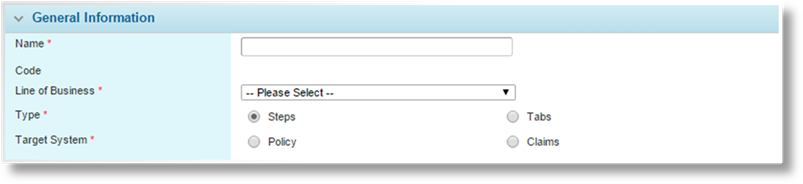
3. Complete the necessary information. Fields marked with a red asterisk * are required.
|
Name |
Enter the name of the workflow. This is the internal name, and does not appear on the workflow itself. |
|
Code |
This is an internal reference name which is generated by the system when the workflow is saved. |
|
Line of Business |
Select a Line of Business from the list of industry presets. |
|
Type |
Select the type of workflow. |
|
•Steps |
A core workflow, organized into steps and screens. |
|
•Tabs |
A tabbed workflow for use with tab grids. |
|
Target System |
Select where the workflow should be used. |
|
•Policy |
The workflow is meant for use in the policy submission system. |
|
•Claims |
The workflow is meant for use in the claims system. |
4. Click Add to save the workflow but remain on the page to continue the configuration, click Add & Close to save the workflow and return to the workflows list, or click Close to return to the workflows list without saving the workflow.
Once the workflow has been saved, additional panels become available.
5. If Steps has been selected as the Type, the Steps panel becomes available to define the steps of the workflow.
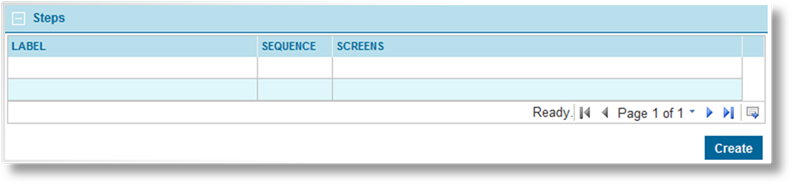
The Steps grid lists all steps currently configured for the workflow. Click a link in the Label column to view an existing step.
a) Click Create to add a step. The Steps window opens.
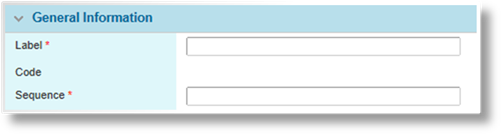
b) Fill in the General Information panel.
|
Label |
Enter the label to be displayed for the step. This is shown in the Submission Screens widget and the progress bar at the top of the workflow page. Labels should be unique within a single workflow. |
|
|
Tip: Once the step has been saved, the Label text becomes available in the Custom Labels section. This allows translated versions of the text to be uploaded for when the browser is set to different languages. The text entered here will be set as the default English text. For details on customizing languages, see the Custom Labels section. |
|
Code |
The code is automatically generated when the step is saved. |
|
Sequence |
Enter a sequence number to determine the step's position in the workflow. |
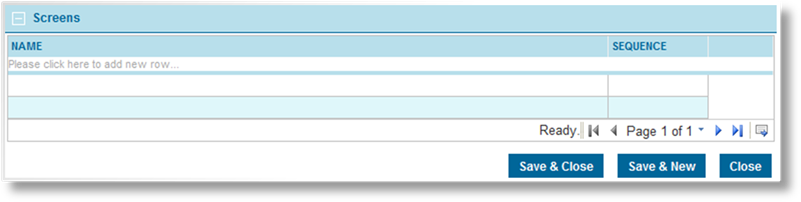
c) Click in the field marked Please click here to add new row.
d) Select the Name of the screen to be added.
e) Enter a Sequence number. If no sequence number is provided, it is considered a zero.
f) Press the Tab key from the Sequence field or click outside the table to add the screen to the list. The screen is highlighted in yellow to indicate that it has not been accepted yet.
g) Repeat the previous steps to add additional screens.
h) When all screens have been added, right-click inside the table and select Accept All Changes. This saves the current table.
i) Click Save & New to save the current step and create a new step, click Save & Close to save the current step and return to the Workflow Management page, or click Close to return to the Workflow Management page without saving the current step.
|
|
Note: Screens can only be used once in a single workflow. |
6. If Tabs has been selected as the Type, the Screens panel becomes available to define the tabs in the workflow. Each screen serves as one tab.
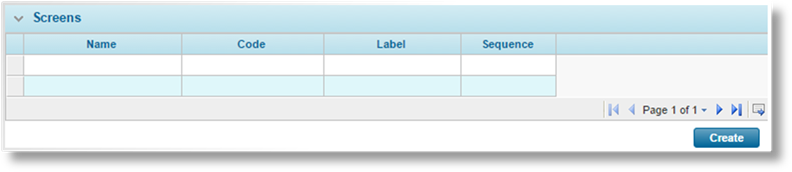
The Screens panel lists all screens currently configured for the workflow.
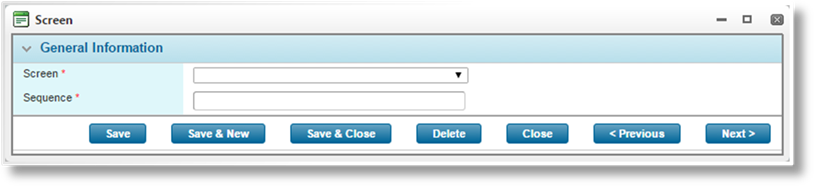
a) Click Create to add a screen, or click a link in the Name column to view an existing screen. The Screen window opens.
|
Screen |
Select the screen to be added. |
|
Sequence |
Enter a Sequence number. This determines the order of the tabs, with lower numbers appearing first. |
|
|
Tip: It is advisable to leave gaps between the sequence numbers, such as 5, 10, 15. This allows new screens to be added to the workflow at a later date, inserted between existing screens. Otherwise, the sequence numbers of existing screens must be changed to allow for the new addition. |
b) Click Save to save the screen, click Save & New to save the screen and clear the form to add another screen, click Save & Close to save the screen and close the window, or click Close to close the window without saving the screen.
When viewing a saved screen, click Delete to remove the screen from the workflow, or click Previous or Next to navigate between screens.
7. By default, each screen is visible at all stages and statuses of the transaction or claim. The Screen Behavior Override is used to create rules that change the behavior based on a variety of options. The table lists all currently defined rules.
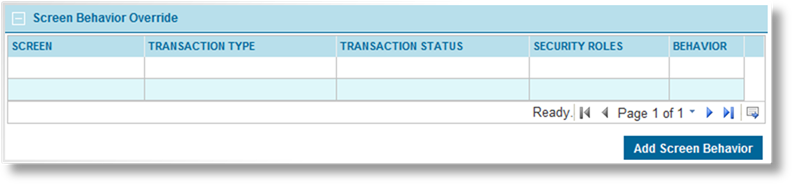
a) Click Add Screen Behavior. The Screen Behavior Override window opens.
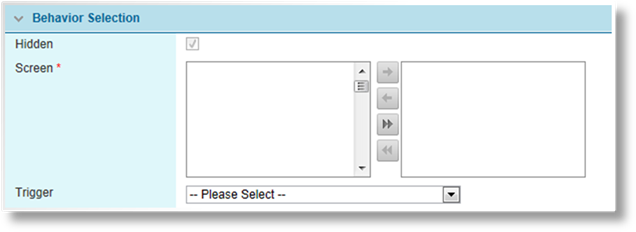
b) Complete the necessary details to define the rule. Fields marked with a red asterisk * are required.
|
Hidden |
This option is checked by default and cannot be modified. |
|
Screen |
Select the screens to be affected by this rule. |
|
Trigger |
This option is used to assign a trigger to the rule. The rule is only applied if the trigger evaluates as true. |
|
|
Notes: Use caution when creating override rules for screens that contain fields used in triggers. It can create circumstances where users trigger changes in a form that they cannot undo. |
|
When a user makes changes in a form that trigger an override rule, it does not occur immediately. The rule is applied when any action is taken that saves the form. | |
|
If a screen is hidden by a triggered override rule, all fields in that screen retain their current value. | |
|
The first screen in the workflow cannot be hidden. |
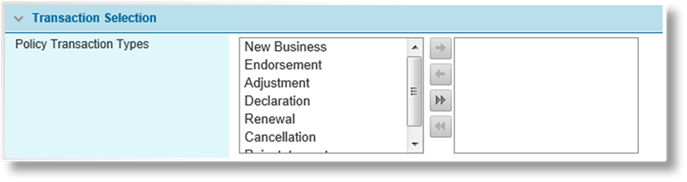
Select the types of transaction where the rule applies.
|
New Business |
The original version of a submission or policy. |
|
Endorsement |
A modification to a bound policy. |
|
Adjustment |
An adjustment to a bound policy. |
|
Declaration |
A periodical modification to a bound policy. |
|
Renewal |
A renewal for an expired policy. |
|
Cancellation |
A cancelled policy. |
|
Reinstatement |
A policy that was reinstated after being cancelled. |
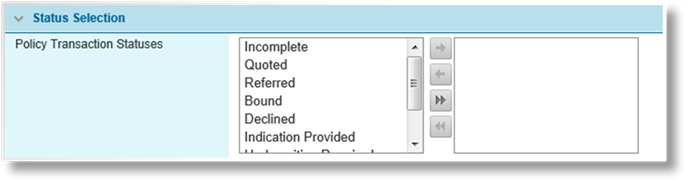
Select the status of submission or policy where the rule applies.
|
Incomplete |
A submission that has not yet had a quote calculated. |
|
Quoted |
A submission that has been quoted and is ready to be bound. |
|
Referred |
A submission that does not meet the requirements of the master cover and has been submitted to the insurance representatives for review. |
|
Bound |
A policy that has been bound. |
|
Declined |
A quote request or referral that has been declined. |
|
Underwriting Required |
A submission that does not meet the requirements of the master cover and must either be corrected or submitted to the insurance representatives for review. |
|
Lost |
A quote that has been marked as lost business. |
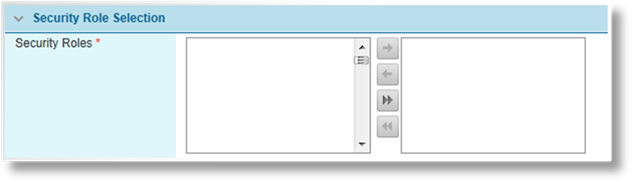
Select the types of user where the rule applies. The user viewing the form must have one or more of the selected security roles in order for the rule to be applied.
|
|
Note: At least one option must be selected in each category. For a rule to apply to all options in a category, all options must be selected. |
c) Click Save & New to save the rule and clear the form to add additional rules, click Save & Close to save the rule and return to the workflow details, or click Close to return to the workflow details without saving the rule.
8. If Steps has been selected as the Type, the Integration Configurations panel becomes available. This allows integrations with external services or systems to be activated from within this workflow. The exact circumstances under which the integration activates, or becomes available for user activation, are controlled by the settings in the integration configuration itself.
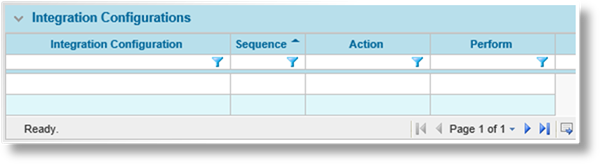
The Integration Configurations panel lists all integrations associated to the current workflow.
a) Click Create. The Integration Configurations window opens.
b) Complete the necessary information. Fields marked with a red asterisk * are required.

|
Integration Configuration |
Select the integration configuration to be included in the workflow. |
|
Sequence |
Enter a sequence number for the integration. If multiple integration configurations are set to activate on the same Event with the same Perform setting, the sequence number will define what order they activate. Sequence is ordered from lowest value to highest, with blank sequence numbers going first. This allows later integrations to depend on the results of earlier integrations, including evaluating the trigger to determine if the integration activates at all. |
c) Click Save & New to save the configuration and clear the form to add additional configurations, click Save & Close to save the configuration and close the window, or click Close to close the window without saving the configuration.
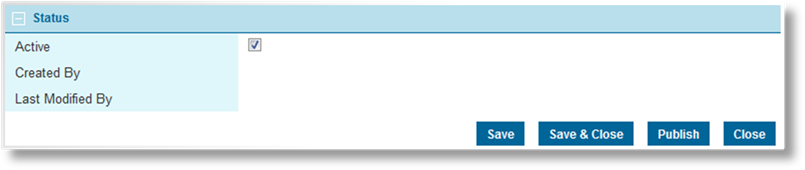
|
Active |
Marks the workflow as active and available for use. If unchecked, the workflow remains linked to any existing resources, but cannot be used for new resources. |
|
Created By |
Identifies the date and time the workflow was created, and the user who created it. |
|
Last Modified By |
Identifies the last date and time the workflow was changed, and the user who made the changes. |
9. Click Save to save any changes and remain on the page, click Save & Close to save and return to the workflows list, or click Close to return to the workflows list without saving any changes.
Click Workflow Report to generate a list of all fields, panels, and screens used in the current workflow. Click here for more information.
1. In the main menu, select Product Design, then select Workflow Configurations, then Workflows. A list of all available workflows is displayed.

|
|
Tip: By default, only Active workflows are displayed. Clear the filter in the Status column to view all workflows. |
2. Click a link in the Name column to view the workflow details. If there are a large number of available workflows, see the Using Grids section for help on finding the appropriate workflow.
See the section on Creating a New Workflow for a detailed description of the fields.
3. To edit or delete a step in a Step workflow, click the link in the Label column to view the step.
Make any necessary changes.
To edit screens, double-click in the field to be edited, make the changes, and click outside the field. The screen is highlighted in gray to indicate that the changes have not been accepted.
To delete a screen, right click the screen in the grid and select Delete. The panel is highlighted in red to indicate that the changes have not been accepted.
Once all changes have been made, right-click inside the table and select Accept All Changes. This saves the current table.
Click Save & Close to save the current step and return to the Workflow Management page, click Close to return to the Workflow Management page without saving the current step, or click Delete to delete the current step from the workflow.
If a screen is removed from the workflow, any override rules associated with that screen are deleted automatically.
4. To edit or delete a screen in a Tabs workflow, click the link in the Name column to view the screen.
Make any necessary changes.
Click Save to save the screen, click Save & New to save the screen and clear the form to add another screen, click Save & Close to save the screen and close the window, click Delete to remove the screen from the workflow, click Previous or Next to navigate between screens, or click Close to close the window without saving the screen.
5. To edit a screen override rule, click a link in the Screen column to view the specific rule for that screen (more than one rule may exist per screen). The Screen Behavior Override window opens with the details of the rule.
All settings may be edited, except for the Hidden checkbox and the Screen selection.
Click Save & Close to save the current rule and return to the Workflow Management page, click Close to return to the Workflow Management page without saving the rule, or click Delete to delete the rule.
6. To edit or delete an Integration Configuration, click a link in the Integration Configuration column. The Integration Configuration Settings window opens.
Make any necessary changes and click Save & Close to save the configuration and close the window, click Close to close the window without saving the configuration, or click Delete to delete the configuration from the workflow.
7. When back on the Workflow Management page, click Save to save any changes and remain on the page, click Save & Close to save and return to the workflows list, or click Close to return to the workflows list without saving any changes.
While a workflow is being created or edited, changes are not available to users immediately. To ensure that changes are implemented all at once, the workflow must be published. This replaces the existing workflow with the updated one.
Tab workflows do not need to be published. When the core workflow is published, all associated tab workflows will be included.
1. In the main menu, select Product Design, then select Workflow Configurations, then Workflows. A list of all available workflows is displayed.
|
|
Tip: By default, only Active workflows are displayed. Clear the filter in the Status column to view all workflows. |
2. Click a link in the Name column to view the workflow details. If there are a large number of available workflows, see the Using Grids section for help on finding the appropriate workflow.
3. Click the Publish button. The workflow is saved and published. A confirmation message is shown.
Once created, a workflow cannot be deleted. It can be deactivated, which leaves it linked to any existing resources, but prevents it from being used for new resources.
1. In the main menu, select Product Design, then select Workflow Configurations, then Workflows. A list of all available workflows is displayed.
|
|
Tip: By default, only Active workflows are displayed. Clear the filter in the Status column to view all workflows. |
2. Locate the workflow or workflows to be deactivated. If there are a large number of available workflows, see the Using Grids section for help on finding the appropriate workflows.
3. Check the boxes for all workflows to be deactivated.
4. Click Deactivate, then confirm the deactivation when prompted to do so. All selected workflows are deactivated. If the workflows list is still defaulted to only show active workflows, they disappear from the list.
|
|
Tip: Individual workflows can also be deactivated or reactivated directly through the workflow record. See the section on Viewing and Modifying a Workflow for details. |
Advanced workflows can be a complex hierarchy of fields, panels, and screens. The Workflow Report option produces an Excel sheet listing all fields, panels or grids, and screens.
|
|
Note: The report uses the most recently published workflow details. To include recent changes in the report, be sure to publish the workflow before running the report. |
1. In the Workflow Management page for the appropriate workflow, click Workflow Report.
2. The report is produced in Excel format. A standard Save / Open dialogue box appears. Select if you want to Open the file, Save the file to your computer, or Cancel the download.

3. The report lists the names and labels of all screens, panels, fields, and option lists in the workflow. It also provides some additional details such as the panel type, field control type, whether each field is designated as a rate driver or available for use in triggers, plus the full formula for calculated fields.

