By default, the Bridge system supports multiple languages. All panel, field, and button labels, for each language, are stored in internal tables. These tables can be customized to reflect regional differences or preferred corporate terminology.
For example, the default Bridge term for the end user is "Client". However, in Europe, the terms "Insured" or "Assured" are more commonly used. This feature allows a user to locate all instances of "Client" within the system, and provide alternate text.
The process involves downloading the entire language chart for a particular language as an Excel file. The file includes the default English labels (for reference) and columns to add alternate text for the entire language or for individual regional versions. The modified file is then uploaded back into the system, and the changes are applied immediately.
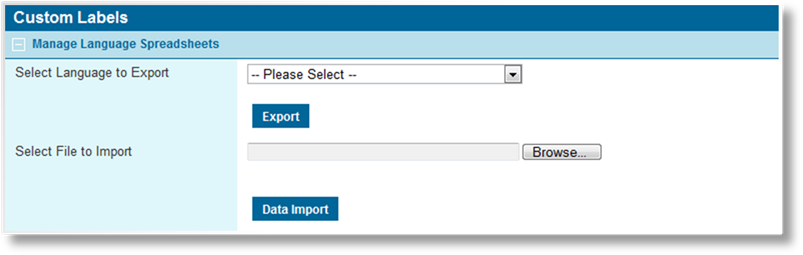
1. In the main menu, select Reference, then select Custom Language. The Custom Labels page opens.
2. Select a language from the Select Language to Export menu. Only the general languages are listed, as the language file includes all regional versions.
3. Click Export.
4. A standard Save/Open dialogue box opens. Click Save and save the file to your computer.
1. Open the exported file (see above for exporting instructions).

Fields are color coded. Any fields in white or grey should not be changed or it could result in errors when importing the file. The fields in yellow are used for the custom changes.
The following columns are included:
|
Resource Key |
Identifies the internal name of each label. |
|
|
Labels and help text for workflow items such as fields, panels, screens, integration configurations, and workflow steps are identified by the following Resource Key formats. The text shown in green will be the code of the field, panel, etc. Premium Type Names: Label_PremiumType_PremiumTypeCode Option List Items (Static-Custom only): Label_OptionListItem_ListCode_ItemCode Field Labels: Label_Field_FieldCode Field Help Text: HelpText_Field_FieldCode Data Source Display Column Header Labels (Data Table): Label_DataSourceDisplayColumn_DataSourceConfigurationCode_ColumnCode Data Source Display Column Header Labels (Grid): Label_DataSourceDisplayColumn_DataSourceConfigurationCode_FieldCode Data Source Display Column Header Labels (Web Service): Label_DataSourceDisplayColumn_DataSourceConfigurationCode_ColumnName Panel Labels: Label_Panel_PanelCode Panel Help Text: HelpText_Panel_PanelCode Screen Labels: Label_Screen_ScreenCode Step Labels: Label_Step_StepCode Integration Label: Label_Integration_IntegrationConfigurationCode |
|
|
Note: Codes will be shown as they appear elsewhere in the system, while others will be modified to remove spaces and special characters. |
|
Default Text (language) |
This displays the original English text from the system. For all language files other than English, any Custom (en) text from the English language file will be displayed instead. |
|
|
This can be used as a reference to verify the purpose of the label and the accuracy of any translations. |
|
Custom (language) |
Any text entered into this column replaces the appropriate label for all regional versions of the selected language. |
|
Custom (language-region) |
Any text entered into these columns replaces the appropriate label for just the specified regional version. If an entry has also been made in the Custom (language) column for a given label, the regional label is used. This allows one label to be applied to the entire language in general, with exceptions made for specific regions. |
|
Context |
Provides a general description of the label and where it is used in the system. These entries can be customized, and are saved for all languages. |
Whenever a page is loaded, the system identifies the language settings for the browser and then locates the appropriate labels. It checks Custom (language-region), then Custom (language), Custom (en), and finally Default Text (en) if no custom labels are found.
2. Once all changes are complete, save the file. The filename should not be changed, or it will not be accepted when importing it back to the system.
|
|
Note: |
|
Deleting a custom label from the language file does not remove the label from the system. In order to return a label to its default text, the custom label must be replaced with the default text. This can be done by copying and pasting the default label from the Default Text (language) column, or by entering the original label text manually. When the file is imported again, the custom label is applied with the updated text. | |
|
When changing labels that can be referenced directly, such as submission/policy status, any triggers and calculated fields that use the old label as a condition must be updated. |
1. In the main menu, select Reference, then select Custom Language. The Custom Labels page opens.

2. Click the Browse button to open a standard file selection window. Select the language file to be imported and click Open. The full path and filename are displayed in the Select File to Import field.
3. Click Import. The file is processed and the changes should appear immediately.
|
|
Note: Once a language file is exported, any changes to the system (such as a system update) are not reflected in the exported language file. If the language file is imported after such system changes, any resources that have been removed or renamed are not updated with the label changes. This should be a rare occurrence, and the chances are reduced by always making changes to a freshly exported language file, then importing once all changes are complete. Checking the customized labels in the system after the import should confirm that the changes were applied properly. |
