Screens are used to group panels together. Each screen is one page in the final workflow, with navigation tools to move between screens.
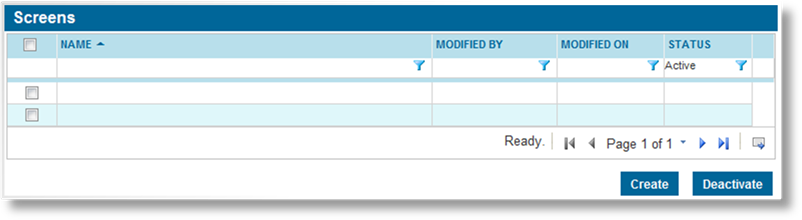
1. In the main menu, select Product Design, then select Workflow Configurations, then Screens. A list of all available screens is displayed.
Some columns have been hidden.
|
|
Tip: By default, only Active screens are displayed. Clear the filter in the Status column to view all screens. |
2. Click Create. The Screen Management page opens.
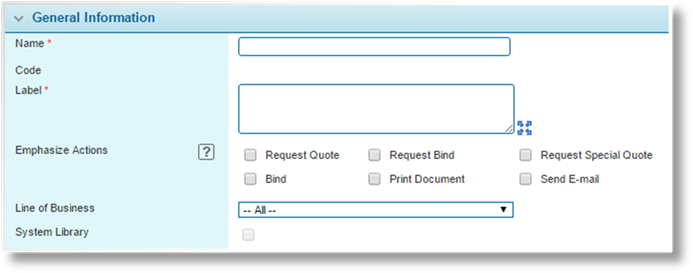
3. Complete the necessary information. Fields marked with a red asterisk * are required.
|
Name |
Enter the name of the screen. This is the internal name, used to select this screen when connecting it to other elements of the form. This name does not appear on the form itself. |
|
Code |
This is an internal reference name which is generated by the system when the screen is saved. |
|
Label |
Enter the label to be shown at the top of the screen. |
|
|
Tip: Once the screen has been saved, the Label Text becomes available in the Custom Labels section. This allows translated versions of the text to be uploaded for when the browser is set to different languages. The text entered here will be set as the default English text. For details on customizing languages, see the Custom Labels section. |
|
Emphasize Actions |
As the user navigates through the workflow, there may be screens where certain actions are common and expected, such as binding the submission on the last page, requesting a special quote on a summary page, or printing a specific document related to the content of the screen. |
|
This option allows specific buttons to be displayed at the bottom of the screen along with the navigation buttons. Each button matches an option in the Actions widget, performs exactly the same function, and follows the same rules for availability based on the transaction type, status, and the rights of the user. Even when activated for a particular screen, the button only appears if the matching option is available in the Actions widget. | |
|
Check the box for each button to be enabled for the current screen. | |
|
|
Tip: The amount of space in the navigation bar depends on the screen resolution and the size of the browser window. The workflow configuration should be tested to ensure that there is enough space for the buttons. The following information may help: |
|
•The Request Quote and Request Special Quote actions are never available at the same time. | |
|
•The Bind and Request Bind buttons are never available at the same time. | |
|
•The Previous button is not displayed on the first screen of the workflow, and the Next button is not displayed on the last screen of the workflow. | |
|
Line of Business |
Select a Line of Business from the list of industry presets, or select All to make the screen available to all lines. |
|
System Library |
This option is currently inactive. |
4. Click Add to save the screen but remain on the page, click Add & Close to save the screen and return to the screens list, or click Close to return to the screens list without saving the screen.
5. On saving the screen, the following panels are added to the page.
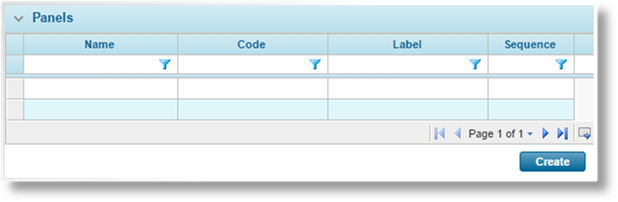
The Panels list displays all panels within the screen. Click Create to add panels. The Panel window opens.
|
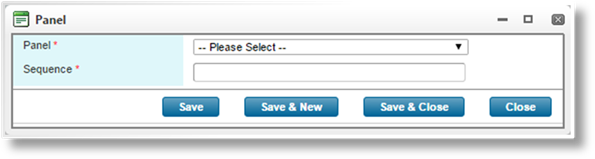
Panel |
Select the Name of the panel to be added. The list displays the names of the panels, and not the labels that appear on the submission form. |
|
Sequence |
Enter a Sequence number. This determines the panel's position in the screen, with lower numbers appearing first. |
|
|
Tip: It is advisable to leave gaps between the sequence numbers, such as 5, 10, 15. This allows new panels to be added to the screen at a later date, inserted between existing panels. Otherwise, the sequence numbers of existing panels must be changed to allow for the new addition. |
Click Save & New to save the panel and clear the form to add another panel, click Save & Close to save the panel and return to the screen page, or click Close to return to the screen page without saving the panel.
In some cases, certain information will only be necessary under certain conditions. Responsive Display of Panels configurations allow panels to be hidden or displayed immediately when the user selects specific options in another panel on the screen.
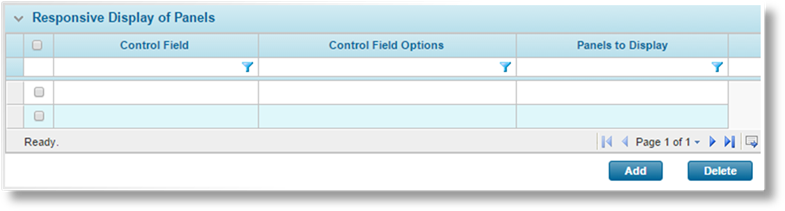
To delete configurations, check the boxes next to all appropriate configurations and click Delete.
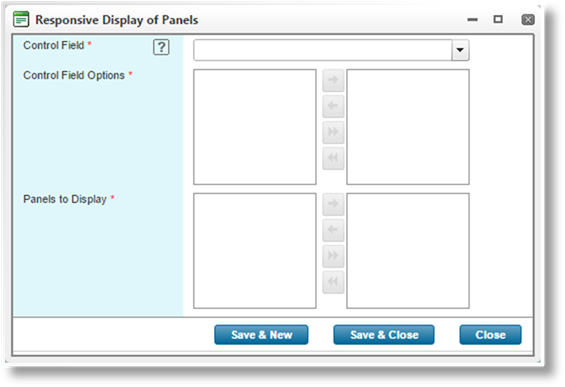
Click Add to add a new configuration, or click a link in the Control Field column to view an existing configuration. The Responsive Display of Panels window opens.
a) Complete the necessary information. Fields marked with a red asterisk * are required.
|
Control Field |
Select the field from the current panel that will control the display of the selected panels. Fields of type Checkbox, Radio Buttons, and Combo Box are available. |
|
Control Field Options |
This field is available when a Radio Buttons or Combo Box type field is selected as the Control Field. |
|
|
For a Radio Buttons control field, this will be an include/exclude field. Select which options will display the selected panels. A selected option cannot be used in more than one configuration. |
|
|
For a Combo Box control field, this will be a text field. Enter all values that will display the selected panels, separated by semi-colons. This should be the primary display values of the combo box. Spaces are permitted, but any spaces at the beginning or end of individual values will be ignored. A value cannot be used in more than one configuration. |
|
Panels to Display |
Select the panels from the current screen that will be affected by this configuration. When the checkbox is checked or one of the Control Field Options are selected, the panels will be displayed. |
|
|
Note: If values exist in the fields of a panel, either default values or entered by the user, they will be maintained whether the panel is displayed or hidden. |
b) Click Add & New to save the configuration and clear the form to add additional configurations, click Add & Close to save the configuration and close the window, or click Close to close the window without saving the configuration.

|
Active |
Marks the screen as active and available for use. If unchecked, the screen remains linked to any existing workflows, but cannot be used for new workflows. |
|
Created By |
Identifies the date and time the screen was created, and the user who created it. |
|
Last Modified By |
Identifies the last date and time the screen was changed, and the user who made the changes. |
1. In the main menu, select Product Design, then select Workflow Configurations, then Screens. A list of all available screens is displayed.

Some columns have been hidden.
|
|
Tip: By default, only Active screens are displayed. Clear the filter in the Status column to view all screens. |
2. Click a link in the Name column to view the screen details. If there are a large number of available screens, see the Using Grids section for help on finding the appropriate screen.
3. See the section on Creating a New Screen for a detailed description of the fields. All fields may be edited, if necessary, except for the Code.
To edit or delete a panel, click a link in the Name column. All fields can be edited except for the selected panel itself. Make any necessary changes and click Save & New to save the panel and clear the form to add another panel, click Save & Close to save the panel and return to the screen page, click Close to return to the screen page without saving the panel, or click Delete to remove the panel from the screen.
4. Click Save to save any changes and remain on the page, click Save & Close to save and return to the screens list, or click Close to return to the screens list without saving any changes.
Once created, a screen cannot be deleted. It can be deactivated, which leaves it linked to any existing forms, but prevents it from being used for new forms.
1. In the main menu, select Product Design, then select Workflow Configurations, then Screens. A list of all available screens is displayed.

Some columns have been hidden.
|
|
Tip: By default, only Active screens are displayed. Clear the filter in the Status column to view all screens. |
2. Locate the screen or screens to be deactivated. If there are a large number of available screens, see the Using Grids section for help on finding the appropriate screens.
3. Check the boxes for all screens to be deactivated.
4. Click Deactivate, then confirm the deactivation when prompted to do so. All selected screens are deactivated. If the screens list is still defaulted to only show active screens, they disappear from the list.
|
|
Tip: Individual screens can also be deactivated or reactivated directly through the screen record. See the section on Viewing and Modifying a Screen for details. |

