
Certain types of field on the submission form provide multiple options. An option list is created and can then be selected during the creation of the field. Other option lists are used to define available choices within the system, and can be attached to master covers.
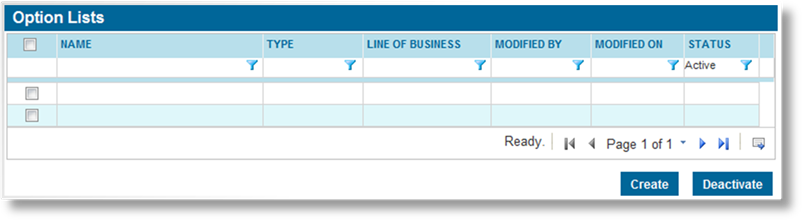
1. In the main menu, select Product Design, then select Option Lists. A table of all available option lists is displayed.
|
|
Tip: By default, only Active lists are displayed. Clear the filter in the Status column to view all lists. |
2. Click Create. The Option List Management page opens.
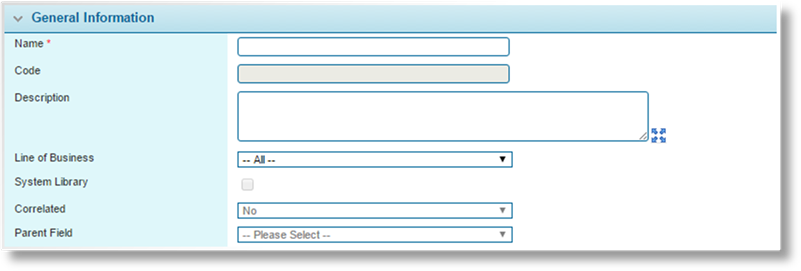
3. Complete the necessary information. Fields marked with a red asterisk * are required.
|
Name |
Enter the name of the list. This is the internal name, used to select this list when assigning it to a field. This name does not appear on the form itself. |
|
Code |
This is an internal reference code which is generated by the system when the option list is saved. |
|
Description |
Enter a description of the list. |
|
Line of Business |
Select a Line of Business from the list of industry presets, or select All to make the list available to all lines. |
|
System Library |
This option is currently inactive. |
|
Correlated |
Correlated fields cause the selection of any option in the parent field to define the available options in the child field. Check the Correlated checkbox if this field is used as the parent or child. This option is only available for certain types of list. Select the appropriate options in the Data Source Properties panel (below) before defining a correlation. |
|
Parent Field |
If this field is to be a child field in a correlated pairing, select the parent field from this list. |

|
Type |
Select the source of the list information. |
|
•Static |
All items in the list need to be added in the Option List Items grid below. |
|
•Existing Resource |
The list is selected from an internal data table, and can be customized in the Option List Items section below. |
|
Resource Type |
Select the specific type of data to be included in the list. |
|
•Custom |
Available when Static is selected as the Type. This option should be selected for general-use lists. Lists of this type can be correlated and can have regional language settings. |
|
•Attachment Type |
Available when Static is selected as the Type. When attached to a master cover, this list defines the choices available for attachment types under that master cover. |
|
•Note Type |
Available when Static is selected as the Type. When attached to a master cover, this list defines the choices available for note types under that master cover. |
|
•Limit Type |
Available when Static is selected as the Type. When attached to a master cover, this list defines the choices available for limit types under that master cover. |
|
•Deductible Type |
Available when Static is selected as the Type. When attached to a master cover, this list defines the choices available for deductible types under that master cover. |
|
•Lost Quote Reason |
Available when Static is selected as the Type. When attached to a master cover, this list defines the choices available when marking a quote as Lost. |
|
•Reinstatement Reason |
Available when Static is selected as the Type. When attached to a master cover, this list defines the choices available when reinstating a cancelled policy. |
|
•Void Reason |
Available when Static is selected as the Type. When attached to a master cover, this list defines the choices available when voiding a transaction. |
|
•Web Service |
This is a reserved resource type and should not be used for creating option lists. It is reserved for use with a single, built-in option list whose Code is DataSourcesWebServicesOptionList and whose Name is DataSources WebServices OptionList. Any other option lists created using this resource type should be deactivated. |
|
|
This resource type is used in conjunction with the built-in option list to customize the list of available web services for use with data source configurations. The option list populates the Data Source field of the Attributes panel on the Data Source Configuration Management page when Web Service is selected as the Data Source Type. It displays both standard and custom web services. Standard web services come built-in to Bridge and are available to all licensees. They are specified in the Web Service List for Data Sources. Custom web services are those that are specific to a licensee. The option list comes pre-populated with the option list items necessary to support the web services that come with Bridge. To add a custom web service to this list, contact your Oceanwide Representative. |
|
|
The built-in option list can be customized by navigating to its Option List Management page and making modifications to the option list items in the Option List Items panel. |
|
|
•To modify the label of a web service, change the Label of its option list item and then save your changes. |
|
|
•To remove a web service from the list, delete its option list item and then save your changes. Use caution when doing so, as there can be data source configurations that depend on it. Existing items that are deleted from this list can be restored. As long as their original Code is used, they will resume working as they did before they were deleted. |
|
|
•Changing the Sequence of the items for this specific option list will not change the order in which the items appear. |
|
|
•Adding a new item to this list for a custom web service requires coordination with Oceanwide. Contact your Oceanwide Representative. |
|
•Country |
Available when Existing Resource is selected as the Type. This populates the list with all countries registered in the system. The final list can be customized in the Option List Items section. |
|
•State |
Available when Existing Resource is selected as the Type. This populates the list with all states and provinces registered in the system. The final list can be customized in the Option List Items section. Lists of this type can be correlated. |
|
•Currency |
Available when Existing Resource is selected as the Type. This populates the list with all currencies registered in the system. The final list can be customized in the Option List Items section. Lists of this type can be correlated. |
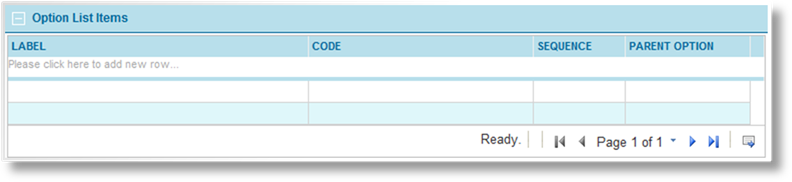
This version of the Option List Items section is used when Static is selected as the field Type. Each item to be included in the list must be entered individually.
a) Click in the field marked Please click here to add new row.
b) Enter the Label of the list item. This is the text that appears in the list in the submission form.
c) Enter a Code for the list item. This can be used to identify the list item for filters and conditions. If no code is provided, it will be generated by the system when the option list is saved.
d) Enter a Sequence number. This determines the item's position in the list, with lower numbers appearing first.
|
|
Tip: It is advisable to leave gaps between the sequence numbers, such as 5, 10, 15. This allows new items to be added to the list at a later date, inserted between existing items. Otherwise, the sequence numbers of existing items must be changed to allow for the new addition. |
e) If the list is correlated, the Parent Option column is included. For each item in the list, select an associated option from the chosen Parent Field.
f) Press the Tab key from the Sequence field or click outside the table to add the item to the list. The item is highlighted in yellow to indicate that it has not been accepted yet.
g) Repeat the previous steps to add additional list items.
h) Once all items have been added, right-click inside the table and select Accept All Changes. This saves the current table.
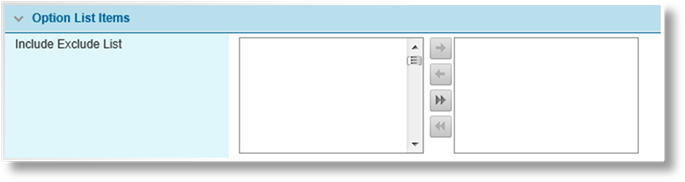
This version of the Option List Items section is used when Existing Resource is selected as the field Type.
Depending on the chosen Resource Type, one or more items may be available in the list. Select which items are Included or Excluded.
4. Click Add to save the option list but remain on the page, click Add & Close to save the option list and return to the option list table, or click Close to return to the option list table without saving the option list.
1. In the main menu, select Product Design, then select Option Lists. A table of all available option lists is displayed.
|
|
Tip: By default, only Active lists are displayed. Clear the filter in the Status column to view all lists. |
2. Click a link in the Name column to view the list details. If there are a large number of available lists, see the Using Grids section for help on finding the appropriate list.
3. See the section on Creating a New Option List for a detailed description of the fields. Some options can be edited, and others are grayed out and cannot be changed.
To remove list items, right-click on the item in the table, and select Delete. The item is marked in red, and is removed when the list is saved.
Use caution when deleting options or changing the Code. If the option has been used within the system, deleting it or changing the code could affect calculations and other resources.
|
|
Note: For option lists with Web Service as the Resource Type, the Code of the list items should not be changed. Doing so can cause data source configurations to stop working. |
|
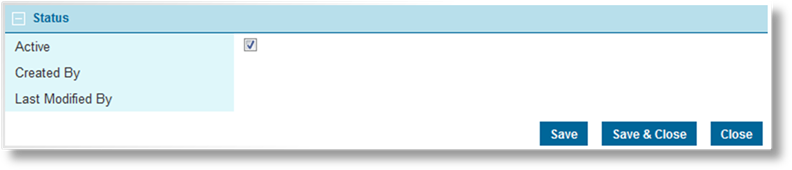
Active |
Marks the option list as active and available for use. If unchecked, the list remains linked to any existing forms, but cannot be attached to new fields. |
|
Created By |
Identifies the date and time the option list was created, and the user who created it. |
|
Last Modified By |
Identifies the last date and time the option list was changed, and the user who made the changes. |
4. Click Save to save any changes and remain on the page, click Save & Close to save and return to the option list table, or click Close to return to the option list table without saving any changes.
Once created, an option list cannot be deleted. It can be deactivated, which leaves it linked to any existing forms, but prevents it from being used for new fields.
|
|
Note: The option list with DataSourcesWebServicesOptionList as its Code should not be deactivated. Deactivating this option list will cause data source configurations that use web services to stop working. |
1. In the main menu, select Product Design, then select Option Lists. A table of all available option lists is displayed.

|
|
Tip: By default, only Active lists are displayed. Clear the filter in the Status column to view all lists. |
2. Locate the list or lists to be deactivated. If there are a large number of available lists, see the Using Grids section for help on finding the appropriate lists.
3. Check the boxes for all lists to be deactivated.
4. Click Deactivate, then confirm the deactivation when prompted to do so. All selected lists are deactivated. If the table is still defaulted to only show active lists, they disappear from the table.
|
|
Tip: Individual option lists can also be deactivated or reactivated directly through the list record. See the section on Viewing and Modifying an Option List for details. |

