Bank accounts are added in the system as reference data. Bank information is used when managing receipts, and can be associated to General Ledger Accounts.
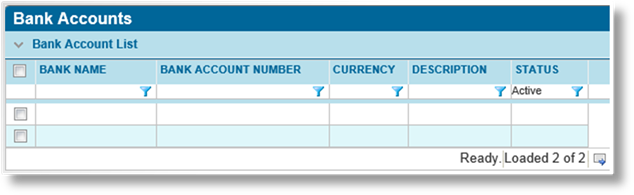
1. In the main menu, select Billing, Configuration, then Bank Accounts. A list of all available accounts is displayed.
|
|
Tip: By default, only Active accounts are displayed. Clear the filter in the Status column to view all accounts. |
2. Click Add. The Bank Account window opens.
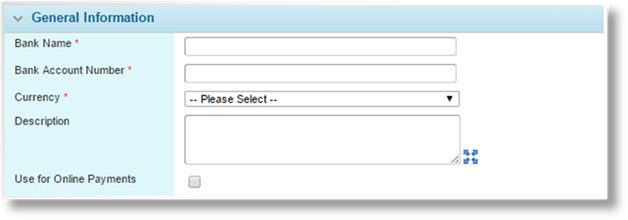
3. Complete the necessary information. Fields marked with a red asterisk * are required.
|
Bank Name |
Enter the name of the bank. |
|
Bank Account Number |
Enter the account number. This number must be unique. |
|
Currency |
Select the currency for the account. |
|
Description |
Enter a description for the account. |
|
Use for Online Payments |
If on line payments are enabled, checking this box associates this bank account to any online payments in the selected currency. Only one bank account can be defined for online payments in each currency. |
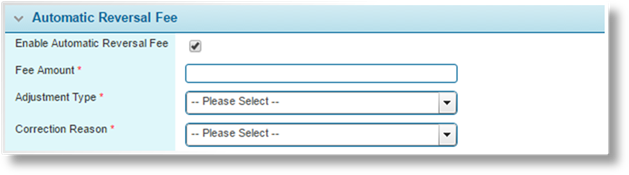
The Automatic Reversal Fee panel allows an additional fee to be charged when a cash receipt is reversed. The fee is created as an adjustment charge. This is commonly used when a receipt is reversed due to "Overdraft" or "Non-Sufficient Funds", and is only applied when a specific Correction Reason is selected.
|
Enable Automatic Reversal Fee |
When enabled, reversal fees will be applied according to the settings below. These settings only apply to the reversal of receipts associated to the current bank configuration. |
|
Fee Amount |
This field is available when Enable Automatic Reversal Fee is enabled. Enter the flat amount of the fee. |
|
Adjustment Type |
This field is available when Enable Automatic Reversal Fee is enabled. The fee is added to the system as an adjustment. Select the Adjustment Type to be applied to the adjustment. |
|
Correction Reason |
This field is available when Enable Automatic Reversal Fee is enabled. Select a Correction Reason to trigger the fee. When a reversal is created and posted with this correction reason, the fee adjustment will be created. |
|
|
Note: The fee settings are only applied to manual receipt reversals. Reversals created automatically as part of another action, such as a reallocation, will not trigger this fee. |
4. Click Add & New to save the details and clear the form to enter another account, click Add & Close to save and return to the Bank Account list, or click Close to return to the Bank Account list without saving the account.

The Status panel is added to the page once the account has been saved.
|
Active |
Marks the account as active and available for use. If unchecked, the account remains linked to any existing configurations, but cannot be used for new setups. |
|
Created By |
Identifies the date and time the account was created, and the user who created it. |
|
Last Modified By |
Identifies the last date and time the account was changed, and the user who made the changes. |
1. In the main menu, select Billing, Configuration, then Bank Accounts. A list of all available accounts is displayed.
|
|
Tip: By default, only Active accounts are displayed. Clear the filter in the Status column to view all accounts. |
2. Click a link in the Bank Name column to view the account details. If there are a large number of available accounts, see the Using Grids section for help on finding the appropriate account.
3. See the section on Creating a New Bank Account for a detailed description of the fields.
4. Click Save & New to save any changes and clear the form to enter a new account, click Save & Close to save and return to the Bank Account list, or click Close to return to the Bank Account list without saving any changes.
Once created, a bank account cannot be deleted. It can be deactivated, which leaves it linked to any existing configurations, but prevents it from being used for new setups.
1. In the main menu, select Billing, Configuration, then Bank Accounts. A list of all available accounts is displayed.
|
|
Tip: By default, only Active accounts are displayed. Clear the filter in the Status column to view all accounts. |
2. Locate the bank accounts to be deactivated. If there are a large number of available accounts, see the Using Grids section for help on finding the appropriate accounts.
3. Check the boxes for all accounts to be deactivated.
4. Click Deactivate, then confirm the deactivation when prompted to do so. All selected accounts are deactivated. If the Bank Account list is still defaulted to only show active accounts, they disappear from the list.
|
|
Tip: Individual bank accounts can also be deactivated or reactivated directly through the bank account management record. See the section on Viewing and Modifying a Bank Account for details. |

