
Notes can be added to a submission or policy to provide additional information or to serve as a reminder if any actions need to be taken at a later date (Follow Ups). Notes marked for follow up appear in the notes list on the Home page until they are marked as completed.
Notes can also be added when taking certain actions on a submission or policy (bind, issue quote, confirm cancellation, etc.). When an action occurs that has the note option enabled, a customized notes page opens. Adding a note is optional. Click Confirm to proceed with the submission process, with or without adding a note, or click Cancel to cancel the action and return to the last submission page. If a note is added, it is included in the Notes & Follow Ups list, and is included in any automatic e-mails sent out related to the action.
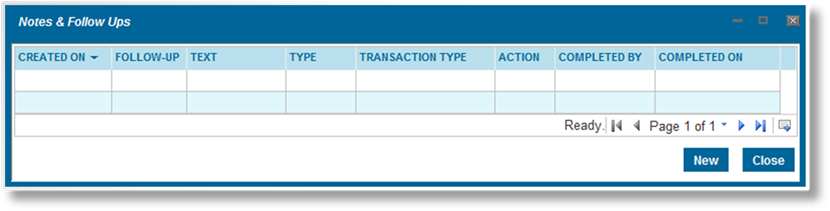
When viewing a submission or policy, select the Notes & Follow Ups option in the Common Screens widget. The Notes & Follow Ups list opens, containing all notes currently attached to the submission or policy.
Click New. The New Note & Follow Up window opens.
The General Information panel displays details about the submission or policy.

|
Transaction ID |
This field identifies the attached submission or policy. |
|
Policy No |
Displays the policy number of the attached submission or policy. This field is hidden if the policy number has not yet been generated. |
|
Client Information |
Displays the name of the client for the attached submission or policy. |
|
Policy Transaction Type |
Displays the transaction type of the attached submission or policy. |
|
Action |
When a note is created as a result of an action, this field identifies the action. If the note is being created manually, this field shows Created by user. |
Fill in the necessary information in the Details panel.

|
Text |
Enter the note text. |
|
Follow-Up |
A date can be entered to schedule a follow-up, or selected from the lookup. Once the follow-up date has been reached, the note is displayed in the Notes grid on the home page until it is marked as complete. |
|
Type |
Select the type of note being created. This option is only available if the note types have been configured in the system. This option is also not available when creating notes as the result of an action in the workflow. |
Click Save & New to save the note and clear the form to enter another note, click Save & Close to save the note and close the note window, or click Close to close the note window without saving the note.
The Notes & Follow Ups list is updated as new notes are added. Click Close to close the window and continue with the submission or policy.
When viewing a submission or policy, select the Notes & Follow Ups option in the Common Screens widget. The Notes & Follow Ups list opens, containing all notes currently attached to the submission or policy.
Click a link in the Created On column. The Note & Follow Up window opens.
Most fields are the same as when creating a new note. Some additional information becomes available when the note is saved.
In the General Information panel:
|
Completed By |
This field is only displayed if the note has been marked as completed. It displays the name of the user who completed the note. |
|
Completed On |
This field is only displayed if the note has been marked as completed. It displays the date and time it was completed. |
The Status panel is added:
|
Created By |
Displays the name of the user who created the note, as well as the date and time it was created. |
|
Last Modified By |
Displays the name of the last user to edit the note, as well as the date and time the changes were made. |
All fields in the Details panel can be edited.
Click Save & Close to save the changes and close the note window, click Mark Completed to set the note to completed and close the note window, click Delete to delete the note and close the note window, or click Close to close the note window without saving any changes.
When viewing a submission or policy, select the Notes & Follow Ups option in the Common Screens widget. The Notes & Follow Ups window opens, containing all notes currently attached to the submission or policy.

Click a link in the Created On column. The Note & Follow Up window opens.
Click Delete to delete the note and close the note window, or click Close to close the note window without saving any changes.
When viewing a submission or policy, select the Notes & Follow Ups option in the Common Screens widget. The Notes & Follow Ups list opens, containing all notes currently attached to the submission or policy.
Click a link in the Created On column. The Note & Follow Up window opens.
Click Mark Completed to mark the note as completed and close the note window, or click Close to close the note window without saving any changes.
The Completed By and Completed On fields are added, identifying the user who completed the note and the time it was completed. The note no longer shows in the Notes & Follow Ups grid of the home page. The Notes & Follow Ups list also shows the name of the user who completed the note and the date that it was completed.