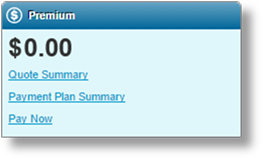
While navigating through the submission form, the system is continuously performing validations and calculations in the background. Once the system has the minimum information necessary to generate quotes, the Premium widget displays the premium from the quote option with the lowest premium or lowest sequence number, depending on the product settings. The default display quote option will be selected from the issued quotes. If there are no issued quotes, the default will fall back to other statuses.
This premium may change as the user proceeds through the submission, adding or changing information.
When the submission is in a status where no quotes can be calculated, the premium is not shown. When at least one quote is available, the premium is displayed for the quote with the lowest premium or lowest sequence.
|
|
Note: For products where different insurer companies may be assigned to the policy, users from those insurer companies will not see the premium in the widget. They will need to view individual quotes for the premium details. |
When one or more quotes are available for review, click Quote Summary to open the Quote Summary window, detailing the quote options and details for each.
Once a quote option has been selected, click Payment Plan Summary to open the Payment Plan Summary window to review or change the selected payment plan. Note that when there is only one option available, either for quote options or payment plans, that option is selected automatically.
In Cancellation - Quoted status, the Edit Cancellation Premium link becomes available. This opens the Edit Cancellation Premium window, allowing the premium to be edited by premium type and new premium types to be added.
If enabled, the Pay Now link is available once a transaction has been bound, not including Cancellations. This opens the Payment Initiation window to begin an online payment of any invoices related to the current transaction.
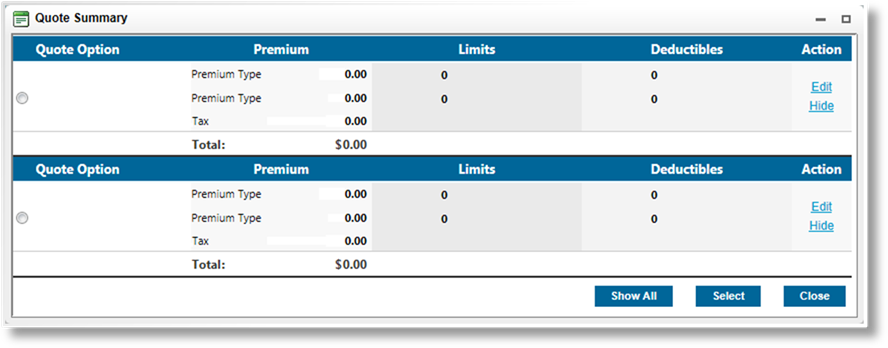
All available quotes are displayed. For each quote, the premium is broken down by category with all Limits and Deductibles itemized per category. The Total premium is displayed at the bottom of each quote.
The available quotes depend on the status of the quote and the settings of the user's account.
|
Issued |
Issued quotes are quotes that have successfully passed all validations when calculating quotes, or failed some validations but were approved and issued by the underwriter. Issued quotes can be selected and bound. These quotes are visible to standard client, distributor, and underwriter users. Depending on the configurations, some issued quotes may be hidden when similar, lower-priced, options are available. The Show All button, available to some underwriter users, displays these hidden quotes. |
|
Underwriting Required |
A quote goes into Underwriting Required status when the quote recalculation is activated by a client or distributor user and one or more elements on the submission form violates the conditions for the quote. The quote requires review and approval from an underwriter user. However, correcting the cause of the violation and recalculating all quotes can allow the affected quotes to become Issued. These quotes are visible to standard underwriter users. |
|
Referred |
A quote goes into Referred status when the quote recalculation is activated by an underwriter user and one or more elements on the submission form violates the conditions for the quote. In addition, an Underwriting Required quote becomes Referred when an underwriter chooses to Process the quote. These quotes are visible to standard underwriter users. |
|
Open |
A quote goes into Open status when it fails quote validation. The quote cannot be selected, although users with the right to edit the quote may make adjustments that allow it to pass the validations, making it available for selection. These quotes are visible to users with the right to edit quotes. |
The Actions column lists the available options for each quote.
|
Hide |
Clicking the Hide link for any quote removes that quote from the list. This makes it easier to perform comparisons of quotes that are under consideration. The Show All button restores all hidden quotes. |
|
The currently selected quote cannot be hidden. | |
|
Edit |
Opens the Quote Premium Override window to view the premium details and make any adjustments. |
|
Process |
When all quotes go into Underwriting Required status, the transaction is placed in the same status. Clicking Process for one or more quotes changes their status to Referred and enables them for processing in Referred status. Clicking Request Quote for the transaction automatically enables all quotes for processing. In either case, the transaction moves to Referred status. |
|
|
When the transaction is in Quoted status, any quotes in Underwriting Required status can still be processed, putting them into Referred status. |
|
Approve |
When quotes are in Referred status, they can be reviewed and Approved. On clicking Issue Quote from the Referred transaction, all Approved quotes become available for selection and binding. |
|
When the transaction is in Quoted status, any quotes remaining in Referred status can still be approved. Issue Quote can then make the newly approved quotes available for selection and binding. |
Click Show All to display any hidden quotes, including any quotes in groups that were hidden by the group settings.
Check the radio button for an Issued quote and click Select to choose that quote. If only one quote is available, it is selected automatically.
If a choice of payment plans is available, the Payment Plan Summary window opens. If only one payment plan is available, it is selected automatically.
If the payment plan is selected automatically, or if payment plans are not available, the window closes and the submission form and widgets are updated to reflect the selected quote. A different quote can be selected by reopening the Quote Summary window and choosing a different quote. If new quotes are generated for the submission, the selected quote is lost and the Premium widget defaults back to the quote option with the lowest premium or sequence, waiting for a new quote to be selected.
Click Close to close the window.
The Payment Plan Summary window can be accessed two ways. When selecting a quote that has multiple payment plans available, the summary opens automatically, allowing the user to select a plan. Once a quote has been selected, the Payment Plan Summary link becomes available in the Premium widget, allowing the user to view the selected plan or select a new plan, if available.

If a payment plan has already been selected, the Payment Schedule panel will be displayed. To select or change the payment plan, select it from the Payment Plan list and click Save & Preview.
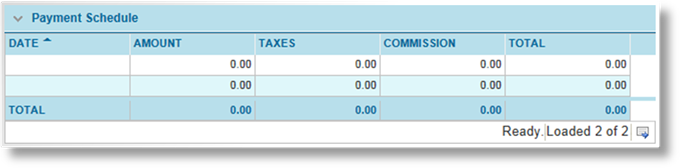
The Payment Schedule panel displays a list of all payments for the selected payment plan, including the corresponding charge date and value of each payment. Other available payment plans can be previewed by selecting them and clicking Save & Preview.
Click Edit Schedule to make changes to individual payments. See the Payment Schedule Editor section for details.
Click Quote Summary to close the window and return to the Quote Summary window or click Close to close the window and return to the submission form.
Accessed using the Edit action in the Quote Summary page, the Quote Premium page allows all rates and calculated premium for a single quote option to be adjusted or overridden.

The Premium Details panel lists all premium types included in the selected quote. The following columns are provided:
|
Premium Type |
Displays each premium type included in the selected quote. |
|
Level |
Identifies where the premium information was collected. |
|
•Policy |
A Policy line is included for each premium type. Values in Policy lines can be overridden. |
|
•Grid |
A Grid line is added if any premium for the premium type comes from one or more premium grids, and displays the total value from those grids. Grid values are provided for information purposes, and cannot be overridden, but the associated Policy values can be modified to compensate. |
|
Tech Premium |
Displays the technical premium calculated from the rates and rules set in the master cover. |
|
Tech Rate |
Displays the calculated annual technical rate. This is derived from the annual Technical Premium divided by the Rating Basis. |
|
Tech Rating Basis |
Displays the rating basis value from the field defined in the master cover. |
|
Effective Premium |
Displays the modified premium value. |
|
Effective Rate |
Displays the modified annual rate value. |
|
Effective Rating Basis |
When one premium type is dependent on another premium type, overrides to the other premium types may affect the rating basis. This column displays the calculated rating basis after any other overrides. |
|
Δ % |
Displays the percentage variance between the technical rate and effective rate. |
|
Commission |
Displays the commission calculated from the effective premium. |
|
Overridden |
Displays if any overrides have been applied to the premium type. |
Click a link in the Premium Type column to display the Premium Adjustment panel for that premium type.
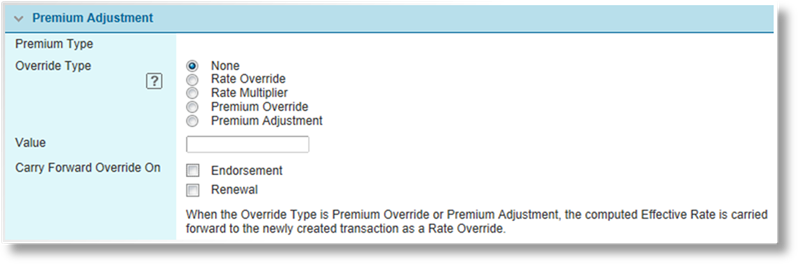
The Premium Adjustment panel is used to apply or edit adjustments to the selected premium type.
|
Premium Type |
Identifies the selected premium type. |
|
Override Type |
Select the type of override to apply. |
|
•None |
No adjustment should be made. Any existing adjustments are removed, returning the Premium Details to their original values. |
|
•Rate Override |
The Value field is used as the Effective Rate. A Rating Basis field must be defined for the selected premium type, or this option will not be available. |
|
•Rate Multiplier |
The Effective Rate is multiplied by the Value field, with the new Effective Rate being used to calculate the Effective Premium. A Rating Basis field must be defined for the selected premium type, or this option will not be available. |
|
•Premium Override |
The Value field is used as the Effective Premium. |
|
•Premium Adjustment |
The Value field is added to or subtracted from the Effective Premium. |
|
Value |
Enter the value to be applied. This field is not shown if None is selected. |
|
Carry Forward Override On |
Without this setting, the current adjustment will only apply to the current transaction. This setting allows the adjustment values to be carried forward and applied to related transactions. This option is not shown if None is selected. A Rating Basis field must be defined for the selected premium type, or this option will not be available. |
|
•Endorsement |
If this box is checked, the current adjustment will be carried forward to any endorsement transactions created from the current transaction. This setting itself is also carried forward, so the adjustment and setting will persist through multiple endorsements. |
|
•Renewal |
If this box is checked, the current adjustment will be carried forward to any renewal transactions created from the current transaction. This setting itself is also carried forward, so the adjustment and setting will persist through multiple renewals. |
|
|
Notes: |
|
Once an adjustment has been saved, it will remain in place even if the quote is recalculated. | |
|
Premium overrides and adjustments are not carried forward directly. They are converted to the equivalent rate override, which is carried forward. | |
|
The Carry Forward settings will only apply for the quote option that is selected and bound. If a quote includes adjustments and carry forward settings, but is not selected and bound, when a renewal occurs the quote may be available but the adjustments and settings will not be included. | |
|
The Carry Forward settings will only work if they exist in the source transaction. For example, a new business transaction is bound with adjustments set to carry forward on renewal, but not endorsement. An endorsement is created, and the adjustments and settings are omitted. If a renewal is created from the new business transaction, the adjustments and settings will be included. If the renewal is instead created from the endorsement, the adjustment and settings will not be present, and will not be included in the renewal. |
Click Calculate Quote to save the adjustments and update the Premium Details or click Close to close the window without saving any adjustments.
Accessed using the Edit Cancellation Premium link in the Premium widget, the Edit Cancellation Premium window allows premium to be edited by premium type and new premium types to be added.
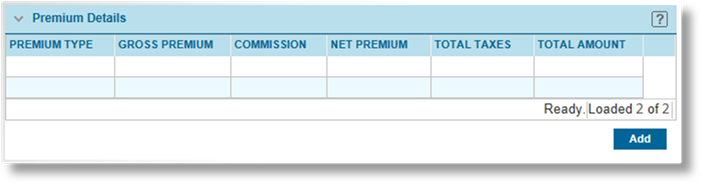
The Premium Details table lists all premium types currently making up the total premium. Click Add to add a premium type, or click a link in the Premium Type column to edit that premium type.
Adding a Premium Type
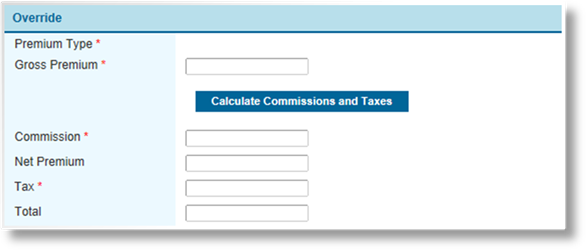
On Clicking Add, the Override panel appears.

|
Premium Type |
Select a premium type to be added. |
|
Gross Premium |
Enter the total gross premium, including commissions. |
Click Save to save the data, or click Close to close the window without saving the new Premium Type.
Once saved, any commissions and taxes are calculated according to the settings in the product, and the totals are displayed. The values can now be edited, as detailed below.
Editing a Premium Type
On saving a new premium type or selecting an existing type for editing, the full Override panel appears.
|
Premium Type |
Displays the selected premium type. Once saved, the premium type cannot be changed or removed. |
|
Gross Premium |
Displays the current gross premium, which can be changed |
|
Calculate Commissions and Taxes |
Uses the Gross Premium to recalculate the commissions, taxes, and totals according to the settings in the product. This replaces any custom values for the commission or taxes. |
|
Commission |
Displays the current commission, which can be changed. The Calculate Commissions and Taxes button will reset any custom values in this field. |
|
Net Premium |
Displays the calculated net premium. |
|
Taxes |
Each tax applied to the selected premium type will be displayed here. Each value can be changed. The Calculate Commissions and Taxes button will reset any custom values in these fields. |
|
|
Note: If a tax or fee is taken from a driver field in the workflow, recalculating the taxes will pull in the current value of that field without any modifications. If the driver field does not take into account adjustments, prorating, or refunds, the tax or fee may need to be modified after recalculating. |
|
Total |
Displays the calculated total premium. |
Click Save to save the current values for the selected premium type. If the commission or any taxes were changed, the Net Premium and Total values will be recalculated before saving. Click Add or select another premium type to make additional changes.
Click Close to close the window at any time. Any unsaved changes will be lost. The transaction will be refreshed with the new values.
When a payment plan is selected and previewed, all payment dates and amounts are calculated according to the payment plan settings. Each of these payments can be edited to change the date of the payment and any amounts.
Clicking Edit Schedule in the Payment Plan Summary window opens the Payment Schedule Editor window.

The Policy Information panel identifies the Bill to Party, the Policy Transaction number, and the expected Currency of the payment.
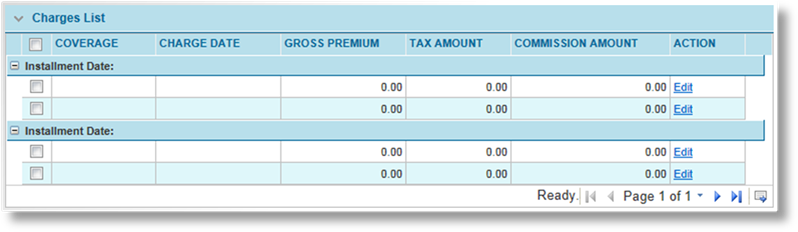
The Charges List panel lists all charges for the selected plan, grouped by Installment Date, and separated by premium type.
To delete charges completely. check the box for each charge to be removed, and click Delete. Individual charges can also be deleted from the Edit Charge window.
Once all changes have been made, click Validate to confirm that the total premium, taxes, and commission amounts match the original totals. This validation is required, and must be performed before attempting to Bind the policy. To edit the premiums, taxes, and commissions, see the Quote Premium Override section.
Click Close to close the window and return to the Payment Plan Summary window.
To edit a charge, click the Edit link. The Edit Charge window opens.
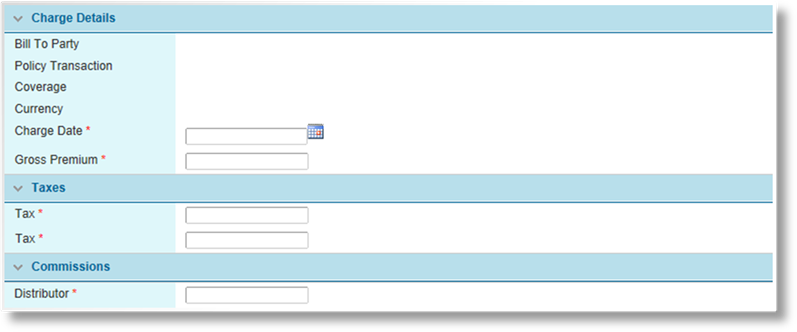
The Charge Details panel lists all details of the charge. The date, premium amount, taxes, and commission can all be edited.
Click Copy to create a duplicate charge. The duplicate can then be edited to represent a new charge.
Click Delete to remove the charge completely. Multiple charges can be deleted at once from the Payment Schedule Editor window.
Click Save & Close to save any changes and return to the Payment Schedule Editor window, or click Close to return without saving the details.
If enabled, this option is available once a transaction has been bound. This allows online payments of invoices related to the current transaction.
1. Click the Pay Now option in the Premium widget. The Payment Initiation window opens.
2. Complete the necessary information. Fields marked with a red asterisk * are required.
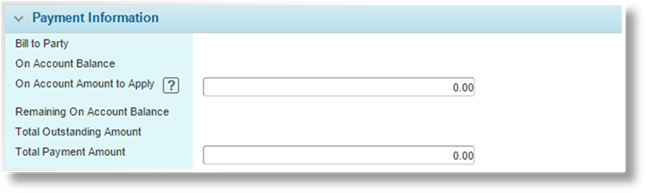
|
Bill To Party |
Displays the name of the bill to party for the current transaction. |
|
On Account Balance |
Displays any funds in the selected currency that may be on account for the bill to party. This field is only displayed if there is a suitable on account balance available. |
|
On Account Amount to Apply |
Enter an amount to use on account funds for this payment. The amount may not exceed the current On Account Balance or the Total Outstanding Amount. This field is only displayed if there is a suitable on account balance available. |
|
Remaining On Account Balance |
Displays the amount that will remain on account after this payment is completed. This field is only displayed if there is a suitable on account balance available. |
|
Total Outstanding Amount |
Displays the total unpaid amount of all outstanding invoices associated to the current transaction. |
|
Total Payment Amount |
Displays the total remaining amount to be paid after any on account amount has been applied. Depending on the configuration of the payment system, this amount may be changed to make a partial payment. |
3. Click Submit to proceed with the payment or click Close to close the window without making a payment.
If the Total Payment Amount is zero, meaning the full payment amount was covered by the on account funds, clicking Submit will complete the payment and close the window.
If there is a remaining amount to be paid, clicking Submit will close the window and change to the online payment screen. The instructions will be on-screen.
4. When the payment is completed, the Online Payments screen opens with a summary of the payment.
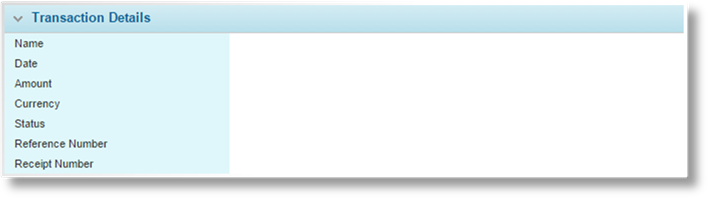
|
Name |
Displays the name of the bill to party for the current transaction. |
|
Date |
Displays the date the transaction was processed. |
|
Amount |
Displays the amount of the transaction. |
|
Currency |
Displays the currency for the transaction. |
|
Status |
Displays the status of the transaction. |
|
Reference Number |
Displays the system-generated reference number for the payment. |
|
Receipt Number |
Displays the number of the receipt generated within the system. |
5. Click the Back to Previous Page button to return to the transaction.
