Payment Integration Rules define how claims payments are handled by the Billing module. Payments can be set to produce charges for invoicing, and can be tracked as general ledger entries.
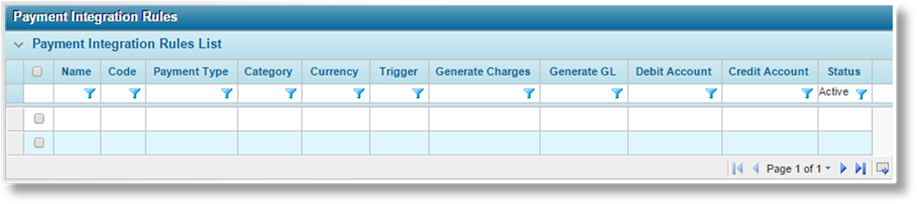
1. In the main menu, select Claims, Configurations, Payment Rules, then Payment Integration. A list of all available rules is displayed.
|
|
Tip: By default, only Active rules are displayed. Clear the filter in the Status column to view all rules. |
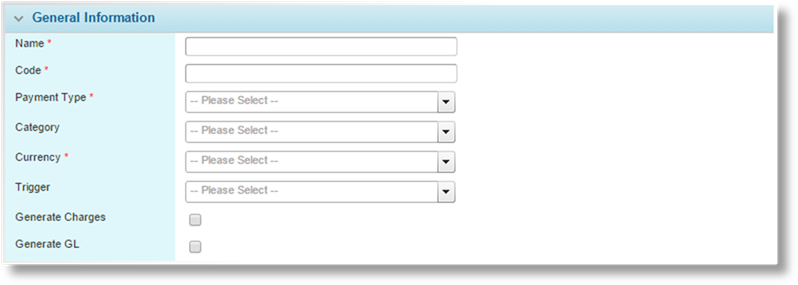
2. Click Add. The Payment Integration Rules window opens.
3. Complete the necessary information. Fields marked with a red asterisk * are required.
|
Name |
Enter the name of the payment rule. |
|
Code |
Enter a code to identify the rule internally. |
|
Payment Type |
Select the payment type condition. |
|
Category |
Select the category condition. |
|
Currency |
Select the payment currency condition. |
|
Trigger |
Select a trigger. The trigger must evaluate as true for this condition to be met. |
|
Generate Charges |
If the payment meets all conditions, the details will be sent to the Billing module where charges will be generated and ready for invoicing. |
|
Generate GL |
If the payment meets all conditions, the details will be sent to the Billing module where general ledger entries will be created. Checking this box opens the General Ledger panel below with additional settings. |

The General Ledger panel becomes available when the Generate GL checkbox is selected.
|
Debit Account |
Select the general ledger account to be debited according to the payment details. |
|
Credit Account |
Select the general ledger account to be credited according to the payment details. |
|
|
Note: Payment Integration Rules must be unique. If another active rule exists with the same settings for Payment Type, Category, Currency, and Trigger, the new rule cannot be saved. The existing account would need to be modified or deactivated in order to save the new account. |
4. Click Add & New to save the payment rule and clear the form to enter another rule, click Add & Close to save and close the window, or click Close to close the window without saving the rule.

The Status panel is added to the page once the payment rule has been saved.
|
Active |
Marks the payment rule as active and available for use. If unchecked, the rule will no longer be applied for new payments. |
|
Created By |
Identifies the date and time the rule was created, and the user who created it. |
|
Last Modified By |
Identifies the last date and time the rule was changed, and the user who made the changes. |
1. In the main menu, select Claims, Configurations, Payment Rules, then Payment Integration. A list of all available rules is displayed.

|
|
Tip: By default, only Active rules are displayed. Clear the filter in the Status column to view all rules. |
2. Click a link in the Name column to view the payment rule details. If there are a large number of available rules, see the Using Grids section for help on finding the appropriate rule.
3. The Payment Integration Rules window opens. See the section on Creating a New Payment Rule for a detailed description of the fields.
4. Click Save & New to save the payment rule and clear the form to enter another rule, click Save & Close to save and close the window, or click Close to close the window without saving the rule.
Click Delete to permanently delete the rule.
If necessary, a payment rule can be deactivated. This will temporarily prevent any matching payments from being transferred to the Billing module.
The rule remains in place and can be reactivated at any time by checking the Active checkbox in the Status panel.
1. In the main menu, select Claims, Configurations, Payment Rules, then Payment Integration. A list of all available rules is displayed.

|
|
Tip: By default, only Active rules are displayed. Clear the filter in the Status column to view all rules. |
2. Locate the payment rules to be deactivated. If there are a large number of available rules, see the Using Grids section for help on finding the appropriate rules.
3. Check the boxes for all rules to be deactivated.
4. Click Deactivate, then confirm the deactivation when prompted to do so. All selected rules are deactivated. If the Payment Integration Rules List is still defaulted to only show active rules, they disappear from the list.
|
|
Tip: Individual rules can also be deactivated or reactivated directly through the Payment Integration Rules window. See the section on Viewing and Modifying a Payment Rule for details. |
If a rule is no longer required, it can be deleted permanently. This will not affect any payments that have already been transferred to the Billing module, but will prevent any new payments from being transferred.
1. In the main menu, select Claims, Configurations, Payment Rules, then Payment Integration. A list of all available rules is displayed.
|
|
Tip: By default, only Active rules are displayed. Clear the filter in the Status column to view all rules. |
2. Click a link in the Name column to view the payment rule details. If there are a large number of available rules, see the Using Grids section for help on finding the appropriate rule.
3. Click Delete to delete the rule.

