Triggers are logical conditions that can be set to evaluate system and submission information against a set of criteria.
Whether a trigger evaluates as true or false can determine if certain options are available on the submission form, if a calculation is processed a certain way, if specific data is included in an email or generated document, or a variety of other options.
Triggers can be nested together, creating detailed logical structures to suit any need.
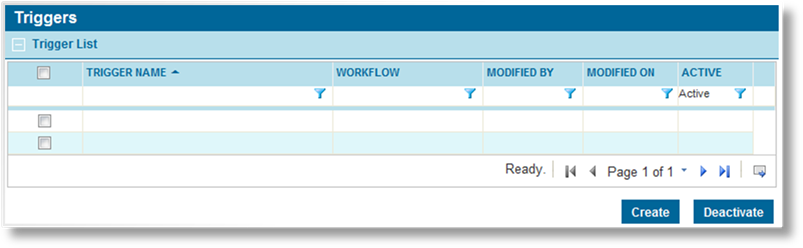
1. In the main menu, select Product Design, then select Triggers. A list of all available triggers is displayed.
|
|
Tip: By default, only Active triggers are displayed. Clear the filter in the Status column to view all triggers. |
2. Click Create. The Trigger Management page opens.
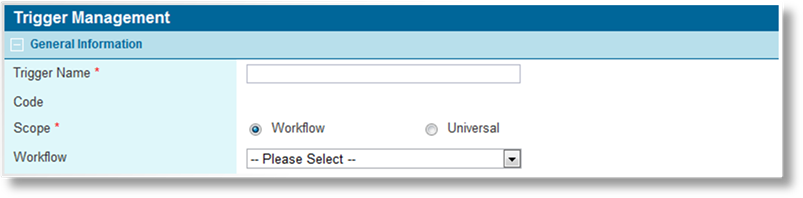
3. Complete the necessary information. Fields marked with a red asterisk * are required.
|
Trigger Name |
Enter the name of the trigger. This is the internal name, used to select this trigger when setting up related features. This name does not appear on the form itself. |
|
Code |
This is an internal reference name which is generated by the system when the trigger is saved. |
|
Scope |
Select how this trigger is available for workflows. |
|
•Workflow |
Restricts this trigger to one specific workflow, selected in the next field. If selected, only fields and triggers belonging to the same workflow are available for setting conditions. |
|
•Universal |
Makes the trigger available throughout the system. Only fields and triggers assigned to all lines of business are available for setting conditions. |
|
|
Note that universal triggers are not supported in Claims workflows. |
|
Workflow |
If Workflow was selected as the Scope, select the appropriate workflow from this list. |
4. One trigger can have multiple conditions. Each condition compares one field or one trigger to a set value. Depending on the chosen Conjunction (see below), the trigger is true if all conditions are true (Conjunction = And) or if any condition is true (Conjunction = Or).
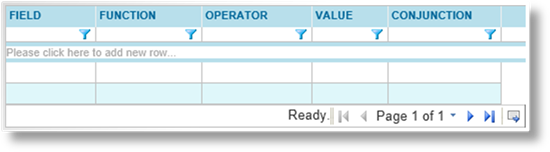
a) Click in the field marked Please click here to add new row.
b) Select the field, trigger, or other option to be checked for this condition.
|
Fields |
Provides a selection of system and workflow fields. In order for a workflow field to be available in this list, the field must be set as a Trigger field, and the availability must match the Scope settings selected above. See the section on Managing Fields for more information. |
|
Triggers |
All triggers within the same Scope can be selected. Since only one type of Conjunction can be used within a single trigger, having triggers within triggers allows for detailed and/or logic structures. |
|
Other Options |
These are additional choices that allow the trigger to check other information within the system. |
|
•Current Screen |
This option obtains the Code of the current screen in the workflow. This can be compared to known screen codes, identified on the Screen Management page. |
c) The Function field is optional, and provides advanced features related to tables, dates, and compliance checks. The result of the function is used to check the condition.
|
Min |
Used for fields within a table, this uses the lowest value in the table. |
|
Max |
Used for fields within a table, this uses the highest value in the table. |
|
Sum |
Used for fields within a table, this adds together all instances of the chosen field within a table. |
|
All |
Used for fields within a table, this checks each record against the selected criteria. All records must evaluate as true for the condition to be true. |
|
Any |
Used for fields within a table, this checks each record against the selected criteria. If one or more records evaluate as true, the condition is true. This can also be used on a field where multiple options can be selected, determining if one of the selected options matches the criteria. |
|
Count |
Used for fields within a table, this counts the number of records in the table. The contents of the records have no effect. |
|
Days From Current |
This function compares the selected date field against the current system date, and returns the number of days difference. |
|
Months From Current |
This function compares the selected date field against the current system date, and returns the number of months difference. |
|
Years From Current |
This function compares the selected date field against the current system date, and returns the number of years difference. |
|
Scan - [List Name] |
This is a special feature that checks the selected field for compliance with one of a series of sanction or watch lists. This feature provides a number from 0 to 100, with 100 meaning an exact match against a restricted person, place, or company. That resulting number is compared to the Value to determine if the condition is met. A separate condition must be created for each different list to be scanned. |
d) The Operator determines how the field or function result is compared to the condition value.
|
Equals |
The field or function result must match the condition value exactly. |
|
Not Equals |
The field or function result must be different from the condition value. |
|
Greater Than |
For numeric or date fields, the field or function result must be greater than the condition value. |
|
Greater Than or Equals |
For numeric or date fields, the field or function result must be greater than or equal to the condition value. |
|
Less Than |
For numeric or date fields, the field or function result must be less than the condition value. |
|
Less Than or Equals |
For numeric or date fields, the field or function result must be less than or equal to the condition value. |
|
Contains |
For text fields, the full text of the condition value must be included anywhere in the field. |
|
Does Not Contain |
For text fields, the full text of the condition value must not be included anywhere in the field. |
e) Enter the condition Value. The field or function result is checked against this value according to the selected operator. The type of value to use depends on the type of field being evaluated:
•For text values, the text should be entered exactly as it should be evaluated. Do not enclose text in quotes or other markers unless those markers are to be included in the evaluation.
•For numerical values, the number should be entered without any commas or markups, other than decimals and/or minus signs (-) for negative values.
•For triggers or single checkboxes, the value is Yes if the trigger evaluates as true or if the checkbox is checked. The value is No if the trigger evaluates as false or the checkbox is unchecked. The values are not case sensitive.
•To evaluate any field that uses an option list (Radio Buttons, Multi-Selects, Include/Exclude Boxes, etc.) refer to the codes assigned to each item in the option list.
|
|
Tips: Direct evaluation of date fields is currently not supported. To evaluate a date, please use a calculated field to perform a date comparison that returns a numerical value. The calculated field can then be used in the trigger. |
|
|
One exception is the CurrentDate() function. When this function is used in the Value field, it will retrieve the current system date and perform a direct comparison when evaluating the trigger. Note that triggers using this configuration can only be used for Automatic Field Evaluations in the Automatic Processing section of the master cover. |
f) Select a Conjunction. If And is selected, every condition must be met for the trigger to evaluate as true. If Or is selected, at least one must be met for the trigger to evaluate as true.
Only one type of conjunction can be used in a single trigger, meaning each condition must be set to the same conjunction. However, a separate trigger with a different conjunction can be included in a condition, allowing complex logical structures.
g) Press the Tab key from the Conjunction field or click outside the table to add the condition to the list. The condition is highlighted in yellow to indicate that it has not been accepted yet
h) Repeat the previous steps to add additional conditions.
i) Once all conditions have been added, right-click inside the table and select Accept All Changes. This saves the current table.
5. Click Add to save the trigger but remain on the page, click Add & Close to save the trigger and return to the trigger list, or click Close to return to the trigger list without saving the trigger.
1. In the main menu, select Product Design, then select Triggers. A list of all available triggers is displayed.

|
|
Tip: By default, only Active triggers are displayed. Clear the filter in the Status column to view all triggers. |
2. Click a link in the Name column to view the trigger details. If there are a large number of available triggers, see the Using Grids section for help on finding the appropriate trigger.
3. See the section on Creating a New Trigger for a detailed description of the fields. All fields may be edited, if necessary, except for the Scope and Workflow.
The following panels were added when the trigger was saved.
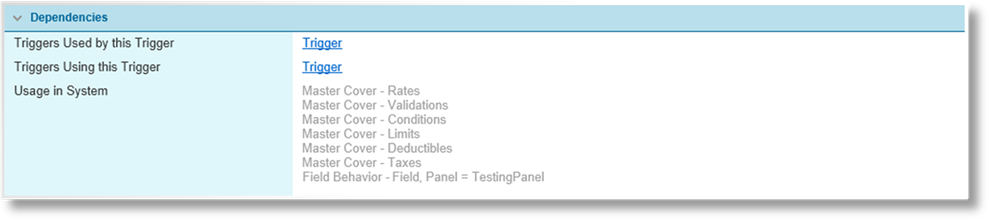
The Dependencies panel identifies how the trigger is linked to other resources in the system.
|
Triggers Used by this Trigger |
Lists all triggers used in the conditions for this trigger. Clicking a link opens a new tab or new window with the Trigger Management page for the selected trigger. |
|
Triggers Using this Trigger |
Lists all triggers that refer to this trigger in their conditions. Clicking a link opens a new tab or new window with the Trigger Management page for the selected trigger. |
|
Usage in System |
Identifies where the trigger is used for master covers or overrides. For master covers, the name of the master cover is provided, followed by the section where the trigger is used. For overrides, the type of override is provided, followed by the field and panel names where the trigger is used. |
|
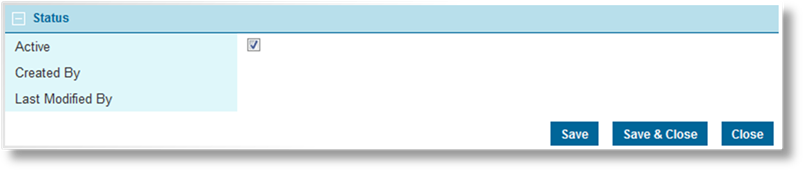
Active |
Marks the trigger as active and available for use. If unchecked, the trigger remains linked to any existing resources, but cannot be used for new resources. |
|
Created By |
Identifies the date and time the trigger was created, and the user who created it. |
|
Last Modified By |
Identifies the last date and time the trigger was changed, and the user who made the changes. |
4. Click Save to save any changes and remain on the page, click Save & Close to save and return to the trigger list, or click Close to return to the trigger list without saving any changes.
Once created, a trigger cannot be deleted. It can be deactivated, which removes it from any existing resources, and prevents it from being used for new resources. The Dependencies panel can be used to identify where the trigger is used, and the impact of deactivating the trigger.
1. In the main menu, select Product Design, then select Triggers. A list of all available triggers is displayed.

|
|
Tip: By default, only Active triggers are displayed. Clear the filter in the Status column to view all triggers. |
2. Locate the trigger or triggers to be deactivated. If there are a large number of available triggers, see the Using Grids section for help on finding the appropriate triggers.
3. Check the boxes for all triggers to be deactivated.
4. Click Deactivate, then confirm the deactivation when prompted to do so. All selected triggers are deactivated. If the trigger list is still defaulted to only show active triggers, they disappear from the list.
|
|
Tip: Individual triggers can also be deactivated or reactivated directly through the trigger record. See the section on Viewing and Modifying a Trigger for details. |
