When a Bridge Licensee Environment is created, a Head Office is setup. Additional offices can be created as subsidiaries of the Head Office, serving as insurers or distributors, or external associate companies can be added.
Distributors are companies that provide the insurance product to the public, generally arranging business on a commission basis.
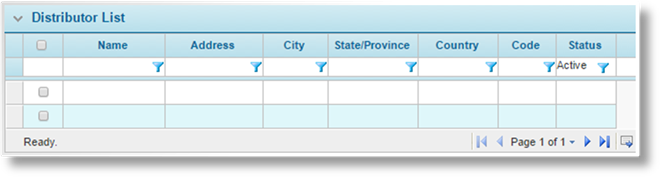
1. In the main menu, select Reference, then select Companies & Users, then Distributors. A list of all available distributor companies is displayed.
Optional columns are available.
If there are a large number of available distributor companies, see the Using Grids section for help on finding the appropriate companies.
|
|
Tip: By default, only Active companies are displayed. Clear the filter in the Status column to view all companies. |
2. Click Add to create a new distributor company, or click a link in the Name column to view an existing company.
To deactivate distributor companies, check the boxes for all companies to be deactivated, click Deactivate, then confirm the deactivation when prompted to do so. Individual companies can also be deactivated through the Distributor Information page.
3. If adding or viewing a distributor company, the Distributor Information page opens. Complete the necessary information. Fields marked with a red asterisk * are required.

Enter the company details.
|
Name |
Enter the company name. |
|
Code |
Enter a unique identifier code for the company. This can be used to identify the company for integration purposes, and is available for generated documents, e-mails, and calculated fields. |
|
Owner's Name |
Identifies the owner of the distributor within the system, defaulted to the company that created the distributor record. This field is only visible once the distributor has been saved. |
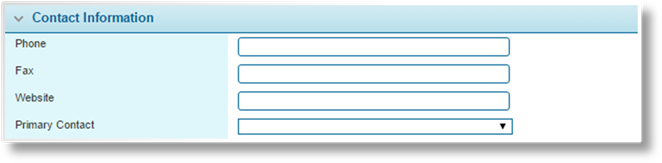
Enter the contact information for the company.
|
Phone |
Enter the phone number. |
|
Fax |
Enter the Fax number. |
|
Website |
Enter the URL of the company's website. |
|
Primary Contact |
This field is only visible once the distributor has been saved. Any of the current users under the distributor company can be selected as the Primary Contact. When an e-mail is sent to this distributor, it goes to the primary contact. If no primary contact is selected, the e-mails go to the first user created under the company. |
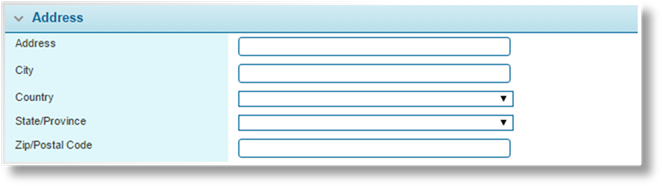
Enter the full address of the new company.

|
Default Commission |
Enter the default commission to be earned by this company. This is the default value when creating a Master Cover Association, but can be changed for each association. |
|
Distributor Code |
Enter an additional identifier code for the company. This can be used to identify the company for integration purposes, and is available for generated documents, e-mails, and calculated fields. |

The Master Cover Associations panel becomes available once the distributor company has been saved, and displays all master covers associated to the current distributor company.
Click Add to associate the distributor company to a new master cover, or click a link in the Master Cover column to view an existing association. See the section on Managing Distributor Master Cover Associations.
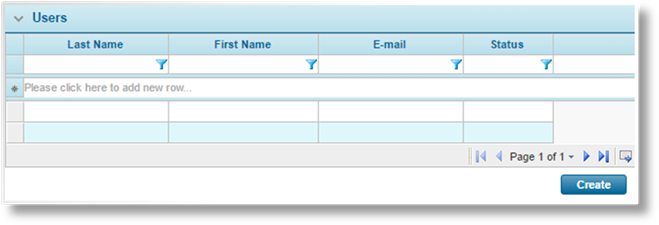
The Users panel becomes available once the distributor company has been saved, and displays all available users registered for this company. Click Create to create a new user account for this company. This opens the User Information page to complete the user configuration. See Managing User Accounts for details.
|
|
Note: The Please click here to add new row option is not functional. The Create button must be used to add new user accounts, or the user can be created through the user management section and associated to the current company. |

The Status panel becomes available once the workflow container has been saved.
|
Active |
Marks the distributor company as active and available for use. If unchecked, the company remains functional and linked to any existing resources, but cannot be selected for new configurations. |
|
Created By |
Identifies the date and time the distributor company was created, and the user who created it. |
|
Last Modified By |
Identifies the last date and time the distributor company was changed, and the user who made the changes. |
4. Click Add or Save to save the distributor company but remain on the page, click Add & Close or Save & Close to save the company and return to the Distributors list, or click Close to return to the Distributors list without saving the company.
5. Once the company has been saved, the Designate as Bill To Party button becomes available. This button automatically creates and saves a billing profile for the company, and opens the Bill To Party Management page to proceed with the configuration.
The Master Cover Associations panel in the Distributor Information page lists all master covers associated to the current distributor company, as well as the details of each association.
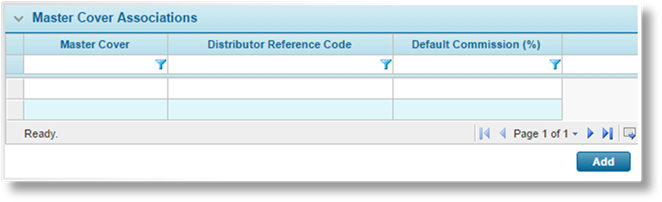
1. Click Add to associate the distributor company to a new master cover, or click a link in the Master Cover column to view an existing association. The Master Cover Association window opens.
2. Complete the necessary information. Fields marked with a red asterisk * are required.

|
Master Cover |
Select a master cover to be associated to the distributor company. |
|
Distributor Reference Code |
Enter an additional identifier code for the company. This can be used to identify the company for integration purposes, and is available for generated documents, e-mails, and calculated fields. |

When billing is active, each bill is addressed to the client at the defined billing address. This is known as client billing or direct billing. The Billing Information panel is used to conditionally override this default setting, addressing the bills to the distributor billing address instead.
|
Agency Bill |
When checked, bills for all clients under this distributor are addressed to the distributor's listed billing address. |
|
Trigger |
A trigger can be selected to control this setting. If the trigger evaluates as true, or if no trigger is selected, the bill is addressed to the distributor as configured. If the trigger evaluates as false, the bill reverts to client billing. The trigger option is only active when Agency Bill is checked. |
|
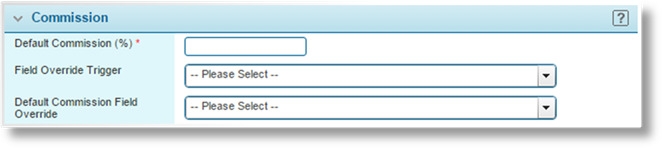
Default Commission |
Enter the default commission, in percentage, for this distributor company under the associated master cover. This default can be overridden for individual premium types. |
|
Field Override Trigger |
This field is available once the association has been saved. Select a trigger to determine if the system should use the Default Commission or the Default Commission Field Override. If the trigger evaluates as false, the Default Commission is used. If the trigger evaluates as true, the Default Commission Field Override is used. |
|
|
If no trigger is selected, the Default Commission Field Override (if selected) is always used. |
|
Default Commission Field Override |
This field is available once the association has been saved. Select a numerical field from the workflow associated to the selected master cover. This field provides the commission percentage in the event of an override. The field can be a calculated field, or can take direct input from the user. |
|
|
If the selected field is left blank in the submission form, either by the calculation or by the user, it is considered to be a zero value. |
|
|
If no override field is selected in this panel, the Default Commission is used. |

The Premium Type - Commission (%) Overrides panel becomes available once the association has been saved, and displays all commission overrides defined per premium type. These override configurations take priority over the Field Override settings in the Commission panel.
Click Add to associate the distributor company to a new master cover, or click a link in the Master Cover column to view an existing association. Check one or more overrides and click Delete to remove those overrides. See the section on Managing Distributor Commission Overrides.
The Commission percentages can be edited directly in this grid. Double-click a cell in the Commission column, and enter the new percentage value. Click outside of the grid to save the changes.
3. Click Save to save the association and continue configuration, click Save & New to save the association and open a new blank record to create a new association, click Save & Close to save the association and close the window, or click Close to close the window without saving.
When viewing a saved association, the Previous and Next buttons can be used to navigate through the association configurations, and the Delete button can be used to delete the current association.
The Premium Type - Commission (%) Overrides panel in the Master Cover Association window lists all commission overrides defined per premium type.
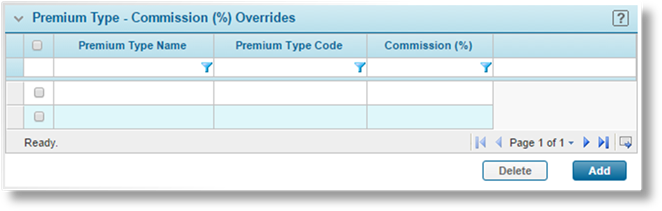
1. Click Add to create a new commission override, or click a link in the Premium Type Name column to view an existing override.
To delete one or more override configurations, check the overrides and click Delete.
The Commission percentages can be edited directly in this grid. Double-click a cell in the Commission column, and enter the new percentage value. Click outside of the grid to save the changes.
2. If adding or viewing a distributor company, the Premium Type - Commission (%) Overrides window opens. Complete the necessary information. Fields marked with a red asterisk * are required.

|
Premium Type |
Select an available premium type. Once a specific premium type override has been added, the Premium Type field cannot be modified. The entire override entry must be deleted to remove the override. |
|
Default Commission |
Enter the percentage commission to be used for the selected premium type. |
3. Click Save & New to save the commission override and open a new blank record to create a new override, click Save & Close to save the override and close the window, or click Close to close the window without saving.
When viewing a saved commission override, the Previous Row and Next Row buttons can be used to navigate through the override configurations, and the Delete button can be used to delete the current override.

