Clients are the companies or individuals who are listed on the policy as the insured party in case of a claim.
Clients can be created ahead of time through the Clients menu, as explained here, or they can be created by the end users during the process of creating a submission.
Once created, the company record displays lists of associated products and any users under the company (for client companies).
A client company is a single insured entity that may have multiple users with access to create and manage submissions and policies.
1. In the main menu, select Clients, then select New Company. The Client Company Information page opens. Alternatively, the Create Company button is available when viewing the Client List.
2. Complete the necessary information. Fields marked with a red asterisk * are required.
|
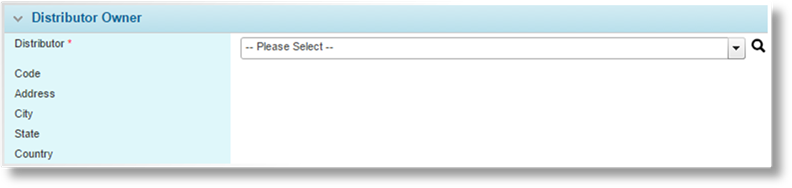
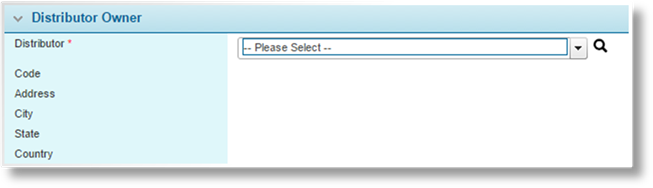
Distributor |
Search for and select the distributor company to be the owner of the client. This client will only be available for submissions assigned to this distributor. |
|
|
Text can be entered into the field to filter the
results. Click the Search icon |
|
|
When a distributor is selected, the Code, Address, City, State, and Country fields display the distributor details. |

Enter the company details.
|
Name |
Enter the company name. |
|
Code |
Enter a unique identifier code for the company. If no code is provided, the system will generate a code on saving. |

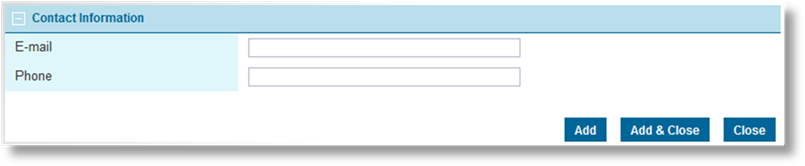
Enter the contact information for the company.
|
Phone |
Enter the phone number. |
|
Fax |
Enter the Fax number. |
|
Website |
Enter the URL of the company's website. |
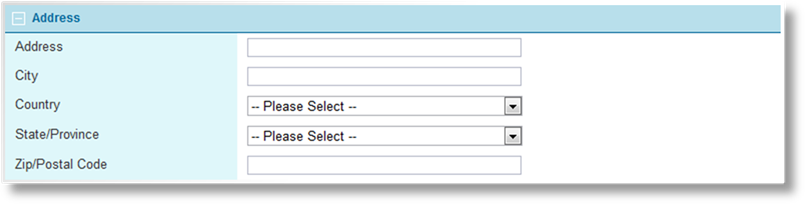
Enter the full address of the new company.

The first User can be identified for the company. On saving the new client company, this information is used to automatically create the first user account under this company.
|
First Name |
Enter the user's first name. |
|
Last Name |
Enter the user's last name. |
|
Employee Number |
Enter an employee number to identify the user. |
|
|
If the user requires access to the system, an e-mail address must be provided. |
|
Phone |
Enter the phone number for the user. |
3. Click Add to save the company information and remain on the page, click Add & Close to save and return to the client list, or click Close to return to the client list without saving the company.
4. Once the company has been saved, the Designate as Bill To Party button becomes available. This button automatically creates and saves a billing profile for the client, and opens the Bill To Party Management page to proceed with the configuration.
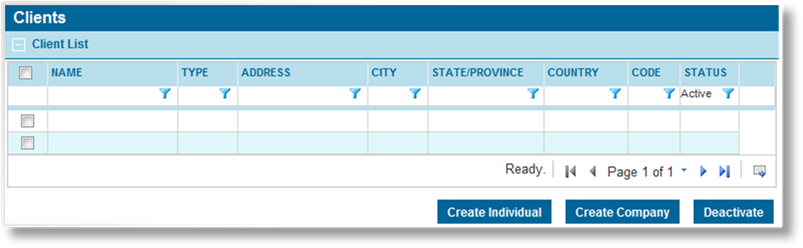
1. In the main menu, select Clients, then select Search / List. A list of all available client companies and individuals is displayed.
|
|
Tip: By default, only Active clients are displayed. Clear the filter in the Status column to view all clients. |
2. The Type column identifies if the client is a company or individual. Click a link in the Name column to view the information for a client company. If there are a large number of available clients, see the Using Grids section for help on finding the appropriate client company.
3. See the section on Creating a New Client Company for a detailed description of the fields. All fields may be edited, if necessary.
The Distributor company can be changed. This transfers ownership of this client and associated policies and submissions to a different distributor company.
|
|
Notes: Changing a Distributor Owner |
|
All transactions and policies related to a client remain with that client during a change of ownership. Distributor access to those transactions and policies changes as follows. | |
|
|
The former owner: |
|
|
•retains access to all transactions and policies created while they owned the client. |
|
|
•can edit any transaction or policy they have access to, and perform policy actions. |
|
|
•does not have access to any new transactions or policies created after the transfer, even if they create the transaction themselves. |
|
|
•can view the client details within a transaction or policy, but cannot edit the information. The client record can no longer be accessed through the Client menu. |
|
|
The new owner: |
|
|
•gains access to all transactions and policies related to the client, with full control to edit and perform policy actions. |
|
|
•can edit the client information, through the Clients menu or through a transaction or policy. |
The following panels have been added to the page.
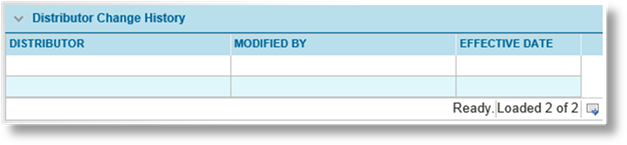
The Distributor Change History grid displays the ownership history of the client. All changes to the distributor owner are listed here, including the date and the name of the user who made the change.
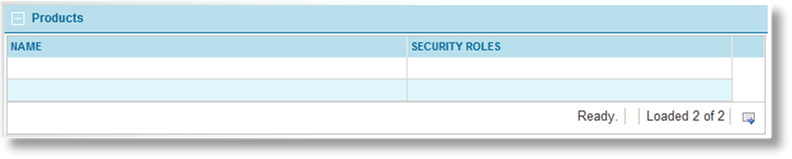
The Products list displays all available master covers that the client company is attached to.
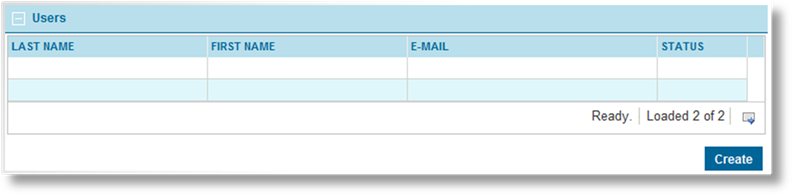
The Users list displays all available users registered for this company. Click Create to create a new user account for this company.
|
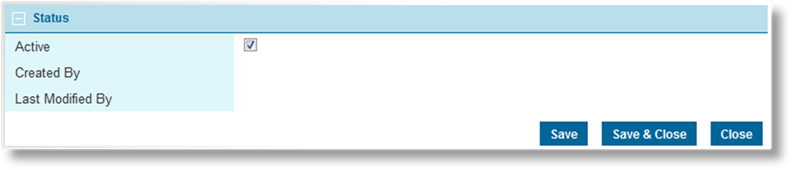
Active |
Marks the company as active and available for use. If unchecked, the company remains linked to any existing records, but cannot be used for new accounts or transactions. |
|
Created By |
Identifies the date and time the company was created, and the user who created it. |
|
Last Modified By |
Identifies the last date and time the company was changed, and the user who made the changes. |
4. Click Save to save any changes and remain on the page, click Save & Close to save and return to the client list, or click Close to return to the client list without saving any changes.
5. Click Designate as Bill To Party to automatically create and save a billing profile for the client, and open the Bill To Party Management page to proceed with the configuration.
An individual client is a single insured person who may have access to create and manage submissions and policies.
1. In the main menu, select Clients, then select New Individual. The Individual Client Information page opens. Alternatively, the Create Individual button is available when viewing the Client List.
2. Complete the necessary information. Fields marked with a red asterisk * are required.
|
Distributor |
Search for and select the distributor company to be the owner of the client. This client will only be available for submissions assigned to this distributor. |
|
|
Text can be entered into the field to filter the
results. Click the Search icon |
|
|
When a distributor is selected, the Code, Address, City, State, and Country fields display the distributor details. |

|
First Name |
Enter the client's first name. |
|
Last Name |
Enter the client's last name. |
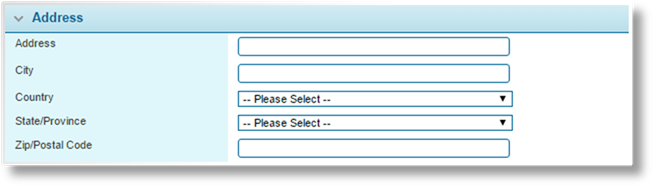
Enter the full address of the new client.

|
|
If the client requires access to the system, or if they should receive notification e-mails, then an e-mail address must be provided. |
|
Phone |
Enter the phone number for the client. |
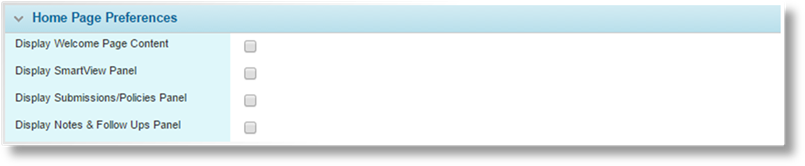
The Home Page Preferences panel provides settings that control what the client will see when they view the Home page in the current portal. The client can modify these settings on their Profile page.
|
Display Welcome Page Content |
Selects whether or not the greetings and instructions are displayed on the home page for the client. | |
|
|
Note: The Welcome Page content may have been customized to provide important information or instructions. Please review the content before deactivating it. | |
|
Display SmartView Panel |
Selects whether or not SmartView is displayed on the home page for the client. SmartView is a data tracking and management system, providing customizable and interactive data views arranged in "Dashboard" screens. Data from throughout the system can be collected and displayed in a range of tables, graphs, and charts, with interactive connections that allow one data view to adjust, filter, or even replace another data view. | |
|
|
A default policy dashboard is provided for this option. | |
|
Display Submissions/Policies Panel |
Selects whether or not the client will see the grid containing all available submissions and policies on the home page. | |
|
Display Notes & Follow Ups Panel |
Selects whether or not to the client will see the grid containing any notes or follow ups requiring action on the home page. | |
|
|
Note: The SmartView, submission, and notes options are only available to clients with the necessary rights to view each feature. | |
3. Click Add to save the client information and remain on the page to continue configuration, click Add & Close to save and return to the client list, or click Close to return to the client list without saving the client.
The Client Risk Manager security role is automatically assigned to individual clients. The default configuration of this role allows the user to create submissions and manage their own client details.
Once the client record has been saved, additional panels become available.
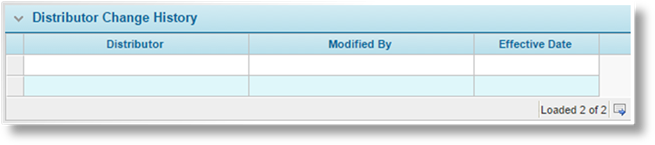
The Distributor Change History grid displays the ownership history of the client. All changes to the distributor owner are listed here, including the date and the name of the user who made the change.

Single Sign-On (SSO) is when a user logs into an external system and then accesses Bridge from that system. The login credentials are passed to Bridge and matched up to an existing account.
|
Single Sign-On Only |
Checking this option means the current user can only access Bridge from the external system. Single-sign-on users differ from normal users as follows. |
|
|
•Login is handled through an internal configuration, so the user's password is deleted and the user will not be sent any emails related to the password. |
|
|
•The user will not have access to the Profile page. |
|
|
If this option is unchecked, the user can log in through SSO or the standard login page. |
|
User ID |
This option is used when the external system uses a User ID other than the e-mail address. Enter the user's ID from the external system, which will be matched to this Bridge user account through the single-sign-in process. When an external ID has been defined, the user will not be able to login through the standard login page. |

When Bridge is integrated with external systems such as Insurity, individual accounts are often required for each system. The primary accounts are where the passwords are maintained, while secondary accounts may be required in the integrated systems to manage local settings.
In the Authentication field, select which system has the primary account. At login, the user will be authenticated in the selected system.
•If Bridge is selected, the primary account is managed within Bridge. If Insurity services are enabled, they will be available without a secondary account.
•If Insurity is selected, the primary account is managed within Insurity. A secondary account must exist within the Bridge system, and must have the same e-mail address as the primary account on the Insurity side. Any new or existing password related to the secondary account will not be valid. The other profile information within the Bridge account should be maintained, as it is used to define security rights, contact information, and other user-specific settings.
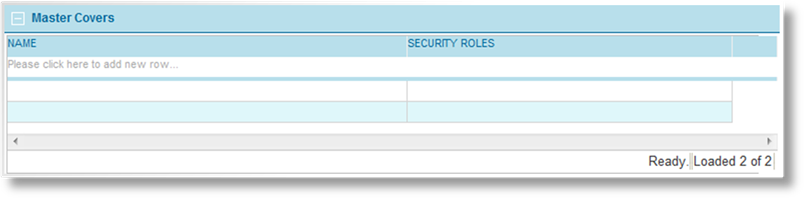
The Master Covers list displays all available master covers that the client is attached to.

|
Active |
Marks the client as active and available for use. If unchecked, the client remains linked to any existing records, but cannot be used for new accounts or transactions. |
|
Created By |
Identifies the date and time the client was created, and the user who created it. |
|
Last Modified By |
Identifies the last date and time the client was changed, and the user who made the changes. |
4. The Assign Password button can be used to send the client a user password to access the system.
5. Once the company has been saved, the Designate as Bill To Party button becomes available. This button automatically creates and saves a billing profile for the client, and opens the Bill To Party Management page to proceed with the configuration.
1. In the main menu, select Clients, then select Search / List. A list of all available client companies and individuals is displayed.

|
|
Tip: By default, only Active clients are displayed. Clear the filter in the Status column to view all clients. |
2. The Type column identifies if the client is a company or individual. Click a link in the Name column to view the information for an individual client. If there are a large number of available clients, see the Using Grids section for help on finding the appropriate individual client.
3. See the section on Creating a New Individual Client for a detailed description of the fields.
The Distributor company can be changed. This transfers ownership of this client and associated policies and submissions to a different distributor company.
|
|
Notes: Changing a Distributor Owner |
|
All transactions and policies related to a client remain with that client during a change of ownership. Distributor access to those transactions and policies changes as follows. | |
|
|
The former owner: |
|
|
•Retains access to all transactions and policies created while they owned the client. |
|
|
•Can edit any transaction or policy they have access to, and perform policy actions. |
|
|
•Does not have access to any new transactions or policies created after the transfer, even if they create the transaction themselves. |
|
|
•Can view the client record, both through the Clients menu and within a transaction or policy, but cannot edit the client information. |
|
|
The new owner: |
|
|
•Gains access to all transactions and policies related to the client, with full control to edit and perform policy actions. |
|
|
•Can edit the client information, through the Clients menu or through a transaction or policy. |
4. Click Save to save any changes and remain on the page, click Save & Close to save and return to the client list, or click Close to return to the client list without saving any changes.
5. The Assign Password button can be used to send the client a user password to access the system.
6. Click Designate as Bill To Party to automatically create and save a billing profile for the client, and open the Bill To Party Management page to proceed with the configuration.
A client that has been created through the Clients section cannot be deleted. It can be deactivated, which leaves it linked to any existing records already attached to it, but prevents it from being used for new accounts or transactions.
|
|
Note: Clients created as part of the submission process on a Live master cover also cannot be deleted. However, clients created for submissions under a master cover in Test status are deleted when the master cover is set to Live. |
1. In the main menu, select Clients, then select Search / List. A list of all available client companies and individuals is displayed.

|
|
Tip: By default, only Active clients are displayed. Clear the filter in the Status column to view all clients. |
2. Locate the client or clients to be deactivated. If there are a large number of available clients, see the Using Grids section for help on finding the appropriate clients.
3. Check the boxes for all clients to be deactivated.
4. Click Deactivate, then confirm the deactivation when prompted to do so. All selected clients are deactivated. If the client list is still defaulted to only show active clients, they disappear from the list.
|
|
Tip: Clients can also be deactivated or reactivated one at a time directly through the client record. See the sections on Viewing and Modifying a Client Company and Viewing and Modifying an Individual client for details. |
 to view the available
distributors.
to view the available
distributors.
