
The Layout tool is used to design the dashboard layout, arranging and sizing tiles to contain the data sources.
The Edit group contains the following standard options.
|
|
Open |
Opens the Select Layout panel to choose an existing layout for editing. |
|
|
Save |
Saves the current layout. |
|
|
New |
Opens the New Layout panel to create a new layout. |
|
|
Options |
Opens the Configuration panel to change the settings for the current layout. |
|
|
Export |
Opens a standard Save window to export the current layout to an XML file. Select a location, enter a filename, and click Save. |
|
|
Import |
Opens the Import Layout panel to import a layout file created with the Export option. |
The Cells group contains the following options.
|
|
Split 2 (vertical) |
With a single tile selected, this option will split the tile vertically into two equal tiles. |
|
|
Split 2 (horizontal) |
With a single tile selected, this option will split the tile horizontally into two equal tiles. |
|
|
Split 3 (vertical) |
With a single tile selected, this option will split the tile vertically into three equal tiles. |
|
|
Split 3 (horizontal) |
With a single tile selected, this option will split the tile horizontally into three equal tiles. |
|
|
Split 5 (vertical) |
With a single tile selected, this option will split the tile vertically into five equal tiles. |
|
|
Split 5 (horizontal) |
With a single tile selected, this option will split the tile horizontally into five equal tiles. |
|
|
Merge (vertical) |
With multiple tiles selected in a row (hold the Ctrl key and click on each tile), this option will merge the tiles into one tile. The tiles must be exactly the same height and alignment. Any space between the selected tiles will be included in the merged tile. |
|
|
Merge (horizontal) |
With multiple tiles selected in a column (hold the Ctrl key and click on each tile), this option will merge the tiles into one tile. The tiles must be exactly the same width and alignment. Any space between the selected tiles will be included in the merged tile. |
|
|
Delete |
With a single tile selected, this option will delete the tile. |
When the Layout window opens, the layout for the currently selected dashboard will open by default. Use the options in the Edit group to Open or Import an existing layout, or use New to create a new layout.
Proceed to the Layout Editor section when the proper layout is displayed.
The Layout panel opens to the right of the screen when selecting Open from the Edit group. Click X to close the panel again.
This panel is used to open an existing layout configuration saved in the system.
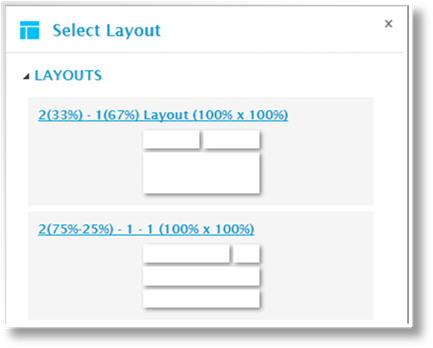
Click the name to open the layout in the Layout Editor.
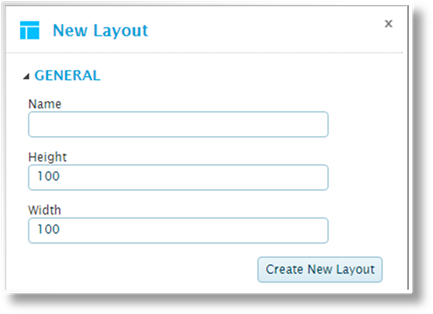
The New Layout panel opens to the right of the screen when selecting New from the Edit group. Click X to close the panel again.
This panel is used to create a new layout configuration.
|
Name |
Enter the name of the new layout. |
|
Height and Width |
Enter the height and width of the dashboard as a percentage of the available screen space. |
|
|
100% is the default. Numbers less than 100% will leave part of the dashboard area blank, while numbers greater than 100% will extend the dashboard with scrollbars. |
|
|
The size of the dashboard and all tiles are set as percentages of the screen space, so resizing the browser window will resize the dashboard and tiles, maintaining the percentage ratio. |
Click Create New Layout to display the layout in the Layout Editor. Note that the layout is not yet saved at this point.
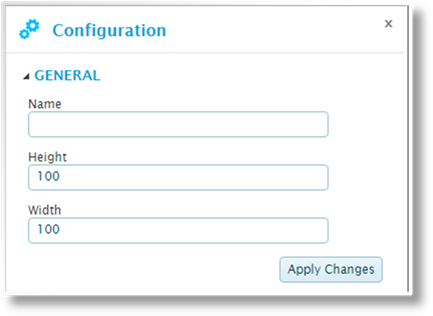
The Configuration panel opens to the right of the screen when selecting Options from the Edit group. Click X to close the panel again.
This panel is used to edit the configuration options for the current layout.
|
Name |
Enter the name of the layout. |
|
Height and Width |
Enter the height and width of the dashboard as a percentage of the available screen space. |
|
|
100% is the default. Numbers less than 100% will leave part of the dashboard area blank, while numbers greater than 100% will extend the dashboard with scrollbars. |
|
|
The size of the dashboard is set as percentages of the screen space, and the sizes of the tiles are set as percentages of the dashboard. Resizing the browser window will resize the dashboard and tiles, maintaining the percentage ratio. |
Click Apply Changes to update the layout in the Layout Editor. Note that the changes are not saved until the layout itself is saved.
The Import Layout panel opens to the right of the screen when selecting Import from the Edit group. Click X to close the panel again.
This panel is used to import a layout that has been exported to a file.
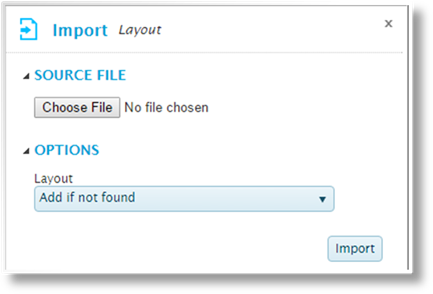
The Source File group is used to select the import file. Click the button to open a standard file browser window. Locate and select the appropriate export file. The file name appears next to the button.
The Options group controls how components will be imported. The following options are available:
|
− None |
This component will not be imported. |
|
− Add a new entity |
The import will be added as a new component, even if a component already exists with the same name. |
|
− Add if not found |
If a component exists with the same name, the import will not be performed. Otherwise, the import will be added as a new component. |
|
− Update existing. Add if not found |
If a component exists with the same name, it will be updated. Otherwise, the import will be added as a new component. |
|
− Update existing matching on Name |
If a component exists with the same name, it will be updated. Otherwise, the import will not be performed. |
The following component can be set for import.
|
Layout |
Select how the layout should be imported. |
Click Import to import the file.
|
|
Notes: If one of the Update Existing options are selected and more than one matching layout is found, the first matching layout will be updated. |
|
If one of the Update Existing options are selected, the saved layout is updated. If that layout is currently open in the Layout Editor, it will not show any changes immediately. Re-open the saved layout to see the imported changes. If the layout is saved before the imported changes are re-loaded, it will overwrite the imported changes. |
The editor section provides a preview of the layout, and allows direct editing of the tile spacing.
Each tile includes information in the top-left corner.
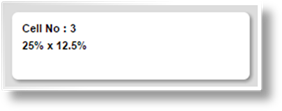
|
Cell No |
Each tile in the layout has a unique cell number. All dataviews are associated to the cell number, so moving the cell numbers around is a quick way to move the tile content around. |
|
|
To change a cell number, double-click the number. It changes to a drop-down listing the available numbers in the layout. Select a number to swap numbers with that tile. |
|
Size |
Displays the percentage of the layout occupied by the tile. Splitting, combining, and manually resizing the tile will show the current percentages. |
To use the controls in the Cells group, select one or more tiles (to select multiple tiles, hold the Ctrl key and click on each tile). The selected tiles are highlighted in blue. Note that certain controls have restrictions on how many tiles can be selected, or how the selected tiles must be aligned. See the option descriptions for details.
To manually resize tiles, click and drag the edges of the tiles. Note that resizing one tile can push the edges of surrounding tiles, but will not pull them back.
When all changes have been made, click Save to save the layout.


