
A Product is used to set options for all master covers assigned to that product. It is also used to group master covers for reporting purposes.
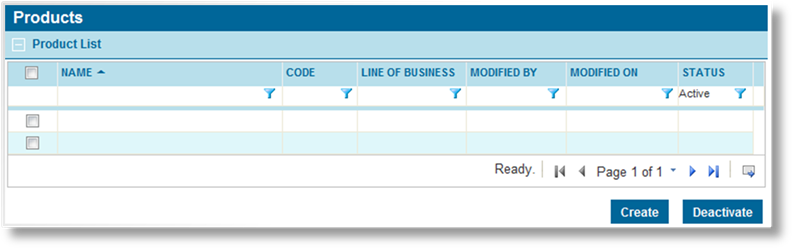
1. In the main menu, select Product Design, then select Products. A list of all available products is displayed.
|
|
Tip: By default, only Active products are displayed. Clear the filter in the Status column to view all products. |
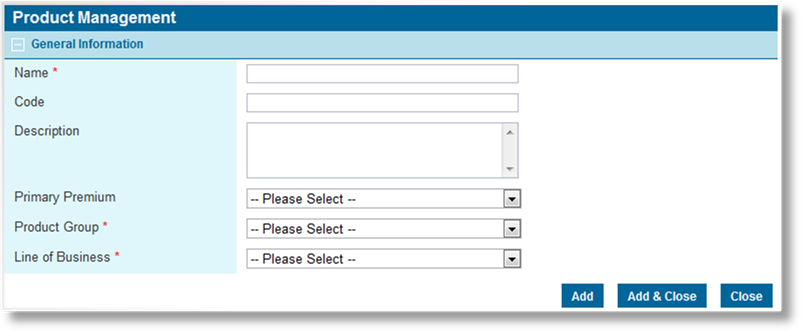
2. Click Create. The Product Management page opens.
3. Complete the necessary information. Fields marked with a red asterisk * are required.
|
Name |
Enter the name of the product. This is the internal name, used to select this product when creating or editing a master cover. |
|
Code |
This is an internal reference name generated by the system when the product is saved. |
|
Description |
Enter a description of the product. |
|
Primary Premium |
Select a Premium Type to be used as the primary premium for use in reports. For information on creating premium types, click here. |
|
Product Group |
Select a Product Group. The available options are defined by an internal list, and can be used for reporting purposes. |
|
Line of Business |
Select a Line of Business from the list of industry presets. |
4. Click Add to save the product but remain on the page, click Add & Close to save the product and return to the product list, or click Close to return to the product list without saving the product.
1. In the main menu, select Product Design, then select Products. A list of all available products is displayed.
|
|
Tip: By default, only Active products are displayed. Clear the filter in the Status column to view all products. |
2. Click a link in the Name column to view the product details. If there are a large number of available products, see the Using Grids section for help on finding the appropriate product.
3. See the section on Creating a New Product for a detailed description of the fields. All fields may be edited, if necessary.
|
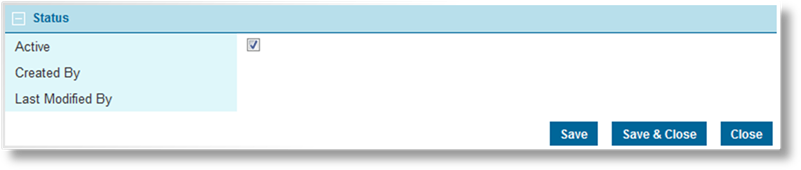
Active |
Marks the product as active and available for use. If unchecked, the product remains linked to any existing master covers, but cannot be used for new master covers. |
|
Created By |
Identifies the date and time the product was created, and the user who created it. |
|
Last Modified By |
Identifies the last date and time the product was changed, and the user who made the changes. |
4. Click Save to save any changes and remain on the page, click Save & Close to save and return to the product list, or click Close to return to the product list without saving any changes.
Once created, a product cannot be deleted. It can be deactivated, which leaves it linked to any existing master covers, but prevents it from being used for new master covers.
1. In the main menu, select Product Design, then select Products. A list of all available products is displayed.

|
|
Tip: By default, only Active products are displayed. Clear the filter in the Status column to view all products. |
2. Locate the product or products to be deactivated. If there are a large number of available products, see the Using Grids section for help on finding the appropriate products.
3. Check the boxes for all products to be deactivated.
4. Click Deactivate, then confirm the deactivation when prompted to do so. All selected products are deactivated. If the product list is still defaulted to only show active products, they disappear from the list.
|
|
Tip: Individual products can also be deactivated or reactivated directly through the product record. See the section on Viewing and Modifying a Product for details. |
