All content (text and images) within a document template can
be set as optional, and will be included or excluded based on data from the
workflow, policy, or system. This is achieved using triggers configured
within the Bridge system and inserted into the template.
•
Document Triggers are evaluated once during
document generation, and control a block on content.
•
Repeater Triggers are used in repeater
structures. They are evaluated for each row in the grid, and if the
trigger evaluates as false the entire row is skipped.
Using Triggers Within Normal Content
Document
Triggers contain the optional content. During
document generation, the trigger is evaluated to be true or false and the
appropriate content is inserted in place of the trigger.
1.
In the document window, place the cursor at the point where the optional text
should appear. If the optional content already exists in the document,
place the cursor at the beginning or end of the content (it will be moved within
the trigger in a later step).
2.
See the section on Inserting Placeholders
Into Document Templates for instructions on finding and inserting
placeholders. When the trigger is inserted, it will appear as follows:
<<OW_TRIGGER_START>>Please Insert Your
Content Here<<OW_TRIGGER_END>>
3.
In order to configure the trigger, the field codes must be displayed.
Press Alt+F9 to enter "Edit Mode", displaying the structure of the
trigger field. The field will appear as follows:
{
MERGEFIELD OW_TRIGGER_START }{ IF { MERGEFIELD
"Trigger Name" } = "Invalid" "" "Please Insert Your Content Here"
}{ MERGEFIELD
OW_TRIGGER_END }
This is essentially
an If/Then logic structure. IF "Trigger Name" is
False, display the "False Content" (the empty quotes), otherwise
display the "True Content" (the "Please Insert Your Content Here"
quotes). The false content is blank by default, meaning nothing will be
displayed if the trigger evaluates as false.
4.
The appropriate content should be entered in the true content area, in place of
the Please Insert Your Content Here text (be careful not to remove the
quotes). Any alternate content can be added to the false content
area. If the text was already in the document when the trigger was
inserted, the text should be moved into the appropriate area.
|

|
Note: The only parts of the field code
that can be altered are the False Content and the True
Content. All other text, including quotes, brackets, and the
"Invalid" condition, must not be changed. |
|
Any such changes could break the field code, preventing
the proper generation of the document. |
|
In addition, the content cannot include quotes or some
of the content will be lost. |
|

|
Tip: Any characters that are not
within the trigger will be left in the document whether the trigger
evaluates as true or false, including hidden characters such as line
breaks (¶). This could cause blank lines within the document.
To ensure proper formatting in the final generated document, line breaks
may need to be included within the trigger. |
|

|
Example:
In this example, two paragraphs are linked to triggers. A return is
entered at the end of the first paragraph within the quotes,
causing the trigger to end on the next line. The next trigger begins
immediately after the first ends, with no space or return. This may
seem counter-intuitive, but if the first trigger evaluates as false there
will be no blank line before the second paragraph. In fact, two
returns can be entered at the end of the first paragraph text, so that the
text will skip a line before the next paragraph. |
|
|
{ MERGEFIELD
OW_TRIGGER_START }{ IF { MERGEFIELD "Trigger Name"
} = "Invalid" "" "First
Paragraph
" }{
MERGEFIELD_TRIGGER_END }{ MERGEFIELD OW_TRIGGER_START
}{ IF { MERGEFIELD "Other Trigger "
} = "Invalid" "" "Second
Paragraph
" }{
MERGEFIELD_TRIGGER_END } |
|
|
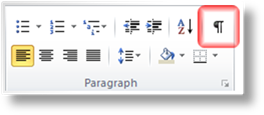
To make it
easier to track special characters, you can use the Show/Hide
option in Microsoft Word. In the Paragraph section of the
Word Ribbon, click the Show/Hide icon.
All special
characters will be displayed, allowing you to verify the position of the
line breaks (¶). The above example is shown below, with the
formatting characters displayed.

|
5.
All content within the quotes for the true content and false content areas can
be formatted. All standard Word formatting options are supported, and will
be applied to the text in the generated document.
6.
Right-click anywhere within the trigger field and select Update
Field.
|

|
Warning: If you do not “Update
Field”, all changes to the trigger configuration will be lost as the
field will revert to default values when you save your
document. |
7.
Press Alt+F9 to exit "Edit Mode". The field codes are hidden and
the new content is displayed within the start and end placeholders.
<<OW_TRIGGER_START>>New
Content<<OW_TRIGGER_END>>