
Receipts entered through the Batch Receipts feature cannot be edited once they have been posted. If an error is discovered after posting, the Receipt Corrections feature can be used to make any necessary changes.
Posted receipts can be Reversed, cancelling them out and removing allocations, or Reallocated, maintaining the receipt details but changing the invoice allocation.
1. In the main menu, select Billing, Transactions, then Receipt Corrections. The Receipt Corrections page opens.
2. Fill in the necessary search filters to locate the required receipts.
|
Reporting Period |
Select a
beginning and/or end date to return results within the selected
range. The dates can be entered manually, or selected from the
calendar lookup |
|
Bill to Party |
Select a Bill To Party to filter the results. |
3. Click Search to display the results in the Receipts panel.

Some columns have been hidden.
The Receipts list displays all posted receipts matching the search criteria.
The list of receipts can be sorted, filtered, and exported, among other options. For more information on working with grids, see the Using Grids section.
Click a link in the Receipt Number column to view the Receipt detail window.
4. Check one or more boxes for receipts to be reversed. The same reversal details will be applied to all selected receipts.
5. Click Reverse. The Receipt Reversal window opens.
6. Complete the necessary information. Fields marked with a red asterisk * are required.
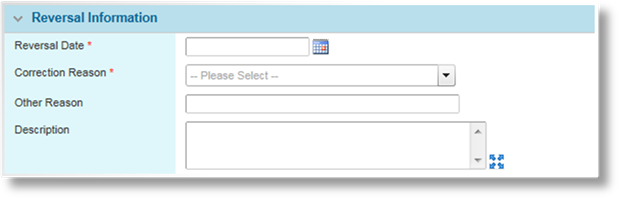
|
Reversal Date |
Enter the date
of the reversal, or select the date from the calendar lookup |
|
Correction Reason |
Select the reason for the reversal. |
|
Other Reason |
This field can be used to add comments related to the Correction Reason. |
|
Description |
A description can be entered for the reversal. |
7. Click Post and then confirm the posting when prompted, or click Close to close the window without completing the reversal.
Once posted, a receipt batch is created containing one reversal receipt for each selected receipt. If the selected receipts are from more than one bank account, a new batch is created for each bank account.
Once a receipt has been reversed, no further action can be taken on the selected receipt or the new reversal receipt.
Click link in the Correction Details column to view the Reversal Information.
|
|
Note: A receipt may have associated payments for Distributor Payables, Insurer Payables, or Tax Payables. If those payments have been marked as Paid, the system will automatically create a matching reversal payment in Ready for Payment status and a matching replacement payment in the appropriate default status. |
1. In the main menu, select Billing, Transactions, then Receipt Corrections. The Receipt Corrections page opens.
2. Fill in the necessary search filters to locate the required receipts.
|
Reporting Period |
Select a
beginning and/or end date to return results within the selected
range. The dates can be entered manually, or selected from the
calendar lookup |
|
Bill to Party |
Select a Bill To Party to filter the results. |
3. Click Search to display the results in the Receipts panel.
Some columns have been hidden.
The Receipts list displays all posted receipts matching the search criteria.
The list of receipts can be sorted, filtered, and exported, among other options. For more information on working with grids, see the Using Grids section.
Click a link in the Receipt Number column to view the Receipt detail window.
4. Check the box for the receipt to be reallocated. Note that only one receipt can be reallocated at a time, and write-off receipts cannot be reallocated.
5. Click Reallocate. The Receipt Reallocation window opens.
6. Complete the necessary information. Fields marked with a red asterisk * are required.

|
Reallocation Date |
Enter the date
of the reallocation, or select the date from the calendar lookup |
|
Correction Reason |
Select the reason for the reallocation. |
|
Other Reason |
This field can be used to add comments related to the Correction Reason. |
|
Description |
A description can be entered for the reallocation. |
7. Click Save and then confirm the reallocation when prompted, or click Close to close the window without completing the reallocation.
On saving, a new reallocation receipt batch is created with a single reallocation receipt. This details of this new receipt match the details of the original receipt. The Receipt Detailed Allocation page opens.
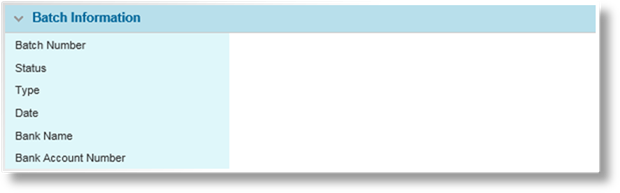
The Batch Information
panel provides reference details about the current batch. This panel
is collapsed by default, but can be expanded using the arrow icon  .
.
|
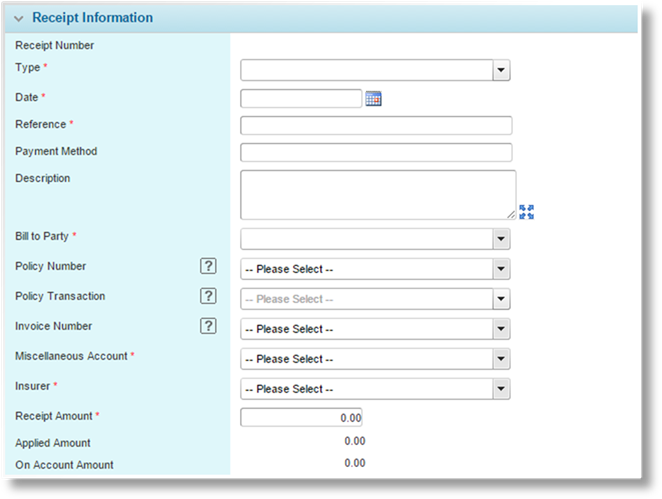
Receipt Number |
The number assigned by the system when the receipt was created. |
|
Type |
Select the type of receipt. |
|
•Standard |
The receipt is in payment for charges from within the system. The receipt amount will either be matched to invoices within the system, be placed on account, or placed into suspension. |
|
•Miscellaneous |
The receipt is related to factors outside of the system. The receipt amount will be logged in the general ledger accounts, but will not be matched to any invoices or bill to party. |
|
•Insurer Refund |
The receipt represents an amount refunded from the insurer, commonly related to policy cancellations. |
|
Date |
The date that the payment was received. |
|
Reference |
The reference code or number for the individual payment. |
|
Payment Method |
The method of payment, inherited from the corrected receipt. |
|
Description |
This field is only visible when Standard is selected for the Type. Enter any description related to the individual payment. |
|
Bill To Party |
The bill to party can be changed, which will clear all allocations. |
|
Policy Number |
This field is only visible when Standard is selected for the Type. A specific policy can be selected to narrow down the available invoices. If a Bill To Party is selected, only policies associated to that bill to party will be listed. |
|
|
This field will be hidden if Unknown is selected for the Bill To Party. |
|
|
Changing this field will clear all allocations. |
|
Policy Transaction |
This field is only visible when Standard is selected for the Type. A specific transaction can be selected to narrow down the available invoices. If a Policy Number is selected, only transactions from that policy will be listed. |
|
|
This field will be hidden if Unknown is selected for the Bill To Party. |
|
|
Changing this field will clear all allocations. |
|
Invoice Number |
This field is only visible when Standard is selected for the Type. If the receipt is to be entirely allocated to a single invoice, that invoice can be selected here. The available invoices are filtered according to any selections in the Policy Number or Policy Transaction fields. Note that the outstanding amounts do not reflect any unposted allocations. |
|
|
This field will be hidden if Unknown is selected for the Bill To Party. |
|
|
Changing this field will clear all allocations. |
|
Miscellaneous Account |
This field is only visible when Miscellaneous is selected for the Type. Select the miscellaneous general ledger account to be associated to the receipt. |
|
Insurer |
This field is only visible when Insurer Refund is selected for the Type. Select the "Accounts Payable – Insurer" general ledger account to be associated to the receipt. |
|
Receipt Amount |
The full amount of the payment. |
|
Applied Amount |
Displays how much of the receipt amount has been allocated to invoices. This field is not displayed if the receipt is in Suspense status. |
|
On Account Amount |
Displays the remaining balance that has not been allocated. When the receipt is posted, this amount will be placed on-account for the Bill to Party. This field is not displayed if the receipt is in Suspense status. |
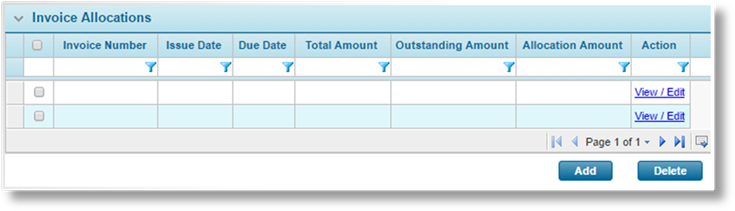
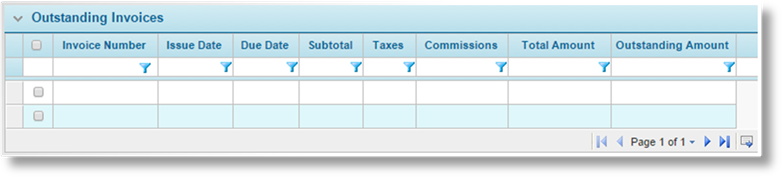
The Invoice Allocations grid lists all invoices associated to the current receipt, either through automatic or manual matching. If the Bill To Party was changed, the receipt will need to be saved for the grid to appear.
a. Click Add to select the invoice allocations. The Invoices window opens with a list of all available invoices, filtered by the settings in the receipt details.
b. Check the boxes for all invoices to be added to the current receipt.
c. Click Save & Close to add the selected invoices to the receipt, save the receipt, and close the window, or click Close to close the window without adding the invoices.
d. The Receipt Allocation grid is updated with the new invoices.
By default, the full Outstanding Amount is allocated, up to the amount available in the receipt. The allocation amount can be edited for each invoice.
a. Click View / Edit in the Action column. The Receipt Allocation window opens.
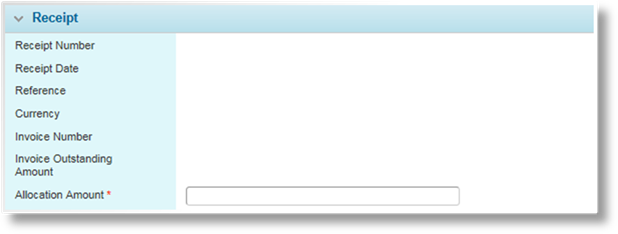
The Receipt panel displays the details of the receipt.
|
Allocation Amount |
Enter the amount to be allocated to this invoice, up to the Invoice Outstanding Amount. |
b. Click Save & Close to save the allocation, save the receipt, and close the window, or click Close to close the window without saving the allocation.
Click a link in the Invoice Number column to view the Invoice detail window.
8. Click Save to save the changes or click Close to return to the Receipt Corrections page. Note that the reallocation receipt was saved when it was created, and can be access through the Batch Receipts page.
If the Receipt Allocations panel has been removed due to changes to the receipt information, saving the receipt will run automatic matching if enabled. If the Receipt Allocations panel is visible, then automatic matching will not run, even if there are no allocations listed.
Click Post to post the batch.
 .
.