
The Policy Settings page is used to define rules and configuration settings for the generation of submissions and policies.
With the master cover selected, click the Policy Settings item in the Screens widget. For instructions on finding and viewing a master cover, see the section on Viewing and Modifying a Master Cover.
|
Product |
Identifies the product associated with the master cover. |
|
Status |
Identifies the current status of the master cover. |
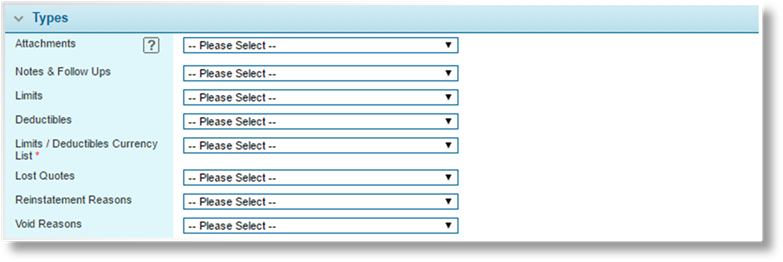
The Types panel defines a variety of lists used throughout the submission process.
|
Attachments |
When attaching files to a submission or policy, the user can select the type of attachment. This list provides the available options. |
|
|
Attachment types can be restricted to certain groups of users, based on security roles. See the Attachment Type Settings panel below. |
|
Notes & Follow Ups |
When creating notes and follow ups, the user can select the type of note. This list provides the available options. |
|
Limits |
This list defines the available choices when adding and configuring limits. |
|
Deductibles |
This list defines the available choices when adding and configuring deductibles. |
|
Limits / Deductibles Currency List |
This list defines the available currencies when adding and configuring limits and deductibles. |
|
Lost Quotes |
When a user marks a quote as lost, they must select a reason why the quote was lost. This list provides the available options. |
|
Reinstatement Reasons |
When a user reinstates a cancelled policy, they must select a reason why the policy is being reinstated. This list provides the available options. |
|
Void Reasons |
When a user voids a transaction, they must select a reason. This list provides the available options. |

The effective coverage period is the period between the Effective Date and the Valid Until date. The Effective Policy Transaction Period Settings control the rules for how the period is determined.
|
Allow Backdating Tolerance |
When this option is unchecked, users are only able to enter an Effective Date equal to the current date or later. When checked, the users can select a date earlier than the current date, up to the limit set in the Backdating Tolerance field (below). |
|
Backdating Tolerance |
Determines the number of days prior to the current date that can be entered into the Effective Date field. This field is only active when Allow Backdating Tolerance is checked. |
|
Set ... Effective Date to |
This setting exists for New Business, Endorsement, Adjustment, and Cancellation transactions. The Effective Date of a new transaction can be set to a date from a selected source. The Effective Date field is then locked and cannot be changed, except where noted. |
|
•Default |
The date is set according to the default behavior. This is usually the current date, or the nearest date within the valid term, but may be modified by other settings. This default date can be edited, unless locked by other settings. |
|
•Field Value |
On creating a new transaction of the appropriate type, the date is copied from a field in the transaction. The Effective Date field can no longer be edited, however any changes to the source field will change the Effective Date on recalculating the quote. |
|
|
The Select Field dropdown is added to the panel on choosing this option. Select a date field from the workflow. |
|
•Default Field Value |
On creating a new transaction of the appropriate type, the date is copied from a field in the transaction. The Effective Date field can be edited, however any changes to the source field will change the Effective Date on recalculating the quote. This option is only available for Cancellation transactions. |
|
|
The Select Field dropdown is added to the panel on choosing this option. Select a date field from the workflow. |
|
•First of Next Month |
On creating a new transaction of the appropriate type, the Effective Date is set to the first day of the following month. |
|
•Term Effective Date |
On creating a new transaction of the appropriate type, the Effective Date is set to the same date as the beginning of the current term. This option is not available for New Business transactions. |
|
Set ... Valid Until Date to |
This setting exists for New Business, Endorsement, Adjustment, and Renewal transactions. The Valid Until date of a new transaction can be set to a date from a selected source. The Valid Until date field is then locked and cannot be changed. |
|
•Default |
The date is set according to the default behavior, as configured by other settings. This default date can be edited, unless locked by other settings. |
|
•Field Value |
On creating a new transaction of the appropriate type, the date is copied from a field in the transaction. The Valid Until date field can no longer be edited, however any changes to the source field will change the Valid Until date on recalculating the quote. |
|
|
The Select Field dropdown is added to the panel on choosing this option. Select a date field from the workflow. |
|
Enforce Minimum Term Duration |
Requires the effective coverage period to be equal or greater than the number of days entered in the Minimum Duration field (below). |
|
Minimum Duration |
Determines the minimum number of days for the effective coverage period. This field is only active when Enforce Minimum Term Duration is checked. |
|
Enforce Maximum Term Duration |
Requires the effective coverage period to be equal or less than the number of days entered in the Maximum Duration field (below). |
|
Maximum Duration |
Determines the maximum number of days for the effective coverage period. This field is only active when Enforce Maximum Term Duration is checked. |
|
Lock Valid Until Date Field |
When a new submission is created, the Valid Until date field is set to a calculated default date based on master cover settings, and cannot be changed. |
|
Hide Valid Until Date Field |
Hides the Valid Until field. The valid until date is still determined according to selected default settings, but the field is not shown. |
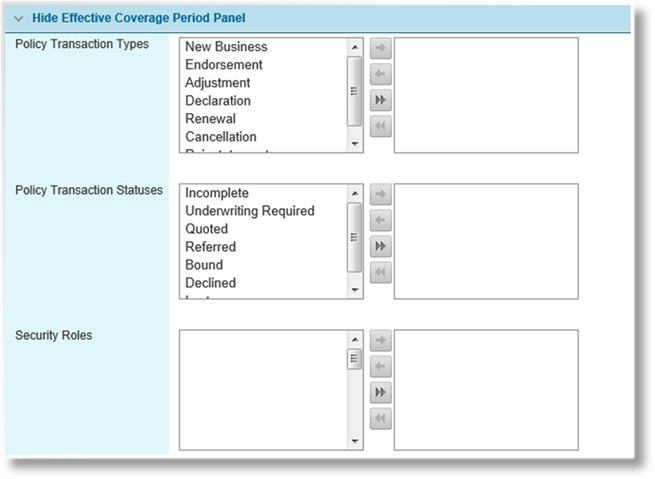
Depending on your business needs, you may want to hide the Effective Date and Valid Until date fields in the Policy Information widget and detail window. This is common when using a fixed policy term, but could also be necessary for various other reasons. The Hide Effective Coverage Period Panel feature allows the fields to be hidden based on any combination of transaction type, transaction status, and the security roles assigned to the user.
|
|
Notes: The fields are only hidden if the transaction and user match at least one selected option in each group. At least one option must be selected in each group or the fields are never hidden. |
|
If the fields are hidden, and the user does not have the necessary security role to view the other details in the Policy Information widget, the entire widget is hidden. |
|
Policy Transaction Types |
Select the transaction types for which the panel should be hidden. |
|
Policy Transaction Statuses |
Select the transaction statuses for which the panel should be hidden. |
|
Security Roles |
Select the user security roles for which the panel should be hidden. |
|
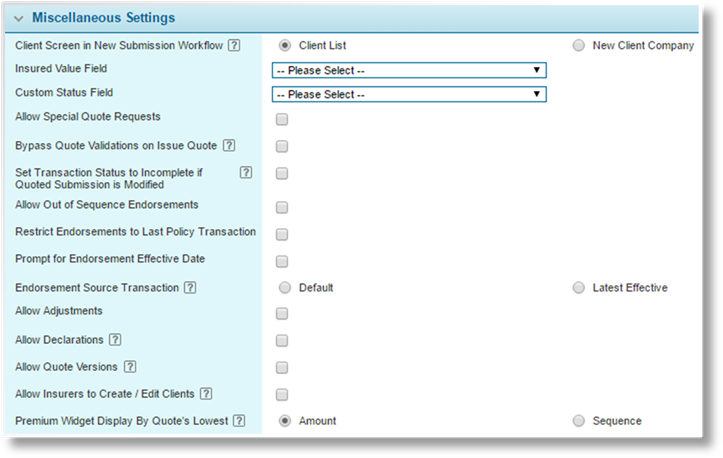
Client Screen in New Submission Workflow |
When creating a new submission, the user is prompted to select or create a client. This setting determines if the prompt will present the user with the list of existing clients or a page on which to create a new client company. |
|
•Client List |
The user will be presented with the Select or Create Client list. The user can select an existing client, create a new client, or skip client selection until a later time. |
|
•New Client Company |
The user will be presented with the New Client Company page, where a new client company can be immediately created and attached to the submission. The user can still navigate to the Select or Create Client list, to select an existing client or create an Individual Client. |
|
|
Note: This feature cannot be used with master covers that have Individual selected as the Type in the Supported Clients panel on the Master Cover - General Information page. |
|
Insured Value Field |
One field can be defined as containing the insured value of the policy. The drop down lists all fields in the attached workflow that have been set as Rate Driver fields. The selected field is available for reports, identified as the insured value. |
|
Custom Status Field |
A field can be selected to override the displayed statuses in the workflow. The drop down lists all Textbox and Label fields from Form panels in the attached workflow. |
|
|
If the field contains a value, either selected manually or calculated, it will be displayed in the Status fields of the Policy Information widget (without the color coding) and the Policy Information window, as well as the Status column of the Policy Transactions list. If the field does not have a value or if the value is blank, the status will revert back to the core system statuses. |
|
|
This only affects the display of the status fields in the workflow. The core system statuses still apply, and still control all aspects of the transaction. Features such as available Actions, workflow overrides, and other resources associated to transaction statuses will not be affected. For reference, the transaction types are still displayed in the Type column of the Policy Transactions list. |
|
Allow Special Quote Requests |
Once a quote has been issued on a transaction, either automatically or manually, this option allows users to submit a special request for a new quote. |
|
Bypass Quote Validations on Issue Quote |
Allows users with the appropriate rights to issue a quote where certain settings or values would normally be rejected by the Quote Validation rules. |
|
Set Transaction Status to Incomplete if Quoted Submission is Modified |
If checked, any changes to a transaction in Quoted or Underwriting Required status will cause it to revert to Incomplete status on saving, instead of recalculating the quote. The transaction can then be re-quoted, either manually or automatically. |
|
Allow Out of Sequence Endorsements |
Allows endorsements to be created with effective dates that are earlier than other bound endorsements, and valid until dates before the end of the term. If unchecked, new endorsements can only start on the same or later date than any other bound endorsement, and the valid until date must equal the end of the term or later. |
|
Restrict Endorsements to Last Policy Transaction |
Only allows endorsements to be created from the most recent transaction per policy term. The transaction must be Bound to allow endorsement. If the transaction is Declined, the next most recent transaction is enabled for endorsement. |
|
Prompt for Endorsement Effective Date |
This option is available when the Default option is selected for the Set Endorsement Effective Date to field. |
|
|
When checked, users will be prompted to enter the Effective Date of an endorsement into a detail window when they click on Endorse in the Actions widget. |
|
|
When the detail window opens, the Effective Date field will be populated with a date by default. If the current date is within the policy term, it will appear by default. If the current date is later than the policy term’s Valid Until Date, the policy term’s Valid Until Date will appear by default. If the current date is earlier than the policy term’s Effective Date, the policy term’s Effective Date will appear by default. |
|
|
When not checked, the system will use the Effective Date based on the selection of the Set Endorsement Effective Date to field. |
|
Endorsement Source Transaction |
This field is hidden and its selection is ignored when Restrict Endorsements to Last Policy Transaction is checked. |
|
|
This option determines how the system should select a policy transaction from which to create an endorsement. When Default is selected, the data will be copied from the transaction used to initiate the endorsement. When Latest Effective is selected, the data will be copied from the latest bound New Business, Renewal or Endorsement transaction whose coverage period includes the endorsement’s Effective Date, and whose Correction Type is not Void or Offset. |
|
Allow Adjustments |
Allows Adjustment transactions to be created. Adjustments are used to make changes to the policy coverage for a specific period within the term. |
|
Allow Declarations |
Allows Declaration transactions to be created. Declarations are used to provide required coverage information on a regular basis. |
|
|
Enabling declarations causes monthly periods to be automatically defined on binding a new business or renewal transaction. An endorsement that extends the term may also generate additional periods. The periods will include the first month of the term (including a partial month) to the last full month of the term. If the term ends partway through a month, that last month will be covered in the renewal. |
|
Allow Quote Versions |
Allows alternate versions of an unbound New Business or Renewal transaction to be created. These quote versions are created to present additional choices with minor or major variations. |
|
|
Quote versions are handled the same as normal transactions, with quoting and referrals. When one version is bound, all alternates are put into Lost status. |
|
Allow Insurers to Create / Edit Clients |
Allows users from underwriter companies to create new clients and edit the client information in submissions. If unchecked, the underwriters are not allowed to create or edit clients. |
|
|
This permission only applies within submissions created under this master cover. The user will also need to have the required security rights. |
|
Premium Widget Display By Quote's Lowest |
When quotes have been calculated but a specific quote has not yet been selected, the Premium widget displays a default quote. Select how that default quote will be determined. |
|
•Amount |
Of the suitable quote options, the one with the lowest premium will be displayed. |
|
•Sequence |
Of the suitable quote options, the one with the lowest sequence number will be displayed. |

|
Generate Invoice on Bind |
If checked, an invoice is generated when a transaction is bound. This invoice will include all charges for the current transaction that are ready for immediate invoicing. If unchecked, all charges produced on bind will be handled through manual or scheduled invoicing. |
|
Allow Online Payment |
The Pay Now option will be available in the Premium widget after binding, allowing the user to make online payments directly from the transaction. All invoices that include charges for the current transaction will be available for full or partial payment. |
|
|
Note: If the Separate Invoicing by Transaction option in the Billing Settings is not checked, the payable invoices may include charges from other transactions. |

|
Select Action(s) For Notes Confirmation to Appear |
When the user takes certain actions within the system, they may be given the opportunity to enter a note associated with the action. Check the boxes for all actions where the notes option should be available. The user always has the option to proceed without submitting a note. |

The Coverage Calculation Methods panel allows you to specify the calculation method to be used when the system calculates the policy premium for a specified transaction type.
|
Cancellation |
Select the calculation method to be used when the system calculates the transaction’s premium, taxes, fees and commissions. |
|
•Prorating |
The refunded premium will be determined by prorating the policy’s premium, taxes, fees and commission using the cancellation’s effective date. |
|
|
For details on how prorating calculations are performed, see the Prorating and Adjustments section. |
|
•Rule Evaluation |
The refunded premium will be calculated using premium values from one or more dynamic fields in the workflow. The premium values can be produced by calculated fields, or brought in from external systems. Multiple rules can bring in values for multiple premium types, including adding together multiple values for each premium type. Taxes, fees, and commissions are then applied to each premium type using their respective settings. Each premium type is rounded according to the Rounding Precision and Rounding Style specified in the Master Cover - General Settings page. |
|
Reinstatement |
Select the calculation method to be used when the system calculates the transaction’s premium, taxes, fees and commissions. |
|
•Reverse Cancellation |
The premium is set to reverse any refund calculated for the associated cancellation transaction. |
|
•Rule Evaluation |
The premium will be calculated using premium values from one or more dynamic fields in the workflow. The premium values can be produced by calculated fields, or brought in from external systems. Multiple rules can bring in values for multiple premium types, including adding together multiple values for each premium type. Taxes, fees, and commissions are then applied to each premium type using their respective settings. Each premium type is rounded according to the Rounding Precision and Rounding Style specified in the Master Cover - General Settings page. |

The Premium Type - Rating Basis panel defines the driver fields containing the rating basis for each premium type. This is used to calculate the technical rate.
All premium types available for the current master cover are listed. Any field set as a Rate Driver from the attached workflow can be assigned to any premium type. The content of the fields could be entered directly by the user, or could be a calculated field deriving the value from a variety of data.
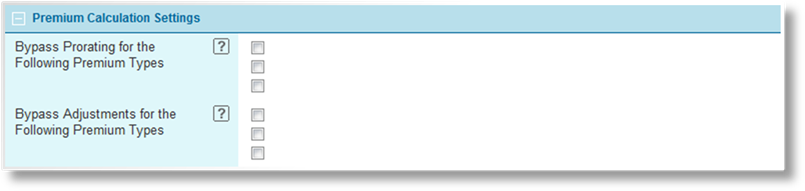
Individual premium types can be excluded from the prorating and adjustment calculations.
|
Bypass Prorating for the Following Premium Types |
Check all premium types that should not be prorated when performing calculations. The selected premium types are always calculated according to a period of one full year. |
|
Bypass Adjustments for the Following Premium Types |
Check all premium types that should not be adjusted when performing calculations on endorsements. The selected premium types are not modified by other transactions. |
See Prorating and Adjustments for more information.
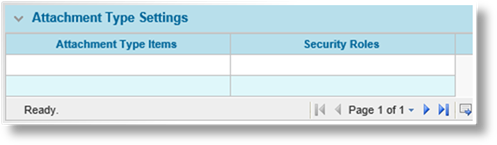
The Attachment Type Settings panel is automatically populated with the options from the Attachments list selected in the Types panel. If the list is changed and the page saved, the new options will be added and any previous options that have been assigned security roles will remain in the panel for reference, but cannot be selected for new attachments, while previous options that have no security roles will be deleted.
By default, no security roles are assigned to attachment types, meaning any user can select the type when attaching files, and all users will have access to the attachment. Once security roles have been assigned, a user will need to have at least one of those roles in order to select the attachment type when attaching files, and to view attachments with that type.
1. To assign security roles, click a link in the Attachment Type Items column to view the settings. The Attachment Type Setting window opens.
|
Attachment Type Item |
Identifies the selected attachment type. |
|
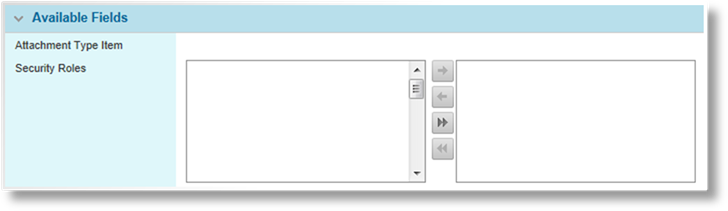
Security Roles |
Select all roles that should have access to this type. A user will need to have at least one of the selected roles to select this type when attaching files, and access any attached files with this type. |
2. Click Save & Close to save and close the window, or click Close to close the window without saving any changes.
Attachment types that are no longer included in the currently selected Attachments list can be deleted using the Delete button. Note that deleting a type that has been used for any attachments will remove the restrictions on those attachments, making them visible to any user with general access to attachments.

To assist with locating transactions in the Submission / Policy List, fields from the attached workflow can be made available as optional columns.
|
Text |
Ten columns can be added for text content (only the first three are displayed in the screenshot). These can be used for Drop-down, Label, Radio Buttons, Text Area, Textbox, and Textbox (email) type fields. For Drop-down and Radio Button fields, the code for the selected item is displayed. |
|
Decimal |
Three columns can be added for decimal values. The three options are set to display a different number of decimal points, 2, 4, and 8. Any digits after the selected number of decimal points are cut off, not rounded, but this is only for display and does not affect the stored value. |
|
Integer |
Three columns can be added for integer values. |
|
Date |
Three columns can be added for dates. |
These optional columns are available in the Submission /Policy List, and can be added to the grid using the Select Columns option in the context menu accessed by right-clicking a column header. For more information about customizing grids and saving the settings, see the Using Grids section.
|
|
Notes: The labels for the dropdown fields in this panel are used as the column headers. The labels can be changed in the Custom Labels section. |
|
Only form fields are available. Fields included in grids are not available. | |
|
When these settings are changed, only new submissions will display the optional fields. When the master cover is set to Live status, all existing submissions and policies are updated to display the appropriate data in the new columns. |
Click Save to save the current settings.
