Lookup tables are custom Excel files containing a list of values and all of the conditions required for each value. Once a table has been uploaded to the system, the $Lookup() function can be used in a calculated field to gather the conditions from the submission form and find the appropriate value from the table.
For details about the $Lookup() function, please see the Full Function List.
1. Create a new Excel file or modify an existing file that has all of the table information.
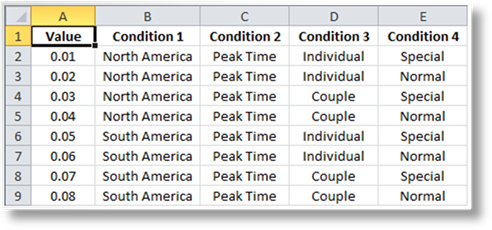
The first row must be the header, with column names for the value and each condition. Note that the word "column" must not be used in the header name. The system supports up to 10 conditions, for a total of 11 columns (last column is K).
The first column must be the value, and cannot contain opening or closing brackets ( ) or the dollar sign $.
The remaining columns contain the conditions in the order they are used in the $Lookup() function. The maximum length for any value or condition is 80 characters, and cannot contain opening or closing brackets ( ), the dollar sign $, single or double quotes ' ", returns \r, new lines \n, or commas ,.
The system supports up to 65,536 rows, including the header.
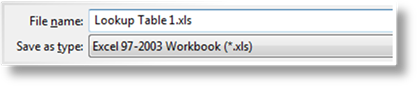
2. Once the table is complete, save the file as Excel 97-2003 Workbook (*.xls). Files of type .xlsx are not supported. Any valid file name can be used.
|
|
Notes: When uploading the Excel file, the system stores the data as it appears in the sheet. If any formatting has been applied that alters the appearance of the data, such as date or number formatting, the lookup conditions must match that formatting, and the reply value should be expected in the formatted style. |
|
For this reason, numerical values should not be formatted with thousands dividers, and only periods should be used for the decimal separator. | |
|
For best results, format all cells as Text. This ensures that all data is stored exactly as it is expected. |
1. In the main menu, select Product Design, then select Lookup Tables. A list of all available tables is displayed.

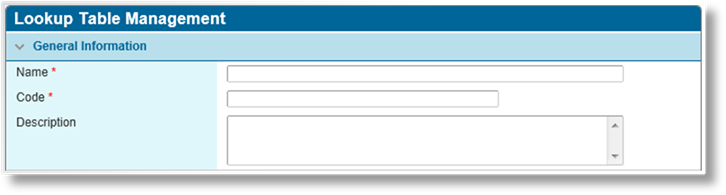
2. Click Create. The Lookup Table Management page opens.
3. Complete the necessary information. Fields marked with a red asterisk * are required.
|
Name |
Enter the name of the table. This is the internal name, used to identify the table in the lookup tables list. |
|
Code |
Enter a unique code for the table. This code is used in the $Lookup() function to identify the table. |
|
Description |
Enter a description of the table. |
4. Click Add to save the lookup table but remain on the page, click Add & Close to save the lookup table and return to the table list, or click Close to return to the table list without saving the lookup table.
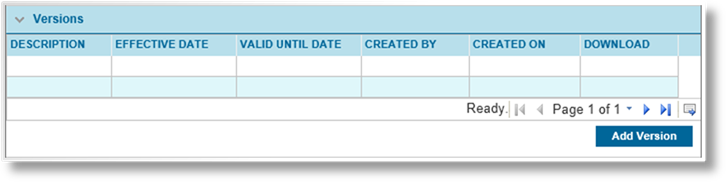
Once the lookup table is saved, the Versions and Status panels become available.

Each lookup table can have multiple versions, effective within a specific period. When a lookup is performed, the Effective Date of the transaction determines which table version is used. If more than one table is in effect for the date, the most recently created version is used.

|
Active |
Marks the table as active and available for use. If unchecked, any lookups on this table will return no results. |
|
Created By |
Identifies the date and time the lookup table was created, and the user who created it. |
|
Last Modified By |
Identifies the last date and time the lookup table was changed, and the user who made the changes. |
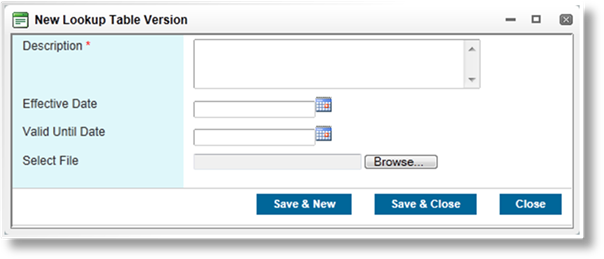
5. Click Add Version. The New Lookup Table Version window opens.
6. Complete the necessary information. Fields marked with a red asterisk * are required.
|
Description |
Enter a description for this version of the table. |
|
Effective Date |
Enter the date
that this table version comes into effect, or select the date from the
calendar lookup |
|
Valid Until Date |
Enter the date
of the last day this table version is in effect, or select the date from
the calendar lookup |
|
Select File |
Click the Browse button to open a standard file browser window. Locate and select the appropriate file, and the file name and path appear in the field. This field and the Browse button are not shown when viewing a saved table version. |
7. Click Save & New to save the table version and clear the form to add a new version, click Save & Close to save the table version and close the window, or click Close to close the window without saving the table version.
Once the table version is saved, the Status panel becomes available at the bottom of the window.

|
Created By |
Identifies the date and time the table version was created, and the user who created it. |
|
Last Modified By |
Identifies the last date and time the table version was changed, and the user who made the changes. |
8. To add additional table versions, repeat steps 5 to 7.
|
|
Tip: The table version should contain the same number of conditions as used in the $Lookup() function. If the function includes more conditions than exist in the table, the function does not return any value. If the table includes more conditions than are used in the function, the function returns the first value that matches the conditions. If it is necessary to change the number of conditions used in a lookup, while maintaining compatibility with previous versions, there are some options. |
|
•If conditions are being added, the older table versions can be modified to include the new condition columns with values that are always included, and then be added in place of the original tables. If conditions are being removed, the new version can include the extra condition columns. | |
|
•The $If() function can be used to adjust the $Lookup() conditions to find the correct table version, or even a different lookup table entirely. |
9. Click Save to save the lookup table but remain on the page, click Save & Close to save the lookup table and return to the table list, or click Close to return to the table list without saving the lookup table.
1. In the main menu, select Product Design, then select Lookup Tables. A list of all available tables is displayed.

2. Click a link in the Name column to view the table details. If there are a large number of available tables, see the Using Grids section for help on finding the appropriate table.
3. See the section on Uploading Lookup Tables for a detailed description of the fields. Some options can be edited, and others are grayed out and cannot be changed.
4. In the Versions table, click a Download link to open or save a copy of that table file. Click a link in the Effective Date column to view the version details.
|
|
Tip: The file attached to a version record cannot be changed. To replace an existing file, delete the original table version and attach the new version with the same settings. |
5. When viewing a Lookup Table Version window, click Save to save any changes and keep the window open, click Save & Close to save and close the window, or click Close to close the window without saving any changes.
6. When viewing the Lookup Table Management page, click Save to save any changes and remain on the page, click Save & Close to save and return to the table list, or click Close to return to the table list without saving any changes.
Once created, a lookup table cannot be deleted. It can be deactivated, which prevents it from being used for new lookups. Individual table versions can be deleted.
1. In the main menu, select Product Design, then select Lookup Tables. A list of all available tables is displayed.
2. Locate the table or tables to be deactivated. If there are a large number of available tables, see the Using Grids section for help on finding the appropriate tables.
3. Check the boxes for all tables to be deactivated.
4. Click Deactivate, then confirm the deactivation when prompted to do so. All selected tables are deactivated. If the list is still defaulted to only show active tables, they disappear from the list.
|
|
Tip: Individual lookup tables can also be deactivated or reactivated directly through the table record. See the section on Viewing and Modifying Lookup Tables and Versions for details. |
While a lookup table cannot be deleted, individual table versions can be.
1. In the main menu, select Product Design, then select Lookup Tables. A list of all available tables is displayed.

2. Click a link in the Name column to view the table details. If there are a large number of available tables, see the Using Grids section for help on finding the appropriate table.
3. In the Versions list, click a link in the Effective Date column to view the version details.
4. Click Delete, then confirm the deletion when prompted to do so. The version is deleted and the window is closed.

 .
.