
Deductibles are used to define the amount that must be covered by the client in the event of a claim, and are determined when a quote is calculated. The quote calculation itself has a specific sequence of events which could affect the calculations, click here for more information.
A deductible can be set as a fixed amount, percentage, or can be linked to a driver field. A trigger can be used to control if the deductible is applied or not.
With the master cover selected, click the Deductibles item in the Screens widget. For instructions on finding and viewing a master cover, see the section on Viewing and Modifying a Master Cover.
|
Product |
Identifies the product associated with the master cover. |
|
Status |
Identifies the current status of the master cover. |

Select a Quote Option to view the deductibles defined for that option.

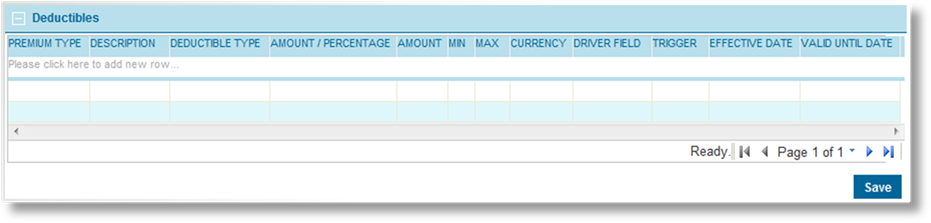
The Deductibles panel displays all deductible amounts under the selected Quote Option.
1. Click in the field marked Please click here to add new row.
2. Select a Premium Type where the deductible should be applied.
3. Enter a Description to be available in the Quote Summary window.
4. Select a Deductible Type from the options defined in the deductible type list selected in the Policy Settings page of the master cover.
5. Select if the deductible should be a flat Amount or a Percentage.
6. Enter the flat amount or percentage, according to the selection in the Amount/Percentage field.
7. Enter a minimum amount for the deductible. This is for information purposes, and does not actively restrict the value.
8. Enter a maximum amount for the deductible. This is for information purposes, and does not actively restrict the value.
9. Select a Currency for the deductible.
10. Select a Driver Field if the deductible amount should be taken from the submission form. If the Driver Field (which may be user-entered or a calculated field) has any value, including zero, that value is used as the deductible amount. If the Driver Field is left blank in the submission form, or if no Driver Field is selected, the Amount value is used by default. Only fields defined as Rate Drivers are available in this list.
11. A Trigger can be selected to set the conditions for this deductible to be applied. If the trigger evaluates as true, the deductible is applied.
12. The Effective Date and Valid Until Date fields can be used together or separately to control when the deductible is applied. If the effective date of the transaction is before the effective date of the deductible or after the valid until date of the deductible, the deductible is not applied.
13. Press the Tab key from the Valid Until Date field or click outside the table to add the item to the list. The item is highlighted in yellow to indicate that it has not been accepted yet.
14. Repeat the previous steps to add additional entries.
15. Once all entries have been added, right-click inside the table and select Accept All Changes. This saves the current table.
16. Click Save to save the changes.
17. Additional deductibles can be added to the same Quote Option, or a different Quote Option can be selected.
With the master cover selected, click the Deductibles item in the Screens widget. For instructions on finding and viewing a master cover, see the section on Viewing and Modifying a Master Cover.
|
Product |
Identifies the product associated with the master cover. |
|
Status |
Identifies the current status of the master cover. |
Select a Quote Option to view the deductibles defined for that option.
The Deductibles panel displays all deductible amounts currently set for the master cover.
1. Double-click on any field in the table to open it for editing. See the section on Creating a Deductible for a detailed description of the fields.
2. Once all changes have been made, click outside the table. The edited deductibles are highlighted in yellow.
3. Right-click inside the table and select Accept All Changes. This saves the current table.
4. Click Save to save any changes.
With the master cover selected, click the Deductibles item in the Screens widget. For instructions on finding and viewing a master cover, see the section on Viewing and Modifying a Master Cover.

|
Product |
Identifies the product associated with the master cover. |
|
Status |
Identifies the current status of the master cover. |
Select a Quote Option to view the deductibles defined for that option.
The Deductibles panel displays all deductible amounts currently set for the master cover.
1. To remove list items, right-click on the item in the table, and select Delete. The item is highlighted in red, and is removed when the list is saved.
2. Right-click inside the table and select Accept All Changes. This saves the current table.
3. Click Save to save any changes.