All newly created portals begin with default content for the logon page, the self-registration page, and the welcome page, as well as the headers and footers of each page in the system. These areas can be redesigned to suit specific needs per portal, allowing custom content including fully formatted text, pictures, and links.
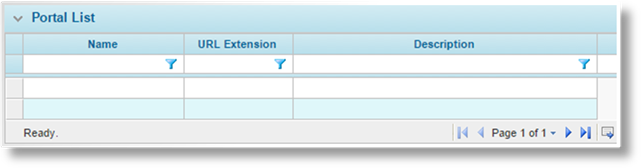
1. In the Main Menu, select Reference, then select Portals. The Portals page opens with a list of all available portals.
2. Click a link in the Name column to view an existing portal. The Portal - General Information page opens, and additional options become available in the Screens widget to the left of the page.
3. Select Content in the Screens widget. The Portal - Content page opens.

4. Multiple areas of the system can be customized from this page. In the Content Areas drop-down, select the area that you want to customize.
|
Footer |
The banner area at the bottom of the page. |
|
Header |
The banner area at the top of the page. |
|
Logon Page |
The page containing the logon panel. |
|
Logon Page Left |
The left column of the Logon page. |
|
Logon Page Right |
The right column of the Logon page. |
|
Password Pages Left |
The left column of the Set Password and Forgot your Password pages. |
|
Password Pages Right |
The right column of the Set Password and Forgot your Password pages. |
|
Policy Form Left |
The left column of the submission/policy screen. The content appears below any widgets currently on the screen. |
|
Policy Form Right |
The right column of the submission/policy screen. The content appears below any widgets currently on the screen. |
|
Self-Registration Page |
If activated, this page allows users to create their own account to access the system. |
|
Self-Registration Page Left |
The left column of the Self-Registration page. |
|
Self-Registration Page Right |
The right column of the Self-Registration page. |
|
Welcome Page |
The first page the user sees after logging in. |
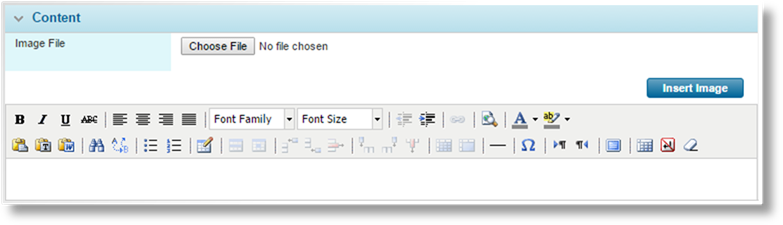
5. The Content panel appears when the Content Area is selected, and is where the content is prepared. Default content is included for any new portals, and can be modified to suit requirements or entirely replaced. Content can be built directly in the window using a variety of common editing tools presented in the toolbar, or it can be pasted in as Text or Rich Text.
|
|
Tip: Text pasted into the editor may undergo some minor formatting changes. The formatting tools can be used to correct the differences. |
The available space varies according to the Content Area.
|
Welcome Page |
The welcome page content does not have size limits. |
|
Header |
The default height of the header is 90 pixels. Any content that exceeds this height is cut off. The width expands to match the content. |
|
Footer |
The default height of the footer is 60 pixels. Any content that exceeds this height is cut off. The width expands to match the content. |
|
Logon Page |
The logon page content does not have size limits. |
|
Self-Registration Page |
The registration page content does not have size limits. |
|
Side Columns |
The side columns do not have any vertical limits, a scrollbar appears if the content exceeds the screen space. The default width of each column is 260 pixels, although that space is reduced if the scrollbars appear (the exact width of the scrollbars may vary according to browser settings). Any content exceeding the available width is cut off. |
|
|
Note: The height of the header and footer areas can be customized, and the footer can be hidden entirely. The customization applies to all portals, and must be applied by Oceanwide. Please contact your Oceanwide Representative to request these changes. |
6. To add images to the page, click the Browse button to open a standard file selection window. The system supports image files of GIF, JPG, PNG, and BMP formats. Select the file to be included and click Open. The full path and filename are displayed in the Image File field.
7. Click Insert Image to add the image at the end of the current content. The image can then be moved by clicking on it with the mouse and dragging it to the appropriate location in the content. The system does not limit the dimensions or file size of the image, however very large files take longer to load each time a user accesses the page.
|
|
Note: Using drag-and-drop or copy and paste to insert images may cause those images to be broken for some users. The Insert Image button should be used to add all image files. |
8. The content can be saved at any time by clicking Save.
|
|
Tip: Moving between content areas does not automatically save the content of the current area. Click the Save button to save the content before navigating away from the page. |
9. Once the content is ready, the saved changes are applied when the portal is published from the General Information page of the portal.

