Claim payment rules can be set to automatically generate payments for the current claim in response to certain events.
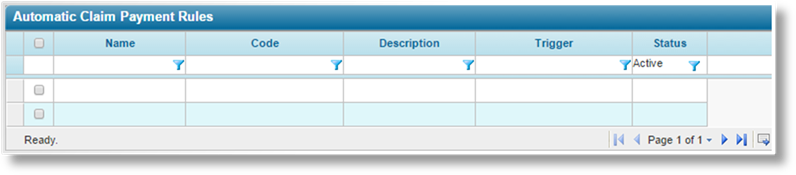
1. In the main menu, select Claims, Configurations, Payment Rules, then Automatic Claim Payments. A list of all available rules is displayed.
If there are a large number of available rules, see the Using Grids section for help on finding the appropriate containers.
2. Click Add to create a new claim payment rule, or click a link in the Name column to view an existing rule.
To deactivate claim payment rules, check the boxes for all rules to be deactivated, click Deactivate, then confirm the deactivation when prompted to do so. Individual rules can also be deactivated through the Automatic Claim Payment Rule window.
3. If adding or viewing a claim payment rule, the Automatic Claim Payment Rule window opens. Complete the necessary information. Fields marked with a red asterisk * are required.

The General Information panel includes settings for the rule and the conditions for when the rule is applied.
|
Name |
Enter the name of the payment rule. |
|
Code |
Enter a code to identify the rule internally. |
|
Description |
Enter a description of the rule. |
|
Workflow Events |
Select one or more events where the rule should be evaluated. |
|
|
Note that workflow events that include the Adjuster Assignment action are not available. |
|
Trigger |
Select a trigger to control if the rule should be applied. |
|
|
Note: In addition to the selected Workflow Events and Trigger, the claim must also have a policy selected for a rule to be applied. |
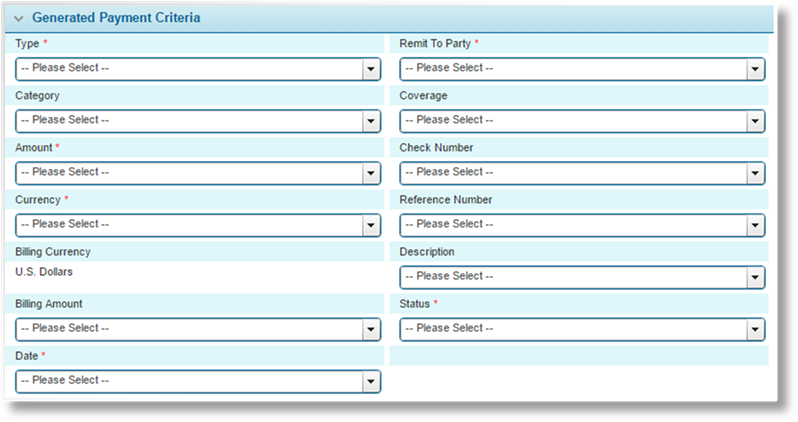
The Generated Payment Criteria panel is used to configure the details for the new payments.
|
Type |
Select the type of payment. |
|
•Expense |
An expense payment to a Claim Party attached to the claim. |
|
•Indemnity |
An indemnity payment, commonly made to the Claimant. |
|
•Recovery |
A recovery payment received from a Claim Party attached to the claim. |
|
•Recovery Disbursement |
A payment made from recovery values. |
|
•Salvage |
A salvage payment received from a Claim Party attached to the claim. |
|
•Salvage Disbursement |
A payment made from salvage values. |
|
Category |
Select a category for the payment. |
|
Amount |
Select a field from the claims workflow to provide the amount of the payment. |
|
Currency |
Select a field from the claims workflow to provide the currency of the payment. If any currency other than U.S. Dollars is selected, the Billing Amount field should also be provided. |
|
Billing Currency |
This field displays the currency used to manage the payment in the Billing module. This is set to U.S. Dollars. |
|
Billing Amount |
This field should be provided if the Currency is anything other than U.S. Dollars. Select a field from the claims workflow to provide the payment amount in U.S. Dollars. |
|
|
This is the amount that will be tracked for billing and used to make any adjustments to the reserves and estimates. |
|
Date |
Select a field from the claims workflow to provide the date of the payment. |
|
Remit To Party |
Select a Party Role to receive the payment. The payment will go to the Claim Party attached to the claim with the selected role. |
|
Coverage |
A premium type from the associated policy can be associated to the payment. Select a field from the claims workflow to provide the premium type. |
|
Check Number |
If the payment is by check, select a field from the claims workflow to provide the check number. |
|
Reference Number |
Select a field from the claims workflow to provide the reference number of the payment. |
|
Description |
Select a field from the claims workflow to provide a description for the payment. |
|
Status |
Select the initial status of the payment. |
|
•Approval Required |
Marks the payment as ready for review and approval. |
|
•Approved |
Marks the payment as approved and submits the information for accounting. The payment can no longer be edited or deleted once it has been saved with this status. |
|
•Draft |
This is the common status for new payments. |
|
•Error |
This status is applied when the payment does not successfully integrate with the Billing module. The payment will not be included in billing calculations. The payment can no longer be edited or deleted once it has been saved with this status, or when the status has been applied automatically. |
|
•Paid |
The payment has been made. If the payment type has been configured for integration with the Billing module, the payment details are transferred for processing. The payment can no longer be edited or deleted once it has been saved with this status. |
|
•Rejected |
Marks the payment as reviewed and rejected. The payment can still be edited and re-submitted for review and approval. |
|
•Void |
The payment is no longer valid, and will not be included in payment calculations. The payment can no longer be edited or deleted once it has been saved with this status. |

|
Adjustment |
Select how the payment will be applied to the current Reserve and Estimate values. |
|
•Automatic Adjustment |
For Expense or Indemnity payments, the amount will be automatically deducted from the related reserve value. |
|
|
For Salvage or Recovery payments, the related estimate value will be reset to zero. |
|
•No Adjustment |
The related reserve or estimate value will not be changed. |

The Status panel becomes available once the payment rule has been saved.
|
Active |
Marks the payment rule as active and applicable. If unchecked, no payments will be created under this rule. |
|
Created By |
Identifies the date and time the payment rule was created, and the user who created it. |
|
Last Modified By |
Identifies the last date and time the payment rule was changed, and the user who made the changes. |
4. Click Add & New or Save & New to save the payment rule and clear the form to enter another rule, click Add & Close or Save & Close to save the rule and close the window, or click Close to close the window without saving the rule.
