Note: Once the 2.0 upgrade has been applied, all Portals and Workflows will need to be republished.
The most significant change in the 2.0 version of Bridge is the use of Multi-Screen workflows. Previously, the entire submission form would be displayed in one long screen. All information, controls, and features were integrated into the form.
Multi-screen has the entire workflow divided into manageable pieces, with all controls and policy information split out into a series of Widgets to either side of the form. Navigation controls have been introduced to allows users to systematically work through the screens, while administrative users can move around freely to review the submission.
The sections below provide a brief introduction to the new features.
|
|
Note: Once the 2.0 upgrade has been applied, all Portals and Workflows will need to be republished. |
A Style option has been added to the Workflow Management page under Product Design, allowing workflows to be published as Single Screen or Multi-Screen.
When Single Screen is selected, the Screen dropdown is enabled and is used to select the one screen that contains the full submission form.
When Multi-Screen is selected, the Steps grid is enabled. This grid is used to enter all of the screens, separated into steps. Sequence numbers define the order of the screens as the user navigates through the workflow. A Screen Behavior Override grid is available to hide or show individual screens based on triggers, transaction type, status, and user roles.
For detailed information on setting up workflows, see the Managing Workflows section of the Bridge User Guide - Product Design - 2.0.0.
One of the most obvious changes will be the layout of the system. The main menu has been moved to the top of the screen, with submenus expanding downward. The main window is now centered with room for smaller windows, called widgets, to the left and right. These widgets contain controls, additional menus, and supplemental information.
Main Menu

The menu items have been reorganized and aligned along the top of the screen, just below the header. If the item includes additional options, a sub-menu will expand down from the main menu.
|
|
Note: Not all options are available to all users. Access is controlled by each user's Security Roles. |
|
|
This menu option has not changed. It returns the user to the Home page. | |
|
|
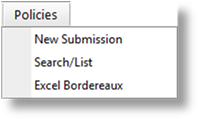
The Policies menu includes options for finding, creating, and managing submissions. Select New Submission to go straight to the Select Product page (this page will be skipped if only one product is available). Select Search/List to open the Submission/Policy List. The Create button is still available from the list screen. Select Excel Bordereaux to generate a report on bound policies. | |
|
|
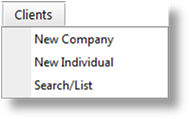
The Clients (formerly Assureds) menu provides a direct method of creating and editing client records, separate from the submissions and policies. Select New Company or New Individual to create a new client of the appropriate type. Select Search/List to open the Client List. The options to create new clients are still available from this screen. | |
|
|
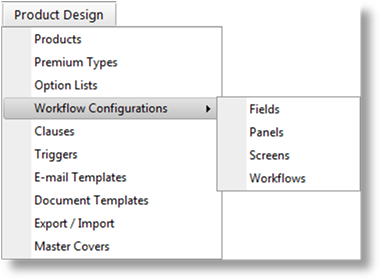
The Product Design menu remains very similar to the old menu, providing options to prepare workflows and resources for use in the master cover and workflow. The Fields, Panels, Screens, and Workflows sections are combined in the Workflow Configurations menu. The Master Covers option is now found under this menu. This option will open the Master Cover List page. When a master cover is selected, or a new master cover is created and saved, the additional pages will be available in the Screens widget (see below). | |
|
|
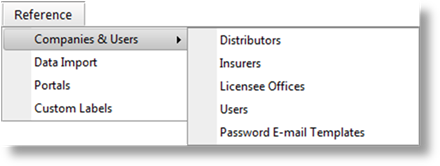
The Reference menu has been created to include most of the remaining features. The Companies & Users option expands to provide access to the Distributors, Insurers, and Licensee Offices options, as well as the controls for Users accounts, and selecting custom Password E-mail Templates. The Data Uplink menu and the Import option are now combined into the Data Import option. The Portals option is now found under this menu. This option will open the Portal List page. When a portal is selected, or a new portal is created and saved, the additional pages will be available in the Screens widget (see below). The Custom Labels feature, used to modify text and labels throughout the system, has been renamed Custom Language. | |
|
|
The Reports option still opens the Cognos reporting system. | |
|
|
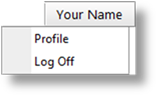
The last item in the menu is the user's name. This menu provides access to the user's Profile, and the Log Off option. | |
Custom links per portal will be included in the new menu, with groups of links expanding downwards. Given the limited horizontal space (which will vary according to the features available to each user), Oceanwide recommends grouping links wherever possible, and shortening the names of groups and links that will appear in the top level menu.
Ideally, most users should have up to seven menu options total, although high-level administrative users will most likely exceed that number. This is not a strict limitation, as the menu bar will wrap around to create a second line of menu options if it exceeds the width of the browser window.
Screens Widget
For menu items that can be accessed directly, independent of other choices, the menu items will expand downwards from the main menu. Sections such as Product Design and Reference are handled with such submenus.
For areas where the user must make a selection before accessing the available options for that selection, the options have been moved into a widget. Currently, this applies to Master Covers and Portals.
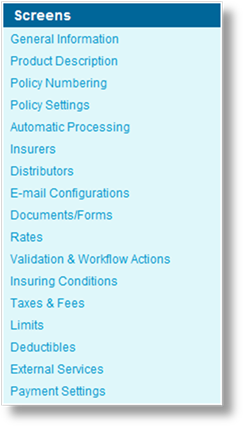
For example, clicking Master Covers in the Product Design menu will open the Master Cover List. When the user selects a master cover, or creates a new master cover and then saves, the Screens widget will open to the left of the form. This widget contains all of the available pages (General Information, Rates, Validations, etc.), depending on the user's security rights. The widget is used to navigate throughout the master cover, and return to the General Information page to access the master cover controls (Set Live, Master Cover Report, etc.). The widget will disappear when the user navigates to another area of the system.
Client Information Widget
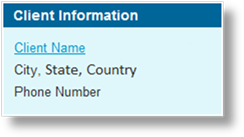 The assured information (now "client information") has been moved
from the Assured panel to the Client Information widget on the
side of the submission form. The Client Information widget displays
some key information about the client for the current submission or policy, and
provides access to the full client details.
The assured information (now "client information") has been moved
from the Assured panel to the Client Information widget on the
side of the submission form. The Client Information widget displays
some key information about the client for the current submission or policy, and
provides access to the full client details.
Clicking the client name will open the client details. Much of the available information will be different depending on whether the user is viewing a client company or individual. The client information stored in the submission or policy is independent of the client record stored in the system.
If the client selection was skipped, or the client needs to be changed, the details page includes a Select Client button. This will open a list of the available clients for the chosen distributor. A new client can be selected, or the same client can be selected again to update the submission with changes that were made to the client record stored in the system. In certain transactions and statuses, it will not be possible to change the client.
For detailed information on this widget and the client information, see the Client Information Widget section of the Bridge Workflow Guide - 2.0.0.
Policy Information Widget
 The contents of the Policy Information and Effective
Coverage Period panels have been moved to the Policy Information
widget to the side of the submission form.
The contents of the Policy Information and Effective
Coverage Period panels have been moved to the Policy Information
widget to the side of the submission form.
The widget displays the most common information about the submission or policy. For more detailed information, click the product name to open the Policy Information details page.
The widget and details page also include the Effective Date and Valid Until date, unless one or both fields are hidden according to master cover settings. The dates cannot be edited directly in the widget, but clicking the dates will open the Policy Information details page. The dates can be edited in the details page, unless the master cover configuration or the status of the transaction prevents changes.
For detailed information on this widget, see the Policy Information Widget section of the Bridge Workflow Guide - 2.0.0.
Premium Widget
 When the submission is in a status
where a valid quote has been calculated, the total premium is now displayed in
the Premium widget. Below the premium is a link to the Quote
Summary window which now contains the familiar information for the premium
details, limits, deductibles, and insuring conditions.
When the submission is in a status
where a valid quote has been calculated, the total premium is now displayed in
the Premium widget. Below the premium is a link to the Quote
Summary window which now contains the familiar information for the premium
details, limits, deductibles, and insuring conditions.
The Premium widget is only shown for users with the necessary roles to view premium information.
Common Screens Widget

The single screen workflow included multiple panels containing information related to the submission, such as a trail of e-mail communications, documents, notes, and the transaction history. Some of these panels have been removed from the form itself and can be accessed through the Common Screens widget, while some new features have been introduced.
|
Documents |
Opens a window listing all generated documents linked to the current submission or policy. |
|
Attachments |
Opens a window listing all files attached to the submission or policy. |
|
E-mails |
Opens a window listing all e-mails attached to the submission or policy. |
|
Notes & Follow Ups |
Opens a window listing all notes attached to the submission or policy. These notes can be viewed, edited, deleted, marked as complete, and new notes can be created, all through this window. |
|
Policy Transactions |
Opens a window listing all transactions in the currently selected term. Clicking a transaction will open it for viewing and editing (if possible). |
Actions Widget
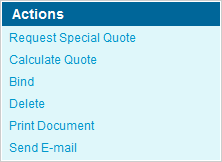
The action buttons from the bottom of the submission/policy form have been moved to the Actions widget. The Next, Previous, and Save and Refresh buttons have been added to the bottom of the form (see the Navigation section below), but all other functions are now handled through the Actions widget. This includes submission actions such as Bind and Issue Quote, but also includes other options such as Print Documents and Send E-mails.
The Calculate Quote action is a special action that allows the user to perform the quote calculation process independently of the calculation points set for navigation. This action is available to users with the new CalculateQuoteAction right, provided to the Underwriter, Underwriter Supervisor, and Compliance Manager roles by default.
The available actions still depend on the type of transaction, the status, and the rights of the user. Detailed descriptions of the actions are available in the Workflow Guides - 2.0.0, available for Clients, Distributors, and Underwriters.
Submission Screens
The Submission Screens widget is described in the Navigation section below.
Moving between screens and tracking your progress in a multi-screen workflow is achieved using the navigation controls around the screen.
Next/Previous: The user can move forward or back one screen at a time using the Next and Previous buttons below the submission/policy form.
The Next button saves the current screen and perform any validations or quote calculations assigned to the current screen. Depending on the results of the validations, the user may be moved to the next page, or may have to make corrections before being allowed to proceed.
The Previous button can be used to step through the previous screens, either to make changes or just to review information. Moving back will not save the current screen, nor will it perform any validations or calculations. If changes are made, the submission will need to be saved using Next or Save and Refresh before clicking previous again.
A third button, Save and Refresh, saves the screen and performs any validations or recalculations, but keeps the user on the current screen.
Progress Bar: Lists the steps in the current workflow, and displays the current progress of completed steps.
While navigating through the workflow, any errors or messages are displayed directly under the Progress Bar.
Navigation Widget: Lists all steps and screens, allowing the user to instantly jump to any screen in the workflow. This widget is only available to users with the new "ViewPolicyMenuWidget" security right. This right has been automatically assigned to the Underwriter, Underwriter Supervisor, and Compliance Manager roles.
In order to support the multi-screen workflow, various changes were required throughout the system. The sections below identify the changes and additions, with references to the full documentation where the features are described in detail.
The Validation Rules page under the Master Cover menu has been renamed Validations and Workflow Actions.
Previously, the majority of validation rules were triggered on calculating a quote. Now, some rules can be set to evaluate for individual screens in the workflow when the user clicks the Next or Save & Refresh.
Other validation rules are still associated with the quote process, but the quote process itself can be assigned to individual screens. On trying to move to the next screen, the system will perform all actions related to calculating a quote, and evaluate any validation rules related to the quote process.
Validations related to binding a policy are unchanged, still being triggered when the user attempts to bind.
For full details, see the Validations and Workflow Actions section of the Bridge 2.0.0 - User Guide - Master Covers.
The Workflows section has been redesigned for the new workflow structure.
Single screen workflows are still supported. Style radio buttons allow the workflow to be designated as Single Screen or Multi-Screen. When Single Screen is selected, a dropdown list is available to select the one screen for the workflow.
When Multi-Screen is selected, a grid becomes available to create the steps in the workflow and assign screens. Multiple steps can be created to divide the full workflow into sections, and each step can have one or more screens. The submission/workflow section includes a navigation bar displaying the steps and the user's progress through the workflow, with a list of individual screens to the side of the submission form. The user can navigate using Previous and Next buttons, or use the steps and screens to quickly move between sections (with some limitations).
For full details, see the Workflows section of the Bridge 2.0.0 - User Guide - Product Design.
With the new screen elements, the Colors section of portal maintenance has been updated. The new elements have been woven into the existing color palette, so that no manual changes are required. The colors can be reviewed and adjusted if necessary.
See the Portals section of the Bridge 2.0.0 - User Guide - Reference and Administration.
Previously, the effective period of a policy would cover the date range between the Effective Date and Valid Until date, including the full first and last days. A renewal would start on the day after the Valid Until date.
Two new controls have been added, allowing the effective period to start and end at a specific time of day (to the hour), and to begin renewals on the last day of the previous term instead of the day after.
In the Master Covers - General Information page, the Display Valid Until Date With Same Day & Month as Effective Date and Policy Start Time settings have been added to the Effective Period panel.
Display Valid Until Date With Same Day & Month as Effective Date: This option will add a day to the default Valid Until date when creating submissions and transactions, and will cause renewals to start on the last day of the previous term instead of the following day.
Policy Start Time: By default, the time for the Effective Date and Valid Until date fields (the "effective period") in a submission or policy is set to midnight (12:00 AM, not shown in the submission/policy form). With this option, the effective period can be set to begin and end at a specific time of day (to the hour).
•When set to 12:00 AM, the effective period will include the full first day, and may or may not include the full last day of the period, depending on the Display Valid Until Date With Same Day & Month as Effective Date setting.
•When set to any other time, the effective period will be from the selected time of the first day, to the selected time of the last day. The Display Valid Until Date With Same Day & Month as Effective Date setting should be checked with this setting or the time will default back to 12:00 AM.
When the two features are used together, a policy can be set to start and end at a specific time of day, and have a renewal start at that time on the last day to create a seamless transition.
|
|
Note: Once submissions have been created for a master cover, these settings should not be modified or it will create inconsistencies between the different submissions. This includes master covers created before this release. |
For more details on using these new options, please see the General Information section of the Bridge 2.0.0 - User Guide - Master Covers.
When a quote is calculated for a submission, underwriters are attached to the submission according to the settings in the master cover. Being attached to the submission or policy does allow users from the underwriter companies to access and manage those submissions/policies (with the necessary security rights), however they cannot edit the attached client.
A new checkbox, Allow Insurers to Edit Clients, has been added to the Policy Settings page in the master cover. When checked, underwriter users will be permitted to edit the client information (if they have the necessary rights), for submissions under the selected master cover. If unchecked (the default setting), underwriter users will not be permitted to edit the client information.
For more details on configuring master covers, please see the Bridge 2.0.0 - User Guide - Master Covers.
Previously, any documents generated under a submission or policy would be produced in PDF format. This new feature allows generated documents to be output as Word ".docx" files, allowing the content to be edited.
When printing a new document, the Word option is available in the Format options of the New Document window.
A common use of this feature is to generate a document, modify it, then upload it back to the submission or policy as an attachment.
A new security right, GenerateWordDocument, has been added to the system to regulate use of this feature. Since this feature can be used to alter "official" documents, this right has not been added to any security roles by default. The right can be provided to specific users who need this ability.
|
ë |
Notes about Combined documents: When printing a Master document with Associated documents, the Word version will combine the formatting of all the documents as follows: |
|
•Any dynamic Table of Contents in the master document or any associated documents will be updated to include the entire final document. For this reason, the table of contents should only be included in the master document. Any table of contents that has been entered manually instead of inserted by Word will not be updated. | |
|
•Any dynamic Page Numbering will be renumbered through all combined documents. Any manual page numbering, or pages without numbers, will not be changed. If section breaks or bookmark references are used to control dynamic numbering, they will be maintained and the pages will be numbered accordingly. | |
|
•Defined Styles will be maintained throughout all documents. However, any text that does not have a defined style will inherit the style from the master document. |
For more details on printing documents, please see the appropriate Bridge 2.0.0 - User Guide - Workflow document.
The Australian Business Number (ABN) is an encoded number used for business within Australia. A new function has been added to confirm if a provided ABN number is valid. The result of the function can be used to trigger a validation, requiring the user to enter a valid number.
$IsAbnValid(p0)
Validates a text field to determine if the content is a valid Australian Business Number (ABN).
P0 (text) Field to be examined
Returns (numeric): 1 if the field contains a valid ABN, or returns 0 if the value is not valid for any reason (too short, contains letters/special characters, failed encoding check, etc.)
For more details on configuring calculated fields, please see the Bridge 2.0.0 - User Guide - Calculated Fields.
The policy numbering settings have been expanded to allow greater control over the appearance of bound policy numbers, and even where the policy numbers come from.
The settings have been removed from the General Information page in the master cover, and are now in their own page, Policy Numbering.
The Prefix and Suffix can be set as static text, identical to the old settings, but also can be set to pull the prefix or suffix text from a field in the submission workflow. The field may be entered by the user, or may be calculated from other fields or system information. The Separators between the sequence number and the prefix or suffix can now be set to a variety of characters, or even omitted completely.
The Sequence Number itself now includes the option for leading zeros, adding zeros before the sequence number to bring it to a specified length.
If you prefer not to use the system-generated sequence numbering, the entire policy number can be pulled from a field within the submission workflow. Again, this may be a field entered by the user, or a calculated field.
These changes will have no impact on existing policy number settings. The existing prefix and suffix settings will be maintained as the static text option, with the default dash (-) as the separators. The current numbering will also be maintained.
For more details on configuring master covers, please see the Bridge 2.0.0 - User Guide - Master Covers.
The default commission per distributor can now be overridden using a field within the submission form itself. The commission could be taken from a calculated field based on a variety of options, or could be an open field where the user can enter or select a commission amount. An optional trigger can also be set to determine if the system will use the default commission from the master cover or the one from the submission form.
Commission overrides still exist per premium type, and will override both the default commission and any value from the submission form.
The commissions are configured separately for each distributor attached to the master cover.
For more details on configuring master covers, please see the Bridge 2.0.0 - User Guide - Master Covers.
Previously, when creating a renewal, all dynamic fields would be copied into the new transaction for the new term. A new setting has been added to the Field Management page, providing control over whether or not each individual field is copied over into a renewal transaction.

The Policy Settings panel allows each field to be set to either copy the content from the Source Transaction or to reset the field to its Default value (leaving it blank if no Default value is defined).
For more details on configuring fields, please see the Bridge 2.0.0 - User Guide - Product Design.
The Trigger section of the Quote Report has been enhanced to include triggers used within functions in calculated fields, as well as a full list of all triggers in the system evaluated against the details of the currently selected submission or policy. If any triggers encountered errors during evaluation, they will also be listed to assist troubleshooting.
To assist with troubleshooting and managing triggers, each trigger listed in the Quote Report is now followed by a link to the Trigger Management page for the chosen trigger. The Trigger Management page opens in a new tab or new window, depending on your browser settings.
The Trigger Management page has also been enhanced to provide additional information. The new Dependencies panel identifies how the trigger is linked to other resources in the system.

|
Triggers Used by this Trigger |
Lists all triggers used in the conditions for this trigger. As with the Quote Report, the links open the Trigger Management page for the selected trigger. |
|
Triggers Using this Trigger |
Lists all triggers that refer to this trigger in their conditions. Again including a link to the Trigger Management page for the selected trigger. |
|
Usage in System |
Identifies where the trigger is used for master covers or overrides. For master covers, the name of the master cover is provided, followed by the section where the trigger is used. For overrides, the type of override is provided, followed by the field and panel names where the trigger is used. |