The main menu has been reorganized to better group related features.
The Products and Reference menus have been merged into the new Product Design menu.
The Product Design menu includes the following options:
•Products
•Option Lists
•Fields
•Panels
•Screens
•Workflows
•Premium Types
•Triggers
•Clauses
•Document Templates
•E-mail Templates
•Export/Import
Instead of selecting a product to access the specific settings, each resource created within Product Design can be assigned to the Line of Business and Product during creation or when modifying the resource at a later time.
Previously, most elements in the system were created for a specific Line of Business, Product, or Workflow. These elements would be unavailable outside of their selected areas, meaning some elements would need to be re-created multiple times.
With this update, many elements can be shared. When selecting the Line of Business, "All" may be selected to share the element across all Lines of Business. If a specific Line of Business is selected, some elements can be further restricted by selecting a Product, or "All" may be selected again to share the element across products.
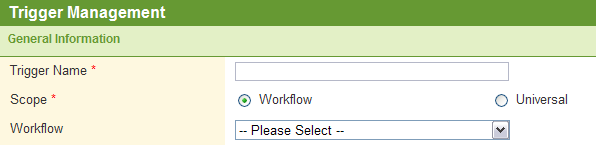
Triggers are handled differently. A trigger can be defined as Universal, or restricted to a single Workflow.
If the Workflow radio button is selected, a Workflow must be chosen from the dropdown menu. If Universal is selected, the trigger can be used for all workflows.
Notes:
A Universal trigger can only be used with fields that are available to all lines of business. This prevents a trigger from being created with fields that may not be available.
While elements may be shared, they will still only be available to the owner company and users with the necessary rights and administrative level.
When creating a workflow, it was possible to create contradicting rules and settings that would create problems in the workflow.
Several validation rules have been added to prevent the creation of such conflicts.
•Calculated fields are evaluated for integrity.
•All rate and limit driver fields used within a Master Cover must exist in the workflow.
•All fields related to all triggers used within a Master Cover must exist in the workflow.
•Fields cannot be both Required and Read-Only without having a Default value. This check is also done when setting override behaviors.
•When a trigger is deactivated, it is removed from all records, such as Master Cover rates, limits, deductibles, etc.
•Option list items cannot be deleted if they are used in any triggers.
•Fields cannot be deactivated if they are used in calculated fields.
With the addition and modification of various features throughout the system, some changes to the security rights were necessary. To minimize the impact on existing accounts, some security roles have been modified to maintain the original purpose of the role.
The following changes have been made:
•The availability of the Edit Submission button is now controlled by the Edit Submission right instead of the Edit Policy right. Consequently, the Edit Submission right was added to all security roles that have the Edit Policy right.
•Previously, for submissions in Incomplete and Quoted statuses, a user needed the Create Submission or the Edit Submission rights in order to save any changes to the submission. Now, the Edit Policy right will also allow changes to be saved.
•The availability of the Recalculate Quote button now requires either the Edit Submission or Create Policy rights. Previously, access to this button required either the Edit Submission or Create Submission rights.
•For submissions in Incomplete status, users required the Create Submission right to view and use the Get Quote button. Access to that button is now controlled by the Create Policy right.
•Premium, Tax, and Currency information is now available in the Submission/Policy List grids. However, users will need the View Premium right to see these columns.
•The following rights have been added to all security roles that have the Edit Submission right:
o View Premium
o View Limits
o View Deductibles
o View Conditions
o View Notes
o View Attachments
o Create Note
o Create Attachment
•The Master Cover includes a new section for E-mail Configurations. This new feature uses the same right as the Notifications section, View Master Cover Notifications.
•The new E-mail Template section within Product Design is controlled by the following rights:
o View E-mail Templates
o Create E-mail Templates
o Edit E-mail Templates
o Delete E-mail Templates
•The above four rights for E-mail Templates have been added to the Product Designer security role. The View E-mail Template right was also added to the Underwriter Supervisor role.
Note: If you feel that any of these changes will have a negative impact on your workflow or any existing user profiles, please contact your System Champion to request any necessary changes to affected users or security roles.
A new feature has been added allowing users to send pre-formatted emails from within the system. The availability of each email template can be controlled with settings based on the user's security roles, as well as the type and status of each submission or policy.
Under the Product Design menu, select Email Templates. The E-mail Templates list opens, displaying all available templates.
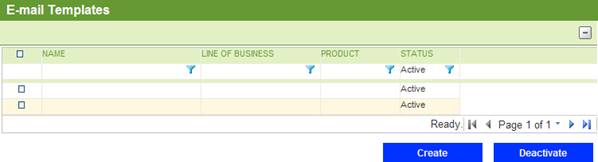
Click the Create button. The Manage Product - E-mail Templates page opens.
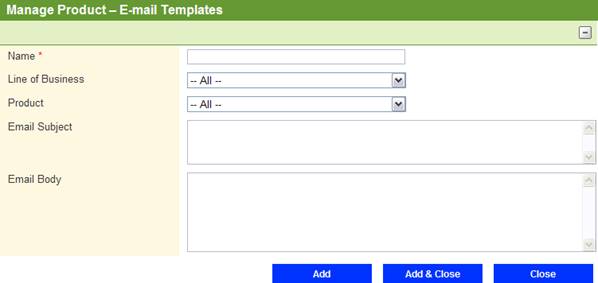
Name: Enter the name of the template as it will appear in the system. This name will be used to select the template when configuring emails, and will be shown when selecting the email in the submission form.
Line of Business: Select a line of business to make this template exclusively available to a single line of business. Select All to make the template available to all lines of business.
Product: If a Line of Business has been selected, a product can also be selected to make this template exclusively available to a single product. Select All or leave the menu as Please Select to make the template available to all products.
Email Subject: Enter a default subject line for the email. When attaching the template to a Master Cover, it can be set to allow users to edit the default subject line before sending.
Email Body: Enter the default text for the email body. When attaching the template to a Master Cover, it can be set to allow users to edit the default text before sending.
Click Add to save the template but remain on the page, click Add & Close to save the template and return to the Email Templates list, or click Close to return to the Email Templates list without saving the template.
Attaching Templates to a Master Cover
Click Master Covers in the main menu. The Master Covers list opens.
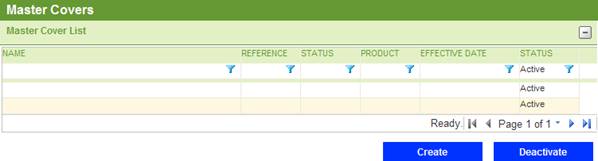
Click a link in the Name column to open the Master Cover. The main menu expands with additional options for the Master Cover.
Click E-mail Configurations. The Master Cover - E-mail Configurations page opens with a list of all currently attached email templates.

Click Create. The Master Cover - E-mail Configurations page opens for the new email setup.

Product: Identifies the product associated with the Master Cover.
Status: Identifies the current status of the Master Cover.

E-mail Templates: Select the template to be attached to the Master Cover.
From Address: If the email should appear to be from a specific sending address, enter that address here. Any replies will be sent to this address. If no address is provided, the system will use the email address of the user sending the email.
Allow Manual Override: Check this box to allow the user to edit the subject line and body text of the email before sending. If unchecked, the subject and body will appear as they were entered in the template setup page, and cannot be changed.
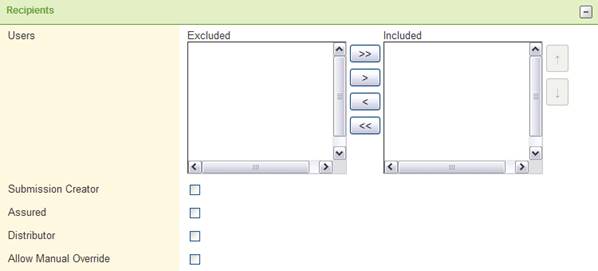
Users: Select the default users to receive the email.
•Use
the double right arrow  to
add all items to the Included list.
to
add all items to the Included list.
•Use
the double left arrow  to
remove all items from the Included list.
to
remove all items from the Included list.
•Select
one or more items in the Excluded list, and click the right arrow  to add them to the Included list.
•Select
one or more items in the Included list, and click the left arrow  to remove them from the Included
list.
to remove them from the Included
list.
•Use the up and down arrows to the right of the Included list to change the order of the included items.
Note: To select and move several items at once, select one item then hold the Shift key and select another item to select all items in between, or hold the Ctrl key to select individual items.
Submission Creator: Check this box to send the email to the user who created the submission or policy.
Assured: Check this box to send the email to the assured attached to the submission or policy. If the assured is a company, the email will be sent to the designated primary contact for that company. If no primary contact has been designated, the email will be sent to the first user in the user list.
Distributor: Check this box to send the email to the distributor attached to the submission or policy. The email will be sent to the designated primary contact for the company. If no primary contact has been designated, the email will be sent to the first user in the user list.
Allow Manual Override: Check this box to allow the user to edit the Users list, as well as the checkboxes for Submission Creator, Assured, and Distributor before sending the email. The user will also be able to manually add additional email addresses to the Additional To, Cc, and Bcc fields. If unchecked, the selected recipients will be displayed, but cannot be edited.

Policy Transaction Type: Select the types of transaction where the email will be available.
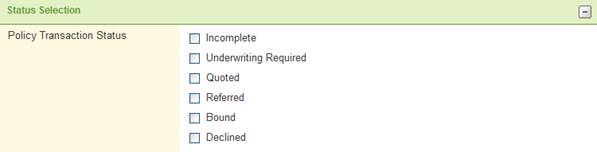
Policy Transaction Status: Select the statuses where the email will be available.

Security Role: The email may be restricted to users with specific security roles. Check all security roles that should have access.
Note: When viewing the Master Cover - Emails Configurations list, the Transaction Selection, Status Selection, and Security Role Selection settings will be combined and displayed in the Availability column.
Click Save to save the settings but remain on the page, click Save & Close to save the settings and return to the Email Configurations list, or click Close to return to the Email Configurations list without saving the settings.
Sending Emails from a Submission or Policy
When a user is viewing a submission or policy that has one or more available email templates, the Send E-mail button and selection menu will be available near the bottom of the form.

Select an email from the dropdown menu, and click Send E-mail. The E-mail Message page opens.
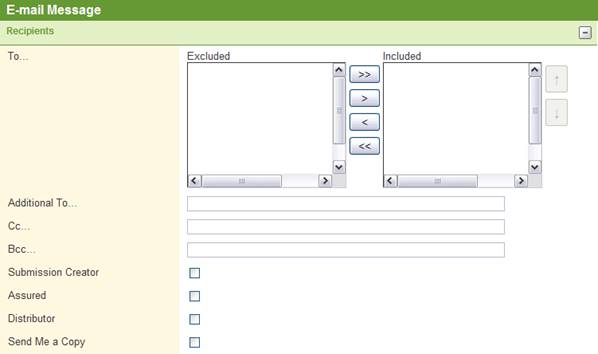
To: If the manual override is not checked for this email template, the To field will display the pre-set list of recipients. If the manual override is checked, recipients can be added or removed.
•Use
the double right arrow to
add all items to the Included list.
•Use
the double left arrow to
remove all items from the Included list.
•Select
one or more items in the Excluded list, and click the right arrow to add them to the Included list.
•Select
one or more items in the Included list, and click the left arrow to remove them from the Included
list.
•Use the up and down arrows to the right of the Included list to change the order of the included items.
Note: To select and move several items at once, select one item then hold the Shift key and select another item to select all items in between, or hold the Ctrl key to select individual items.
Additional To: Any additional recipient addresses can be added in this field. Multiple addresses should be separated by commas. This field is only available if Manual Override has been checked for this email template.
Cc: Any recipient addresses to be CCed can be added in this field. Multiple addresses should be separated by commas. This field is only available if Manual Override has been checked for this email template.
Bcc: Any recipient addresses to be BCCed can be added in this field. Multiple addresses should be separated by commas. This field is only available if Manual Override has been checked for this email template.
Submission Creator: Check this box to send the email to the user who created the submission or policy. This box is only available if Manual Override has been checked for this email template.
Assured: Check this box to send the email to the assured attached to the submission or policy. This box is only available if Manual Override has been checked for this email template.
Distributor: Check this box to send the email to the distributor attached to the submission or policy. This box is only available if Manual Override has been checked for this email template.
Send Me a Copy: Check this box to send a copy of the email to the address registered in your user account.

From: Displays the user name or email address that will be shown as the sender of the email.
Email Subject: Displays the subject line of the email, as it will appear on the outgoing email. Any placeholders will have been replaced with the appropriate system data. If Manual Override has been checked for this email template, the subject can be edited.
Email Body: Displays the body of the email, as it will appear on the outgoing email. Any placeholders will have been replaced with the appropriate system data. If Manual Override has been checked for this email template, the body can be edited.
Click Send to send the email and return to the submission or policy form, or click Close to return to the form without sending the email.
Viewing the Email History
Once one or more emails have been sent from a submission or policy form, the Emails panel will be available, listing all available emails. Only emails available to the user will be displayed, as defined by the security roles selected for the email template.

Click a link in the Subject column to view the email details.
The new custom email option has also been applied to the system emails that may be sent at various points in the submission workflow.
Previously, contacts were assigned to a Master Cover and a series of event related checkboxes would determine which notifications they would receive. Whenever an event occurred, a notification would be sent to each contact assigned to that event.
With this release, email templates can be created and assigned to specific event types. When the event occurs, the custom template is sent to the contacts assigned to that event or group of events. If no template is assigned to an event, then no emails will be sent for that event.
The Policy Workflow Emails panel is used to assign email templates to workflow events.
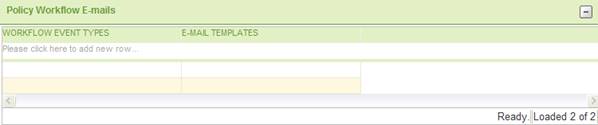
Click on the "Please click here to add new row" line to add a new event email.
Select one of the Workflow Event Types. Some events are unique to a specific combination of the submission or policy status and the action taken. Other events are more generic, and can apply to common actions taken on multiple types of submission or policy.
Select an E-mail Template. For information on setting up a template, click here.
From the E-mail Templates column, press the Tab key to add the event to the list.
Click Save to save the settings.
Note: Any one email template may be re-used for many event types, but each event type can only have one email template assigned to it in each Master Cover.
Custom email templates can now be used for password emails, instead of the system default emails. This allows for custom welcome messages and instructions.
Once the email templates have been created (see here for instructions), they can be assigned to different types of user.
Under the Administration menu, select Password E-mails. The Password E-mails page opens.
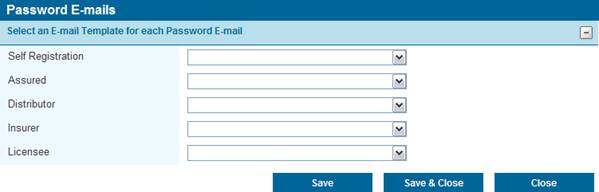
For each type of user, select an email template from the dropdown.
•Self Registration: This will be the first password sent to a new user who registered through the self registration page. Any additional passwords after the first will use the Assured template.
•Assured: This email will be sent to users under assured companies.
•Distributor: This email will be sent to users under distributor companies.
•Insurer: This email will be sent to users under insurer companies.
•Licensee: This email will be sent to users under licensee companies.
Click Save to save the settings but remain on the page, click Save & Close to save the settings and return to the Welcome Page, or click Close to return to the Welcome Page without saving the settings.
Note: If the password emails are not set, the system will use the default emails.
A new Special Quote workflow has been added. When a submission or endorsement is quoted, users with the Request Special Quote right can request a new quote, including an email to provide the details of their request.
Enabling Special Quotes in a Master Cover:
In the main menu, click Master Covers. A list of available Master Covers opens.
Click a link in the Name column to open a specific Master Cover. The Master Cover is displayed, and the Master Covers sub-menu expands.
In the sub-menu, click Policy Settings. The Master Cover - Policy Settings page opens.
In the Miscellaneous Settings panel, check the box for Allow Special Quote Requests.
Click Save to save the changes to the Master Cover.
Submitting a Special Quote:
When viewing a submission with Quoted or Endorsement - Quoted status, click the Request Special Quote button.
If confirmation notes are enabled for this action, the note page will appear. You can enter a note, if you choose. Click Confirm to complete the special quote request.
The status changes to Special Quote Requested. If a notification email has been configured for special quotes, it will be sent to the designated contacts listed in the Master Cover. If a note is entered, that note will be included in the notification email.
Users with the right to issue quotes can make any necessary changes to the premiums or terms, then issue the revised quote. The quote may also be bound or declined by users with the appropriate rights.
This process may repeat as many times as necessary to reach an agreement.
A new setting is available in the Master Cover, allowing endorsements to be created out of sequence.
Previously, endorsements could only be created from the most recent bound transaction record. Now, with the appropriate settings, an endorsement can be created from any bound transaction in the Policy Transactions list.
All information will be copied from the selected transaction into the endorsement submission. The Effective Date and Valid Until Date can be set for any date range within the term of the original policy.
With this process, endorsements can overlap. This allows for the creation of time-specific changes, without affecting other underlying endorsements.
The submission/policy page includes several default panels. Previously, some of these panels would be shown at all times, and others would appear depending on the status of the submission or policy.
Now, some of these default panels can be shown or hidden according to the user's security rights, defined in their security roles. A new "View" right is available for each of these panels.
•Quote Information: Displays the calculated premiums, taxes, and commissions for the submission or policy. This is controlled by the ViewPremium and EditPremium rights.
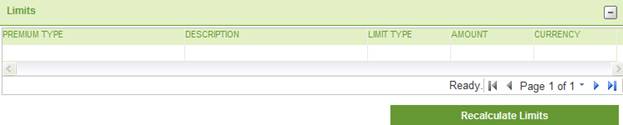
•Limits: Displays the limits defined for the submission or policy. This is controlled by the ViewLimits and EditLimits rights.
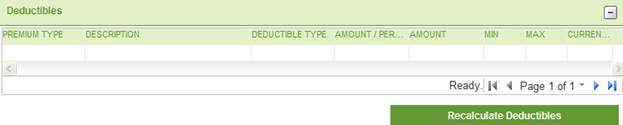
•Deductibles: Displays the deductibles defined for the submission or policy. This is controlled by the ViewDeductibles and EditDeductibles rights.
•Insuring Conditions: Displays the various Insuring Conditions and terms defined for the submission or policy. This is controlled by the ViewConditions and EditConditions rights.
Notes: For the panels listed above, the following rules apply:
For submissions in Bound or Quoted status, the user will need the appropriate View rights to view the panels.
For submissions in Underwriting Required, Referred, or Declined status, the user will need the appropriate Edit rights to view the panels.
•Notes: Displays any notes created under the submission or policy. This is controlled by the ViewNote right.
•Attachment List: Displays any files that have been attached to the submission or policy. This is controlled by the ViewAttachment right.
Note: For the panels listed above, the appropriate View rights will determine if the panel will be shown.
When a submission is in certain statuses, changes can be made that would affect the premiums, limits, deductibles, and conditions.
The Recalculate Quote button can be used to recalculate the entire submission. However, doing so would reset all four panels, as well as trigger any validation rules. A new button has been added to each panel, allowing just that panel to be recalculated without changing the status of the submission or triggering any validations.


To enable more detailed reporting, a field can be defined as the Insured Value and a premium type can be defined as the Primary Premium.
Defining the Insured Value:
Once defined, the Insured Value will be available to the Cognos reporting system for use in reports. Only one Insured Value can be defined for each Master Cover.
In the main menu, click Master Covers. A list of available Master Covers opens.
Click a link in the Name column to open a specific Master Cover. The Master Cover is displayed, and the Master Covers sub-menu expands.
In the sub-menu, click Policy Settings. The Master Cover - Policy Settings page opens.
In the Miscellaneous Settings panel, open the Insured Value Field dropdown.
Select the field to be used in the reports. Only fields for numerical values will be available.
Click Save to save the changes to the Master Cover.
Defining the Primary Premium:
Once the Primary Premium type has been defined, the Maximum Limit for that premium type will be available to the Cognos reporting system for use in reports. Only one Primary Premium can be defined for each product.
In the main menu, click Product Design. The Product Design sub-menu expands.
In the sub-menu, click Products. A list of available products opens.
Click a link in the Name column to open a specific product. The Product Management page opens.
In the General Information panel, open the Primary Premium dropdown.
Select a premium type.
Click Save to save the changes to the Master Cover.
An Effective Period date range can now be added to the following records within a Master Cover:
•Rates
•Validation Rules
•Limits
•Deductibles
•Taxes & Fees
•Documents/Forms
•Insuring Conditions
During creation or editing of any of these records, the Effective Date and Valid Until Date fields can be completed to define an effective period for that option. Each date can be left out to create an open-ended period.
Each of these options will only apply to policy transactions where the Effective Date (the beginning of the coverage period) falls within the specified Effective Period.
New options are available when creating lists. The list may be defined as a Limit Type list or a Deductible Type list.
When defining limits or deductibles, a column exists for the Type of limit or deductible (Per Occurrence, First Occurrence, or Aggregate, for example). Previously, only a few default options were available. Now, custom lists can be created to provide a variety of options.
Creating an Option List:
Under the Product Design menu, select Option Lists. The Option Lists grid opens, displaying all available lists.
Click Create. The Option List Management page opens.
Fill in the necessary information in the General Information panel.
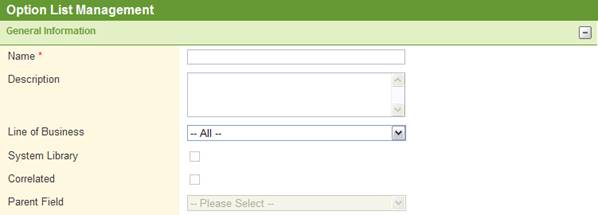
Name - Enter the name of the list.
Description - Enter a description of the list.
Line of Business - Select a Line of Business from the list of industry presets, or select All to make the list available to all lines of business.
Select the list format in the Data Source Properties panel.

Type - Select Static.
Resource Type - Select either LimitType or DeductibleType, depending on what list you are creating.
Next, add the individual items in the Option List Items grid.
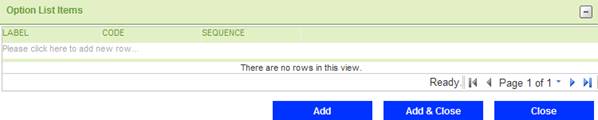
Click in the field marked Please click here to add new row.
Enter the Label of the list item. This is the text that will appear in the list in the submission form.
The Code field will be generated by the system when the option list is saved.
Enter a Sequence number. This will determine the item's position in the list, with lower numbers appearing first.
Note: It is advisable to leave gaps between the sequence numbers, such as 5, 10, 15. This allows new items to be added to the list at a later date, inserted between existing items. Otherwise, the sequence numbers of existing items will need to be changed to allow for the new addition.
Press the Tab key from the Sequence field or click outside the table to add the item to the list. The item will be highlighted in yellow to indicate that it has not been accepted yet.
Repeat these steps to add additional list items.
Click Add to save the option list but remain on the page, click Add & Close to save the option list and return to the option list table, or click Close to return to the option list table without saving the option list.
Assigning an Option List to a Master Cover:
In the main menu, click Master Covers. A list of available Master Covers opens.
Click a link in the Name column to open a specific Master Cover. The Master Cover is displayed, and the Master Covers sub-menu expands.
In the sub-menu, click Policy Settings. The Master Cover - Policy Settings page opens.
In the Types panel, open the Limits or Deductibles dropdown.
Select the appropriate option list.
Click Save to save the changes to the Master Cover.
The Type options defined in the list will now be available when adding limits or deductibles, either through the Master Cover or through the submission form.
When taking certain actions on a submission, such as Bind, Request Quote, or Decline, a Note page is displayed allowing the user to attach a note related to the activity. If the user does not want to attach a note, they could click Confirm to proceed without creating a note.
Those Note pages can now be activated or deactivated individually. This creates a customized workflow where the opportunity to create notes is restricted to suitable activities.
Note: This does not affect the ability to manually add notes to the submission or policy. Users with the CreateNotes right can still add notes manually.
Modifying the Notes Settings:
In the main menu, select Master Covers. The Master Cover List opens.
Click a link in the Name column to open the Master Cover. The main menu expands with additional options for the Master Cover.
In the Master Covers sub-menu, select Notifications. The Master Cover - Notifications page opens.
In the Notes Confirmation panel, check or uncheck any options to determine if the Note page will appear for those activities.
Click Save to save the changes to the Master Cover.
If Quote Validation rules are setup for a Master Cover, those rules will now be enforced when using the Issue Quote button. If changes have been made to the submission so that it no longer complies with the validation rules, then the user will be unable to proceed with issuing the quote until corrections are made.
As this may cause issues with some workflows, a bypass option has been added. When the bypass is active, quote validation rules will be ignored when clicking Issue Quote, but will still be applied at all other stages.
Activating the Quote Validation Bypass Option
In the main menu, select Master Covers. The Master Cover List opens.
Click a link in the Name column to open the Master Cover. The main menu expands with additional options for the Master Cover.
In the Master Covers sub-menu, select Policy Settings. The Master Cover - Policy Settings page opens.
In the Miscellaneous Settings panel, check the Bypass Quote Validations on Issue Quote checkbox.
Click Save to save the changes to the Master Cover.