Data Importer Data Value Mappings
In This Topic...
Create and manage the Data Value Mappings of a Template.
Users can map policy data such as Countries or Currencies, to custom values that are different from the values required by the system. This is effective when uploading the Excel file for import, as users can enter their custom values in the Data Value Mapping instead of using the system codes, and then the system will correctly retrieve the field values based on these mappings.
For example, the system uses the ISO country code for Canada (CA) to process the request, and you have created a custom value for this as "Canada" in the Excel file. When uploading the file in the Data Importer, when CA is provided under the Country column as the value, the system will automatically retrieve "Canada" as a result.
Viewing Data Value Mappings
To view the details of a saved mapping.
Before Getting Started
- You are assigned the Manage Uplink & Data Importer Templates security right.
-
You have already accessed Data Importer from the Administration menu.
Steps
-
From the main menu navigate to the Template List. The Template List is displayed.
-
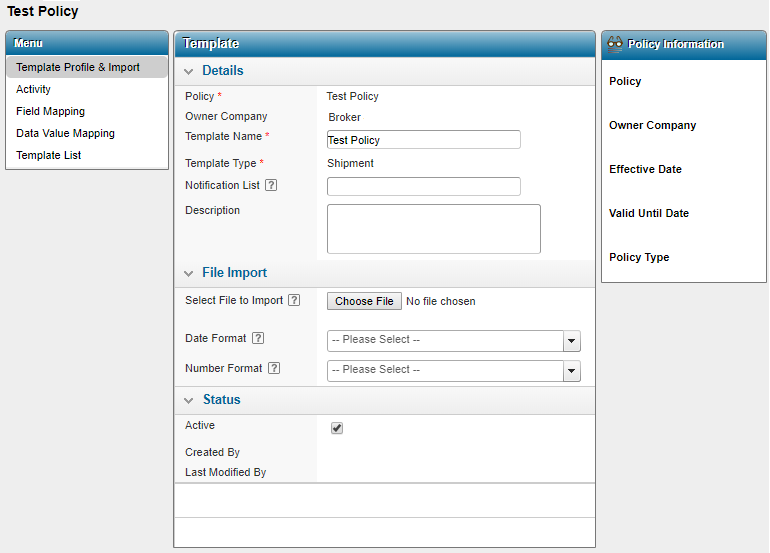
Click the View Details link to display the Template page.
-
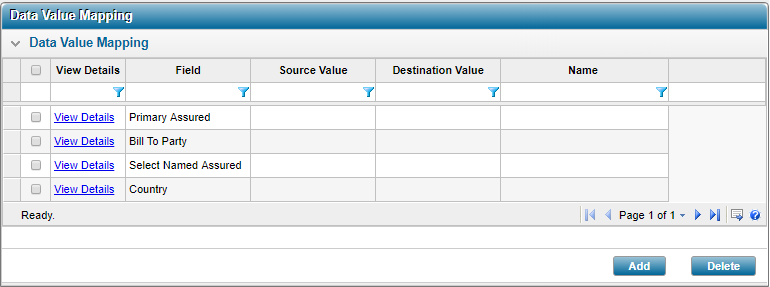
Click Data Value Mapping from the Menu on the left. The Data Value Mapping list is displayed.
Creating Data Value Mappings
Based on the Field Mapping process, once a file has been imported users with the appropriate security rights can create Data Value Mappings for the fields that were pulled from the system. A Data Value Mapping uses a source value provided by the user, and translates it to a system-generated value.
Why would I need to Create a Data Value Mapping?
Users can map policy data such as Countries or Currencies, to custom values that are different from the values required by the system. This is effective when uploading the Excel file for import, as users can enter their custom values in the Data Value Mapping instead of using the system codes, and then the system will correctly retrieve the field values based on these mappings.
Before Getting Started
- You are assigned the Manage Uplink & Data Importer Templates security right.
-
You have already accessed Data Importer from the Administration menu.
Steps
-
From the main menu navigate to the Template List. The Template List is displayed.
-
Click Data Value Mapping from the Menu on the left. The Data Value Mapping list is displayed.
-
Click Add. The Data Value Mapping window opens.
Enter the details of the mapping. Fields marked with a red asterisk * are required.
Note: Users must follow the general rules and dependencies that apply to the Shipment Form when creating the Data Value Mapping in order to avoid errors.
- Click Save to save the new mapping, click Save and New to save the mapping and create a new one, click Save and Close to save the mapping and close the window, or click Close to close the window without saving the mapping.
Result
The mappings are saved for use in the booked shipment.
Data Value Mappings for Storage Via the Shipment Form Policies
When creating the Excel file to be imported through the Data Importer, special considerations must be made for policies that are configured for Storage Via the Shipment Form (SVTSF). Prior to uploading the file, users must configure the Field Mappings and Data Value Mappings accordingly for the SVTSF policy.
For policies configured for SVTSF, users are not required to map the each country field for Loading/Discharge/Origin/Destination countries. Instead, users can map all country fields to a single Country field by providing a Named Location or Unnamed Location, and specifying this in the Excel file created. When the storage certificate is generated, the specified country will be displayed in each field accordingly.
Modifying a Data Value Mapping
To modify to any values that may have changed within the shipment booking process.
Before Getting Started
- You are assigned the Manage Uplink & Data Importer Templates security right.
-
You have already accessed Data Importer from the Administration menu.
Steps
-
From the main menu navigate to the Template List. The Template List is displayed.
-
Click Data Value Mapping from the Menu on the left. The Data Value Mapping list is displayed.
-
Select the Data Value Mapping you wish to open. The Data Value Mapping modal opens.
Modify the details of the mapping as necessary.
- Click Save to save the new mapping, click Save and New to save the mapping and create a new one, click Save and Close to save the mapping and close the window, or click Close to close the window without saving the mapping.
Result
The mappings are saved for use in the booked shipment.
Deleting a Data Value Mapping
Before Getting Started
- You are assigned the Manage Uplink & Data Importer Templates security right.
- You have already accessed Data Importer from the Administration menu.
Steps
-
From the main menu navigate to the Template List. The Template List.
-
Click Data Value Mapping from the Menu on the left. The Data Value Mapping list is displayed.
-
Click the checkbox next to the View Details link of the mapping you wish to delete. Note that users can delete multiple mappings at the same time by selecting the checkbox next to each mapping to be deleted.
- Click Delete.
Result
The mapping(s) is removed from the list.


