Reporting a Loss
In This Topic...
Submitting the First Notice Of Loss (FNOL) begins the claim process. The FNOL will be sent to the insurance representatives in charge of claims, who will choose to either reject or accept the claim.
There are four steps involved in submitting an FNOL
-
Enter personal information, if necessary.
If logging onto the system to report a loss, the personal information will already be filled in. If reporting a loss without logging on, the personal information will need to be entered.
- Enter policy/loss information.
- Enter voyage information.
- Enter additional information.
Steps
-
In the main menu bar, open the Claims menu, and select Report a Loss. The First Notice of Loss page opens.
Note: If the original shipment can be accessed, looking up the shipment and clicking the Report a Loss button at the bottom of the shipment page will also begin the process. This will automatically fill in some sections of the form.
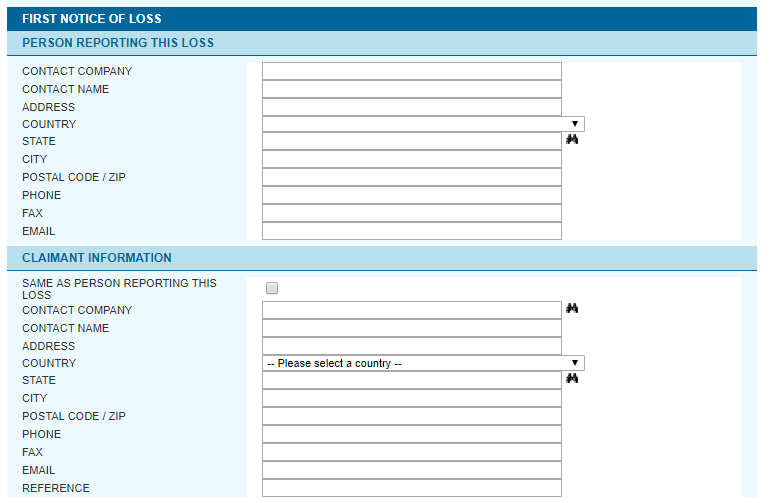
- Enter the contact information of the person reporting the loss. If the FNOL is being entered after logging in, this information will already be filled in.
- Enter the claimant contact information if the claimant is not the person reporting the loss. If it is the same person, select Same as person reporting the loss to copy the information from the previous section.
-
Click Next to proceed to the next page.
-
Note: If the FNOL is being submitted after logging in and selecting a policy, the Policy Number and Policy Name fields will already be filled in. If the claim is to be submitted under a different policy, it can be selected from the lookup. If the FNOL process was started from a certificate, the Certificate Number will also be completed.
-
Click Next to proceed to the next page.
-
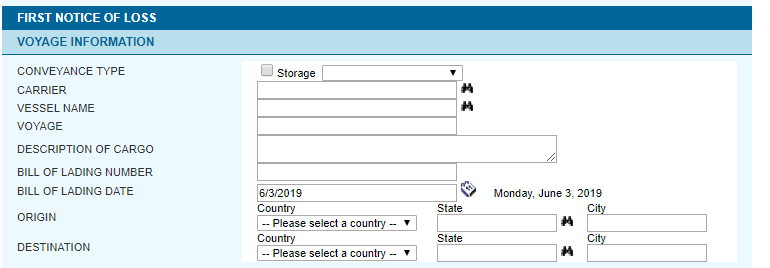
If the coverage was for cargo held in storage, check the Storage box. Otherwise, select the type of conveyance for the shipment. Enter the name of the carrier. If the FNOL is being submitted after logging in and selecting a policy, the carrier may be selected from the system using the lookup. Selecting a carrier will narrow down the results in the Vessel field. If the Vessel field is completed first using the lookup, the Carrier field will be filled in automatically. Enter the name of the vessel. If the FNOL is being submitted after logging in and selecting a policy, the vessel name may be selected from the system using the lookup . Selecting a vessel will automatically fill in the Carrier field. If the Carrier field is completed first using the lookup, the vessel names available in the lookup will be limited to the selected carrier. Enter a voyage number, flight number, or a transit reference number, if necessary.
Enter a description of the cargo.
Enter the bill of lading number, if necessary.
This field defaults to the chosen Date Of Loss. Enter the bill of lading date, if necessary, or click the calendar lookup to select a date.
Select the country of origin for the cargo, enter the state if applicable, and enter the city name.
Select the destination country for the cargo, enter the state if applicable, and enter the city name.
Note: If the claim was begun from the shipment page, or a valid certificate number was entered in the Policy Information section, many of the Voyage Information fields will already be filled in.
-
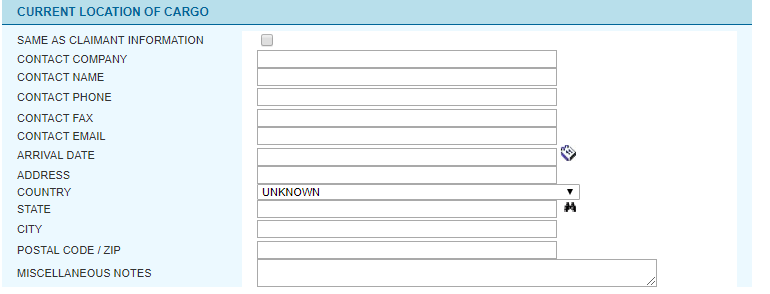
Enter the Current Location of Cargo.
-
Click Next to proceed to the next page.
Select a Settling Agent and enter any Other Information, if applicable.
-
Click Submit to complete the First Notice of Loss. The Claim Review window opens with a summary of the claim information as well as the following tracking information:
The FNOL is automatically sent to the claims representatives for review.
- Notes and supporting documentation may be added to the claim via the Claim Review screen. This can be done immediately after submitting the FNOL, or when looking up the claim at a later time.
Adding Notes and Documents Claims
Once a First Notice of Loss has been submitted, or once it has been acknowledged as a claim, notes or documents can be attached to provide additional information. The notes can also be emailed to various contacts.
Note: The appropriate user rights are required to attach notes and files to claims. For more information, contact your insurance representative.
How to Add a Note to a Claim
Steps
-
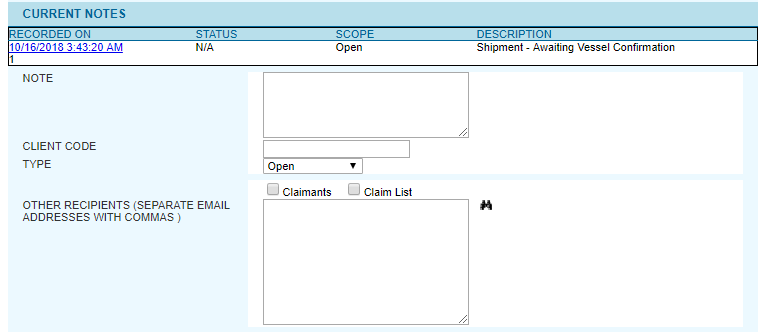
Submit a FNOL or look up and select an existing FNOL or claim. The Current Notes section will be near the bottom of the page.
-
Notes can be emailed to various contacts. The emails will include the note, as well as the claim number, date reported, date of loss, and the claimant name.
Other Recipients: Type the email addresses of any other parties who are to receive a copy of the note (separate individual addresses with commas). Check the boxes for Claimants to add the email address listed for the claimant, and/or Claim List to add the addresses of the insurance representatives in charge of the claim.
- Click Submit to add the note. If any email contacts were designated, the email will be sent immediately.
How to Attach a Document to a Claim
Steps
-
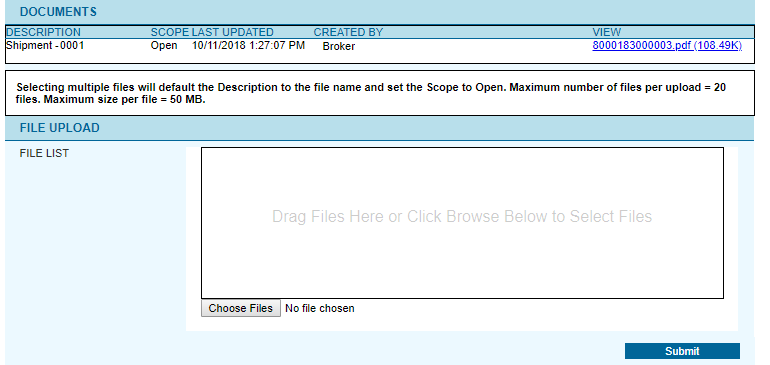
Submit an FNOL or look up and select an existing FNOL or claim. The Documents section will be near the bottom of the page.
Note: Documents may be attached when viewing a claim without logging in, but only the Open scope will be available.
- Click Browse to open a standard Choose File dialogue box, and locate the file. Select the file and click Open.
-
Click Submit to attach the document to the claim.
Note: Once a note or document has been attached to the claim, it cannot be edited or deleted.
Reporting a Loss Without Logging On
A First Notice Of Loss (FNOL) can be submitted without logging in or even having an account for the system. Anyone may report a loss if they have the required information. Much of the information is on the certificate of insurance, so it is recommended to have the certificate available when submitting the FNOL.
Steps
-
In the Log On window, click Report a Loss. The First Notice of Loss page opens.
- Enter the contact information of the person reporting the loss.
- Enter the claimant contact information if the claimant is not the person reporting the loss. If it is the same person, select Same as person reporting the loss to copy the information from the previous section.
-
Click Next to proceed to the next page.
-
Enter the Policy Information.
Policy Number Enter the policy number the FNOL is being submitted under. Policy Holder Enter the name of the policy holder. Certificate Number Enter the certificate number from the certificate of insurance issued for the shipment.
-
Enter the Loss Information.
Date of Loss Enter the date the loss or damage occurred, or click the calendar lookup to select a date.
Estimated Loss Enter the amount being claimed, and select the currency. Description of Loss Enter a detailed description of the loss and/or damages. Supporting documents can be attached at a later step. -
Click Next to proceed to the next page.
-
Enter the Voyage Information.
Conveyance Type
If the coverage was for cargo held in storage, check the Storage box. Otherwise, select the type of conveyance for the shipment.
Carrier
Enter the name of the carrier.
Vessel Name
Enter the name of the vessel.
Voyage
Enter a voyage number, flight number, or a transit reference number, if necessary.
Description of Cargo
Enter a description of the cargo.
Bill of Lading Number
Enter the bill of lading number, if necessary.
Bill of Lading Date
This field defaults to the chosen Date Of Loss. Enter the bill of lading date, if necessary, or click the calendar lookup to select a date.
Origin
Select the country of origin for the cargo, enter the state if applicable, and enter the city name.
Destination
Select the destination country for the cargo, enter the state if applicable, and enter the city name. -
Enter the Current Location of Cargo.
Note: Check the box for Same as Claimant Information to copy the claimant information entered in the First Notice of Loss page, then complete any remaining fields.
Contact Information Enter information for the person to contact at the cargo's current location.
Arrival Date Enter the date the cargo arrived at the current location, or click the calendar lookup to select a date. Address Enter the address information for the current location of the cargo. Miscellaneous Note Add any notes related to the location or contact. -
Click Next to proceed to the next page.
Select a Settling Agent and enter any Other Information, if applicable.
-
Click Submit to complete the First Notice of Loss. The Claim Review page opens with a summary of the claim information as well as the following tracking information:
System claim number System-generated number for this claim. Security ID Identification number that is generated by the system for security purposes. Underwriter claim number A number may be assigned by the underwriter for internal reference purposes. Broker claim number A number may be assigned by the broker for internal reference purposes. - The status of the claim can also be verified without logging in.
Verifying the Status of a Claim Without Logging On
Anyone with access to the claim information can verify the status and details of the claim without needing an account for the system.
Steps
- In the Log On page, click View Claim Status. The View Claim Status window opens.
-
Provide the necessary information.
Claim Number The system generated claim number assigned to the claim when it was created. Security ID The system generated security ID number assigned to the claim when it was created. - Click Verify Claim.
- If a matching claim is found in the system, the Claim Review page will open.
