Managing Custom Events
Custom Events can be configured to create custom workflow processing events. This functionality enables the system to accommodate custom processing events outside of the core activities supported by the system by default.
When the defined conditions are met, a customized action button displays in the Screen Button Bar at the bottom of the claims workflow screen. When the user clicks this button, the claim automatically transitions from its current Status/Sub-Status to the Target Status defined for the Custom Event.
Notes: The Submit Claim link is not available in the Claim Actions widget when one or more custom event buttons are displayed in the Screen Button Bar. In order to provide the user with the option to submit a claim, a separate Custom Event must be configured with a target "Submitted" claim Sub-Status.
Claim Sub-Statuses are configured through a custom Option List. For additional information, see the Managing Option Lists for the Claims Workflow section.
Configuring a Custom Event
- Open the appropriate Workflow Container. For instructions on finding and opening a container, see the section on Managing Workflow Containers.
-
In the Workflow Container Menu widget, open the Workflow Management group and select Custom Events. The Event Configurations page opens with a list of all available events within the current container.

- Select an action.
- Click a link in the Name column to view an existing event.
- Click Add to add a new event.
- Check the boxes for one or more panels and click Deactivate to disable the selected events. Inactive events will still be supported for existing configurations, but cannot be selected for new configurations. An event can also be deactivated from the Event Details page.
- On viewing or creating a new event, the Event Details page opens.
-
The panels and fields are described below. Fields marked with a red asterisk * are required.

- Select an action.
- Click Save to save the Custom Event and remain on the page.
- Click Save & Close to save the Custom Event and return to the Event Configurations page.
- Click Close to return to the Event Configurations page without saving the Custom Event.

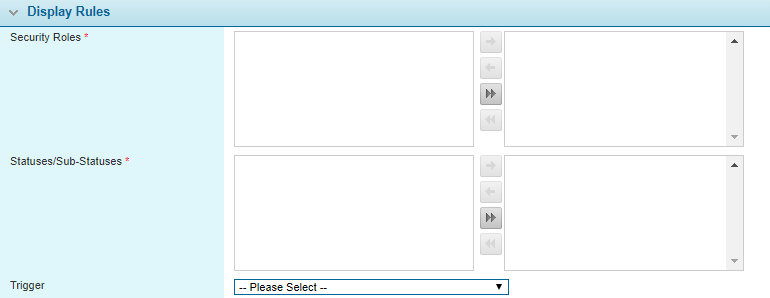
The Display Rules panel is used to designate the Security Roles and claim Statuses / Sub-Statuses for which the Custom Event will be available. The option to select a Trigger to determine the availability of the Custom Event is also supported.
Tip: A Custom Validation can be configured to prevent the claim status from transitioning to the Target Status even when the defined conditions are met. For additional information, see the Custom Validation Rules section.

The State Transition Details panel is used to designate the claim Target Status/Sub-Status and to customize system-generated messages for the user.