Data Backfill

The Data Backfill tool is used to resolve several Data Maintenance requests without the need of intervention from Insurity.

Accessing the Data Backfill Tool

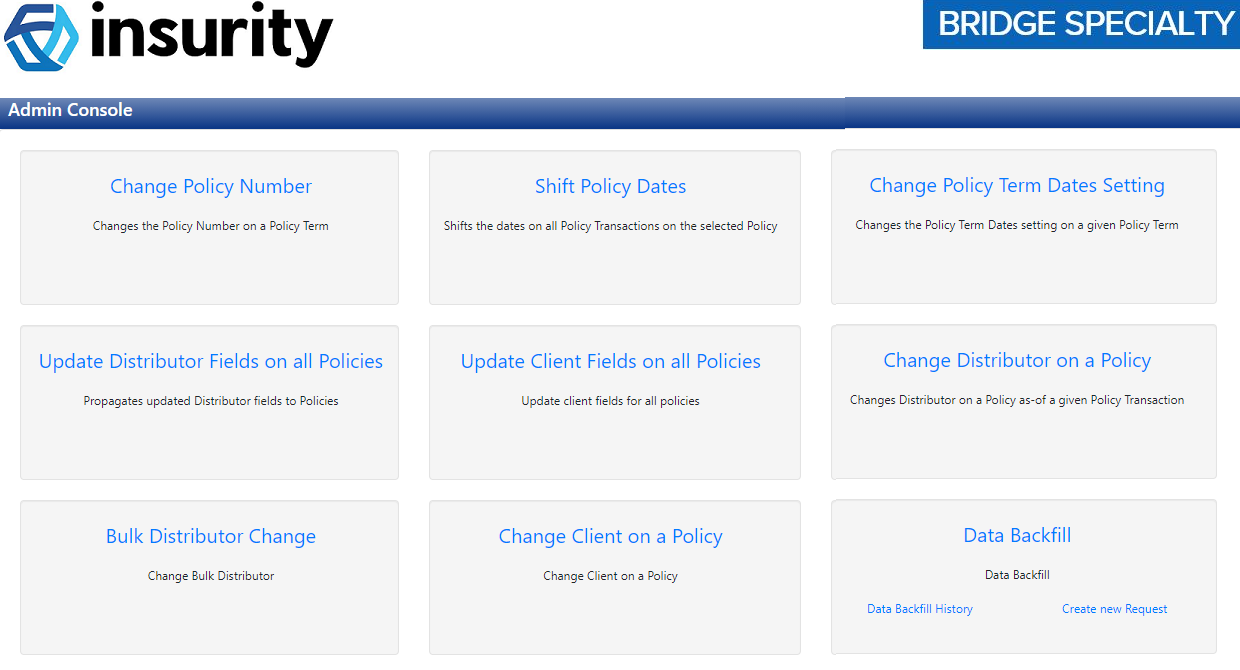
Users can access the Data Backfill tool through the Admin Console menu under Reference.

On the Admin Console home page, in the Data Backfill tile, users can select to Create a New Request.

Creating A New Request

Upon clicking Create a New Request in the Data Backfill tile, the Master Cover Search page is displayed.

As the user begins typing in the Master Cover field, results begin to populate with the Master Covers available for selection.

Click on the Master Cover you wish to perform the Data Backfill job for. Additional fields are displayed upon selecting a master cover.

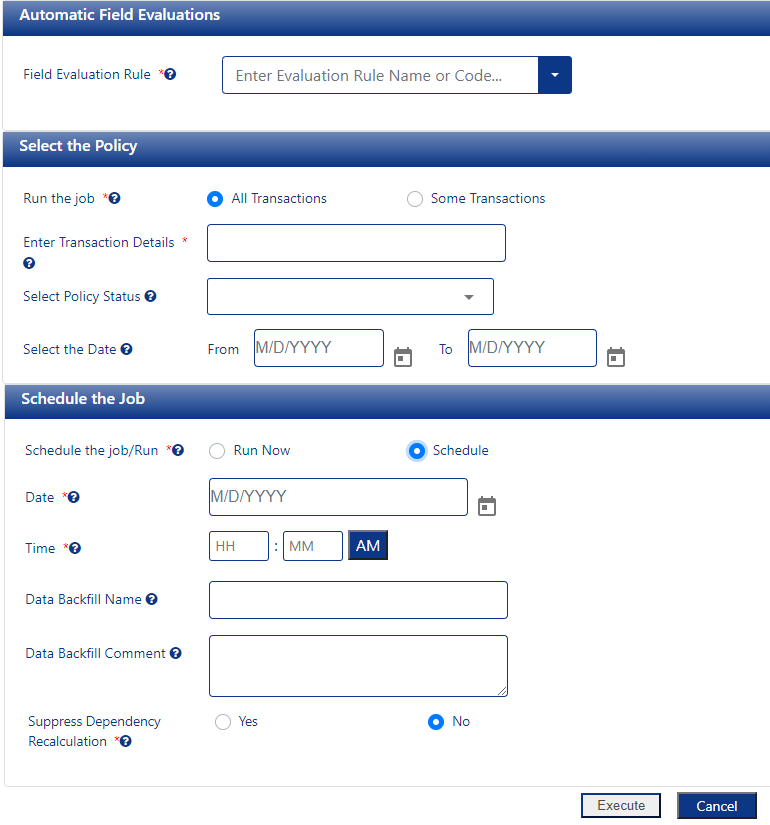
Users must enter the required fields to complete the request. Fields marked with a red asterisk * are required.

Automatic Field Evaluation Rules

Field Description
Field Evaluation Rule Select the Field Evaluation Rule based on the associated master cover.

Select the Policy

Field Description
Run the Job Select which transactions that the Data Backfill request will be performed on.
  • All Transactions

When All Transactions is selected, the Data Backfill request is performed on all transactions.

Upon selecting All Transactions, the user has the option to select the policy status and date range to perform the Data Backfill request.

  • Some Transactions

When Some Transactions is selected, the Data Backfill request is performed on the transactions specified in the Transaction Details field.
Enter Transaction Details

This field is only displayed when Some Transactions is selected in the Run the Job field.

Enter the Resource ID of the Transactions to be included in the request. If adding multiple resource IDs, separate by comma.

Select Policy Status

This field is only displayed when All Transactions is selected in the Run the Job field.

  • Quoted

  • Bound

  • Incomplete

  • Referred


When selected, the Data Backfill job will be executed on policy transactions with the selected policy status.

Users can select multiple policy statuses.

Select the Date

This field is only displayed when All Transactions is selected in the Run the Job field.

Schedule the Job

Field Description
Schedule the job/Run Select when the job should be executed.
  • Run Now

If selected, the Data Backfill job will be executed immediately.
  • Schedule

If selected, the Data Backfill job will be executed based on the specified date and time.
Date

This field is only displayed when Schedule is selected in the Schedule the job/Run field.

Enter the date the job will be executed on.

The date must be equal to or greater than the current date.

Time

This field is only displayed when Schedule is selected in the Schedule the job/Run field.

The system will set the time the job will be executed on based on the server time when the request is made. Typically, the automatic job runs nightly.

Data Backfill Name Enter the name of the Data Backfill job.
Data Backfill Comment Optionally, enter a comment for the Data Backfill job.
Suppress Dependency Recalculation

This field provides an option to recalculate the Calculated Fields so that changes are applied after the Data Backfill request process is completed.

When set to Yes, Calculated Fields will be treated as input field and will not be calculated.

When set to No, the system does not suppress the dependency calculation of fields.

Once all the required fields have been entered, click Execute. If any of the required fields are the missing, the execute button will be grayed out. The job will either be scheduled or executed based on the selections above. Click Cancel to exit the new request and return to the Admin Console home page.

Is the job was scheduled, the "Your request has been saved successfully." confirmation message is displayed at the top of the page.

If the job should be executed immediately, the "Your process has been completed successfully." confirmation message is displayed at the top of the page.

Quick Guide

How Do I Create a Data Backfill Request?

  1. Click Create a New Request on the Data Backfill tile.
  2. Search for the Master Cover.
  3. Select the Field Evaluation Rule.
  4. Select the Policy details.

    1. Select when to run the job.

    2. Enter the transaction details, if applicable.

    3. Select the Policy status, if applicable.

    4. Select the effective date, if applicable.

  5. Schedule the job.

  6. Click Execute to save the scheduled job, or to run the job request immediately, depending on the selection in the Schedule the Job panel.