In general, data related to an individual claim is separate from data in other claims. When using placeholders in documents, e-mails, and calculated fields, they will only retrieve data from the currently selected claim.
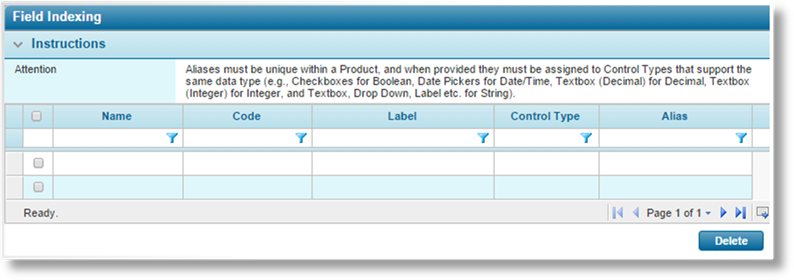
Field Indexing collects data across all claims, and makes it available for searches, data comparisons, documents, and e-mails. In addition, all indexed fields will be available as optional fields in the Claims list.
1. Once a Product has been selected, click Field Indexing in the Product Menu widget. A list of indexed fields is displayed. For instructions on selecting a product, see Viewing and Modifying a Product.
Some columns have been hidden.
2. Click Add. The Fields window opens.
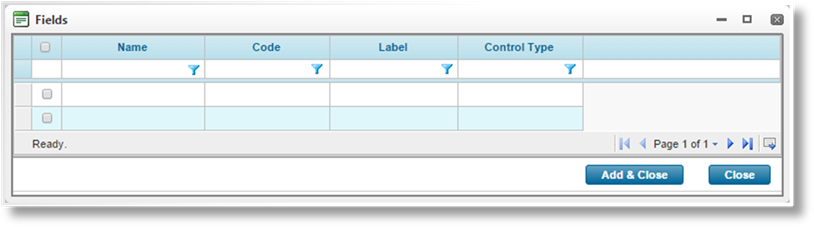
Indexing can be performed across different fields, but they must be of the same data type. The Fields list can be filtered to show fields of a specific type.
Check the boxes for all fields to be indexed. At this point, the fields are only being added to the index list, so fields of different data types can be added at the same time.
3. Click Add & Close to close the window and add the selected fields to the list, or click Close to close the window without adding any fields.
4. Once the fields are added to the list, they will be indexed and data will be added or updated whenever a claim is saved. When the associated workflow is published, the system will review all claims to backfill the indexed information.
Individual fields can be referenced using the Code, or an Alias can be defined for one or more fields of the same data type. Referencing the alias accesses all fields associated to that alias.
The alias can be used to reference the indexed content in documents, e-mails, and calculated fields. The placeholder will be the exact alias name, enclosed within square brackets, such as [[Alias]].
To add an alias, double-click in the Alias field and enter an alias name. Hit Enter or click outside the field to save the changes.
Fields can be added to the index multiple times, under different aliases.
1. Once a Product has been selected, click Field Indexing in the Product Menu widget. A list of all available indexes is displayed. For instructions on selecting a product, see Viewing and Modifying a Product.

Some columns have been hidden.
2. The Alias details can be modified directly in the grid. Double-click in an alias field to edit the value. Hit Enter or click outside the field to save the changes.
1. Once a Product has been selected, click Field Indexing in the Product Menu widget. A list of all available indexes is displayed. For instructions on selecting a product, see Viewing and Modifying a Product.

Some columns have been hidden.
2. Check the boxes for all fields to be removed from the index. Click Delete, and confirm the deletion when prompted. The fields are removed and the stored index information is deleted.