Once the product is ready, users can create submissions.
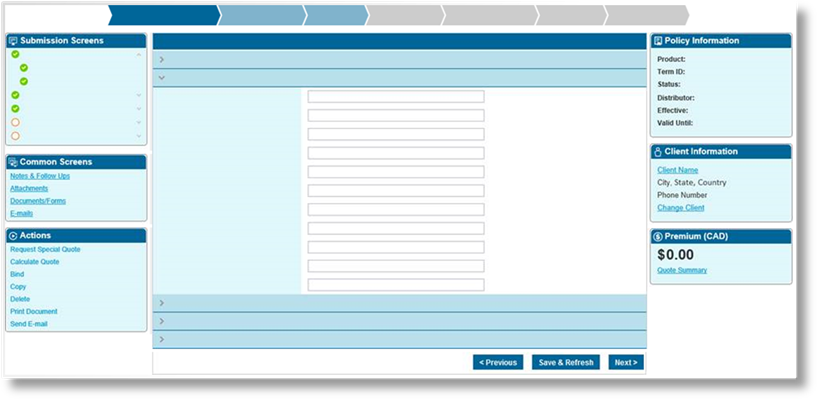
The submission screen is made up of a central area where the workflow screens are displayed for the user to enter the submission details.
To the left and right are the Widgets, which provide additional submission information and controls.
There are two ways to navigate through the screens in a workflow. At the bottom of the page are Next and Previous buttons which will step through the screens in sequential order. The Submission Screens widget displays the steps in the workflow, where clicking on a step displays the individual screens within that step, and clicking on a screen navigates directly to that screen.
The steps in the workflow and the progress through the workflow are displayed in the progress bar at the top of the page.
The submission process starts with selecting a product. Next, the user selects one of the distributor companies available for the product. For either the product or distributor, if there is only one option available it is selected automatically.
Once the distributor is selected, the user can select a client from those owned by the distributor, create a new client, or defer the client selection to a later time. The submission cannot be bound until a client has been chosen, however.
The submission screen opens with the New Business transaction type in Incomplete status. This is the starting point for all new policies.
The user navigates through the workflow filling in details. As the user moves between screens, the system may review and validate the information. Any errors or notifications will appear at the top of the screen, and the user may need to correct certain information before being able to proceed.
Some validations may require that the submission be reviewed by the underwriter. In these cases, the status will change to either Underwriting Required or Referred. A representative of the underwriter company can review the information and either accept the details and issue a quote, or decline the submission. The validations may also prevent the user from binding the submission themselves, but the Request Bind option in the Actions widget will allow them to request that an administrator review the submission and bind it.
Once enough information has been provided and the validations have passed, the system can produce quotes. This may happen automatically as the user moves through the workflow, or it can be activated manually using the Calculate Quote option in the Actions widget.
The Premium widget displays the lowest valid quote, and clicking the Quote Summary link displays a list of the available quotes. The preferred quote can be selected, or users with administrator access can customize the quotes. Once a quote is selected, a payment plan can be chosen, and a breakdown of the scheduled payments is displayed.
Once the quote and payment plan are selected, the submission can be bound. This books the insurance coverage and creates the appropriate premium charges, ready for invoicing.
Once a policy is bound, additional transactions can be created to adjust the coverage or renew the policy. These are separate transactions initiated from the Actions widget when viewing the source transaction, which may be the original New Business policy or another transaction related to the policy.
These transactions are handled similarly to the New Business submission, except that they are created from an existing transaction and will inherit data and settings from that source transaction. The workflow, navigation, quoting, and binding process will only have a few differences particular to each type of transaction.
Renewal transactions are created to extend the coverage for another term. The renewal may simply continue the existing coverage, or may include changes.
Endorsements, Adjustments and Declarations are transactions that modify the coverage within the current term, although endorsements can extend the term.
A policy can be Cancelled, which ends all coverage as of a specific date. A cancellation can be reversed using a Reinstatement.
While working within Bridge, the system provides additional options for communication and documentation related to the current policy and transaction.
Documents can be generated, either manually or automatically. These documents are created from templates and can pull in details from the system and the current transaction or policy. These documents are attached to the transaction for reference.
External Attachments can be uploaded to the transaction. These may be image files or supporting documents.
E-mails can be sent from a transaction, automatically or manually. Like the generated documents, the e-mails are created from templates and can pull in system and transaction data. E-mails are attached to the transaction for reference.
Notes can be attached to a transaction. These can be simple notes to provide additional information, or may be reminders for actions that need to be taken at a later date. A reminder can have a due date, and can be marked as Complete.