Security Role configurations are not included in the product export / import. These are handled separately in the Export / Import Security Roles panel.
1. In the source environment, go to the main menu, select Product Design then Export / Import. The Export / Import page opens. Go to the Export / Import Security Roles panel.
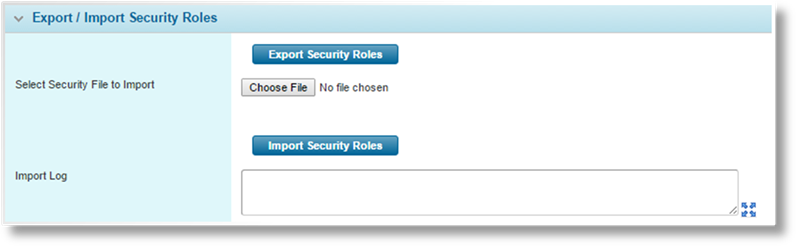
2. Click Export Security Roles to begin the export. Once the data has been assembled, a standard browser Save/Open dialogue box appears to allow the file to be saved.
3. To import the file, go to the Export / Import Security Roles panel in the target system.
|
Select Security File to Import |
Click the button to open a standard file browser window. Locate and select the appropriate export file. The file name appears in the field. |
|
Import Log |
After import, any messages or errors will be displayed in this field. |
4. Click Import Security Roles to begin the process. If an existing role in the target environment has the same Code as an imported role, the existing role will be replaced.
5. Once the import has completed or stopped due to an error, the Import Log window is populated with the relevant messages and errors from the import. Copy the text (click inside the field, press Ctrl + A to select all text, then Ctrl + C to copy) and save it for future reference. This text can be used for troubleshooting or as a checklist of items that must be corrected after the import.