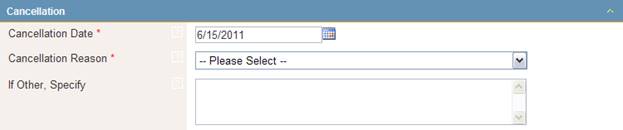
Bound policies can now be cancelled by users with the appropriate rights. The user locates the appropriate bound policy, and clicks Cancel. A Cancellation section is added to the form, and the status changes to Cancellation - Incomplete.
At this point, the user may click Reject Cancellation to return the policy to Bound status.
Otherwise, they would need to select a Cancellation Date and Cancellation Reason, then click Calculate Refund. The Cancellation Date must be within the Effective Coverage Period or the system will flag this as an error..
The prorated refund amount is calculated based on the time from the Cancellation Date to the end of the policy term. With the appropriate rights, the user can modify the refund amount, add additional charges or refunds, and recalculate commissions and taxes.
At this point, the user again has the option to Reject Cancellation and return the policy to Bound status.
Otherwise, they may click Confirm Cancellation.
They will have the opportunity to attach a note, if they choose to do so. They may click Confirm to finalize the cancellation, or click Cancel to step back to the cancellation screen.
If confirmed, the status will change to Cancelled.
Previously, all document templates were added to the product , and assigned to a group that would define the type of submissions and status that the document would be available to. The document system has been rebuilt to allow for greater control of how and where documents can be generated.
Open a specific master cover and select the Documents/Forms option in the Master Covers menu. The currently attached documents are displayed in the grid. Click Create to add a new document.
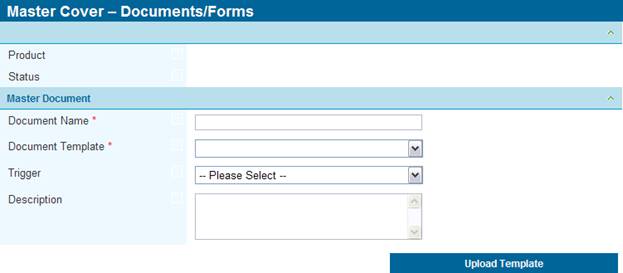
Enter the Document Name, and select one of the Document Templates (formerly labeled Master Document) attached to the product. A Trigger can be defined, and a Description can be added.
If the required template has not been uploaded, the Upload Template button can be used to go straight to the Documents/Forms page in the associated product.
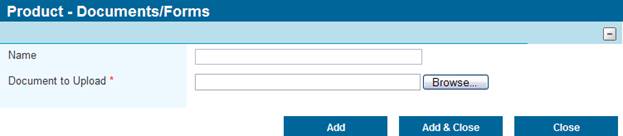
Use the Browse button to select the file. A Name can be provided for the template. If no name is provided, the filename will be used instead. Clicking Add & Close will save the template and return to the template creation page.
The next sections are used to define the specific rules for the document.

Transaction Selection identifies which types of submission or policy the document will be available to.
Status Selection makes the document available only to submissions or policies with the specified statuses.
Security Role Selection defines what users have the ability to generate and view the document. Users who do not have at least one of the checked security roles will not be able to print the document, and will be unable to view the document attached to the submission or policy if it has been generated by another user.
Note: Any documents already attached to existing products will be automatically setup in the appropriate master covers. The transaction and status selections will be assigned according to the previously assigned groups, and all security roles will be selected. These settings can be adjusted as needed.
Other Associated Changes

When viewing generated documents in the Documents/Forms panel, the date and time have been removed from the file names.
The Type column has been removed from the Documents/Forms grid.
If a user does not have the rights to print any of the attached documents, the Print Document button and connected drop down menu will be hidden.
Release 1.4 introduces a system for online payments by credit card. This is setup in the Master Cover, and supports multiple payment options.
Setting up Payment Processing
The View Master Payment Settings right is required to view the settings page, and the Edit Master Payment Settings right is required to make changes.
When viewing a master cover, click the Payment Settings option in the main menu. The settings cannot be modified if the master cover is Live.
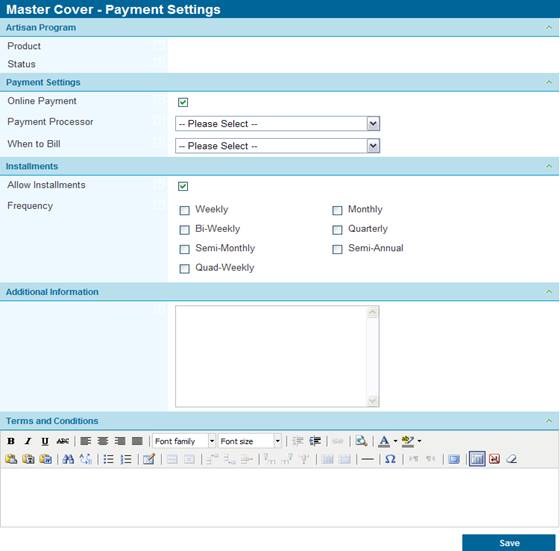
Checking the Online Payment box enables online payment. If not enabled, binding a policy will function normally, and billing will need to be handled separately.
The Payment Processor is the company that will handle the payments online, and can be selected from the available options. New companies can be added, which is handled by Oceanwide.
While the assured will provide their credit card information when they Bind the policy, and the appropriate validation will be done, the charge may not be processed immediately. If When to Bill is set to Bind Date, the full payment or first installment will be processed immediately. If it is set to Effective Date, then the full payment or first installment will be charged on the date that the insurance takes effect.
The assured may be required to pay the full amount in one payment, or they may be provided with installment options. The Allow Installments checkbox enables the Frequency options. One or more options may be checked, and the assured will be able to choose which of the available options to use.
Any Additional Information can be entered, which will be displayed on the payment screen.
The Terms and Conditions can be defined in detail, using Rich Text and a standard suite of formatting tools.
Making a Payment
If enabled, the payment process is triggered when binding a policy. The quote and referral process is unaffected, with payment only occurring once the assured tries to bind.
Note: Only new business is currently supported for Payment Processing. Renewals and endorsement adjustments will be handled in future releases.
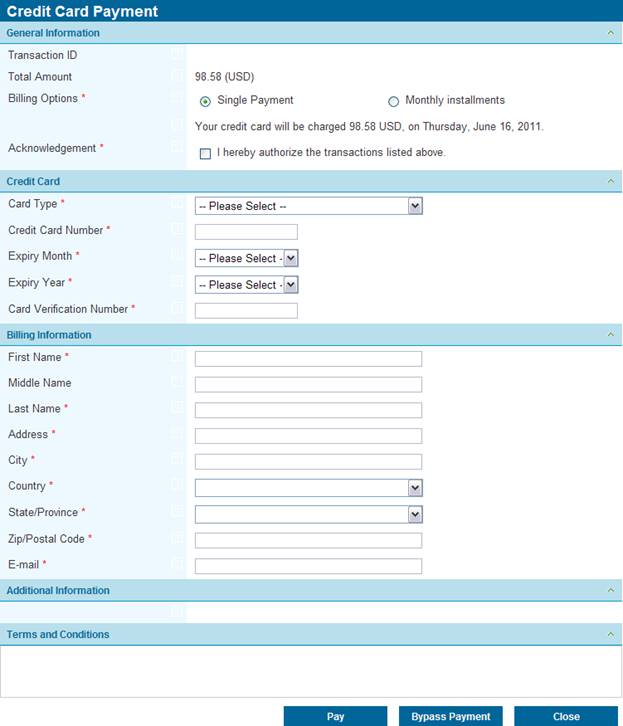
All available billing options will be displayed, according to the setup in the master cover. The assured may select different options and the system will display the amount that will be charged, the frequency of the charges (if installments are chosen), and the date that the first or full amount will be charged to their card.
The assured must then check any and all Acknowledgment checkboxes required for the payment.
The next section is for the Credit Card information. The assured selects their card type, then enters the full card number, expiry date, and the card verification number. Validation will be performed by the payment processing company when the information is submitted.
The Billing Information is copied directly from the assured details in the submission form, but can be edited if necessary.
Finally, any Additional Information and Terms and Conditions are displayed, as defined in the master cover.
Once the form is complete, the assured clicks the Pay button to submit the payment. Any missing required fields are flagged immediately, and will need to be completed before submitting the payment. If the card information is rejected by the payment processing company, an error message will be displayed with the reason for the rejection. The assured may correct any errors and submit the payment again.
Clicking the Close button will cancel the payment and return to the submission form in Quoted status.
Administrative users with the Bypass Payment right will have the Bypass Payment button. If an alternate payment method is used, this button allows the policy to be bound without completing the online payment process.
When viewing the Submission/Policy List, bound policies will have one of two statuses. Authorized indicates that the online payment was successful, and accepted by the payment processing company. A status of Paid Manually indicates that the payment was bypassed by an administrator.
For any Authorized policies, the Billing ID column will display the transaction number provided by the payment processing company.
Note: The Payment Status and Billing ID columns are not displayed by default. The columns can be added by right-clicking on the header, choosing Select Columns, checking the additional columns, and selecting Apply Changes.
For immediate information on completing forms and fields,
help icons  have been
added to the system. Clicking one of these icons will open a pop-up window
with a description and instructions specific to that field. If no help
text has been defined for a field, the help icon will not be shown.
have been
added to the system. Clicking one of these icons will open a pop-up window
with a description and instructions specific to that field. If no help
text has been defined for a field, the help icon will not be shown.